
Google Analytics in your WordPress site means serious business. That is why there are tons of WordPress sites integrated with it.
As per WordPress statistics, around 19,500,000 websites on the entire web use WordPress. Likewise, approximately 13,130,587 websites use Google Analytics to understand their website performance.
For a successful website, it is integral to understand how your audience interacts with your website. The best way to understand your audience’s performance is through traffic statistics. For this, you need Google Analytics.
Google Analytics is the free digital analytics software from Google that allows you to analyze your website data and measure your website’s success.
Why is Google Analytics so important?
Google Analytics helps you come up with strategies for your website based on the data. With Google Analytics, you can measure internal site search, visitor bounce rate, understand visitor demographics, targeted social media platforms, and determine your site’s content type.
Overall, it helps you understand :
- Who visits your website.
- Where they are coming from.
- What they do on your site once they are there.
- How successful your content and user funnels are.
- And much more.
How to Sign up with Google Analytics
Google Analytics is available for free. The Signup process is prompt and easy. To create your Google Analytics account, follow the instructions below.
Step 1: First, you must have a Google account. You can use your Google or Gmail account to sign in. If you don’t already own one, go ahead and create a Google account.

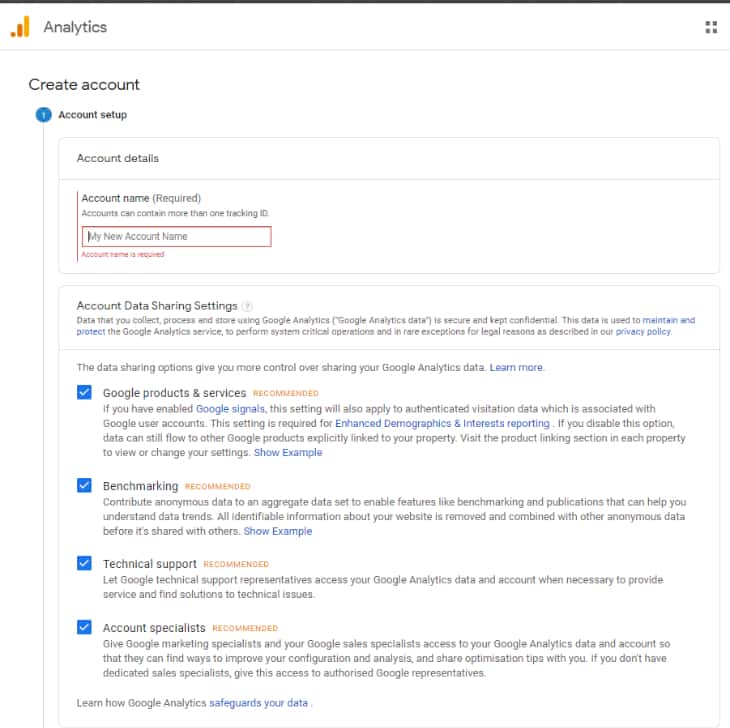
Step 2: After you sign-in with your Gmail account, it will direct you to a page similar to the picture below. It is where you must sign in Google analytics with your Gmail account.
Next, it will ask you to provide an account name.
Step 3: On the next screen, you can choose between web, apps, or webs and apps. Select ‘Web.’

Fill in the empty fields such as website name, website’s URL, country, and time zone.
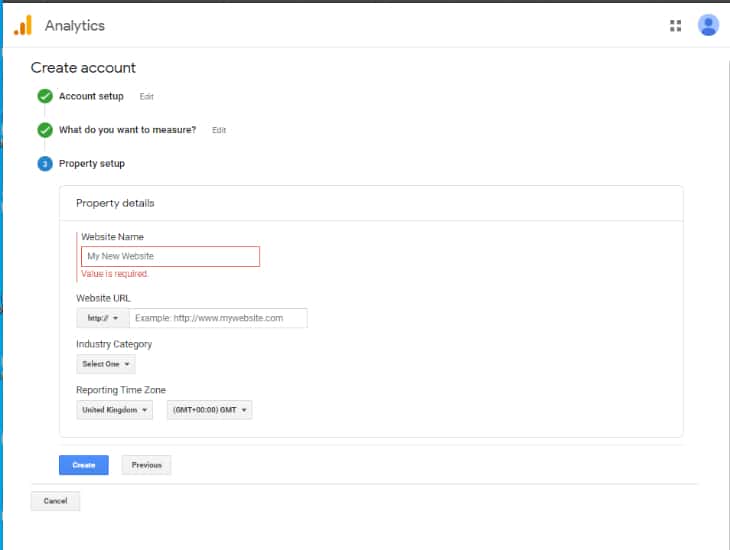
After completing the form, click on the Next button. It will direct you to Google Analytics terms and services. Click on the ‘I Agree’ button.
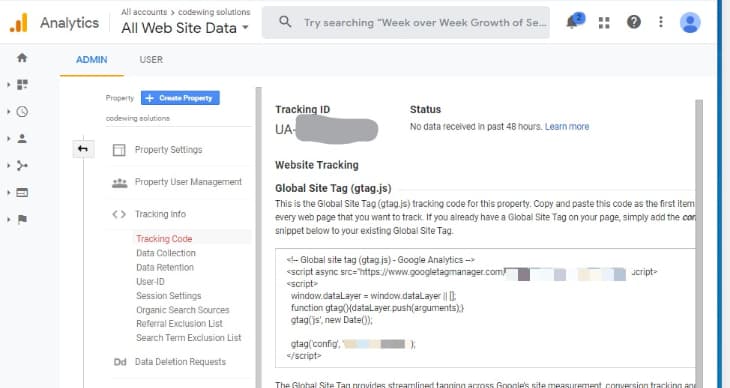
Step 4: You will get a Google Analytics tracking code. Copy the tracking code
(You will need it later for your WordPress site according to your chosen method.)
It will be wise to leave the analytics browser tab open. You might require to revisit the site more than once after installing the code on your WordPress site.
How to Install Google Analytics in WordPress
There are various ways to add Google Analytics to WordPress. Here, I introduce you to four different ways to integrate Google Analytics into your site.
- Adding Google Analytics to WordPress with MonsterInsights
- Adding Google Analytics with Insert Headers and Footers plugin
- Adding Google Analytics using Google Tag Manager
- Embed Google Analytics to WordPress without a plugin.
According to your requirement, choose the method that suits you the best.
(Note: Use only one of the given methods to add Google Analytics on your website to avoid double tracking of page views.)
Adding Google Analytics to WordPress with MonsterInsights
Using MonsterInsights is the most convenient method to add Google Analytics to your WordPress site amongst all three ways.
Here we use the MonsterInsights plugin to integrate Analytics to our site.

MonsterInsights is one of the widely used Google Analytics plugins for WordPress. It is ideal for adding Google Analytics to WordPress to beginners and experts alike.
MonsterInsights is available in both premium and a free version. In this tutorial, I will be using the MonsterInsights free version.
For advanced features like E-commerce tracking, Ads tracking, Author tracking, etc., you should pick the premium version.
First off, you should install and activate the MonsterInsights plugin.
Go to plugins > Add new.

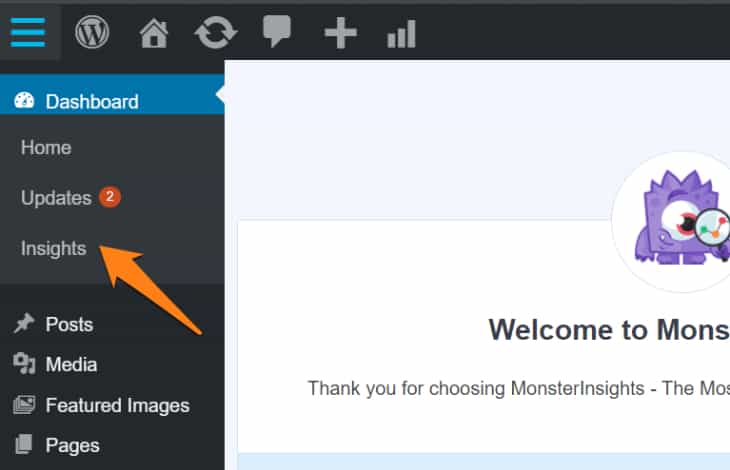
Search MonsterInsights Plugins, install, and activate it. Upon activation, a new menu item labeled ‘Insights’ will appear on your WordPress admin menu. Click on it to set up MonsterInsights.
Select a category for your website (a business website, blog, or online store) and click on the ‘Save and Continue’ button.

Next, click on the ‘Connect MonsterInsights’ button. A pop up to Google accounts will appear, asking you to either sign in or select a Google account.
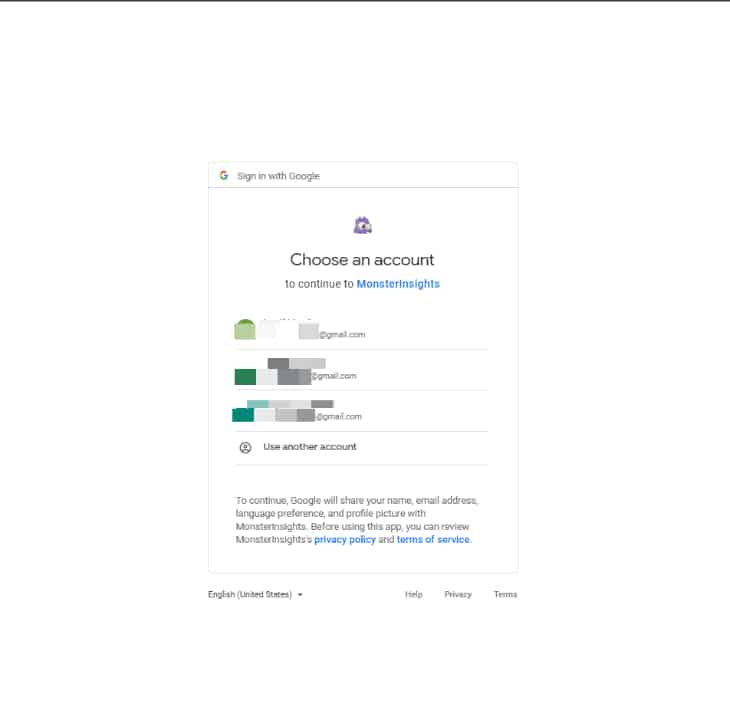
It will ask you to allow MonsterInsights to access your Google Analytics account. Click on the ‘Allow’ button and continue.

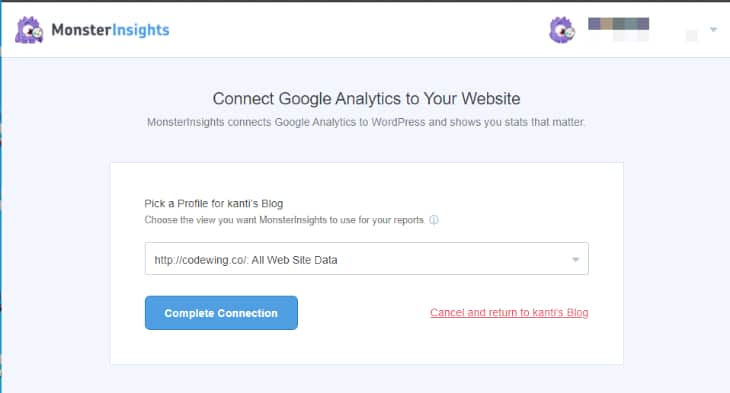
Select the profile you want to track. Add your website and click on the ‘Complete Connection’ button to continue.
MonsterInsights will install Google Analytics on your website. Upon installation, it will ask you to select the desired settings for your website. The default settings work well with most of the websites.
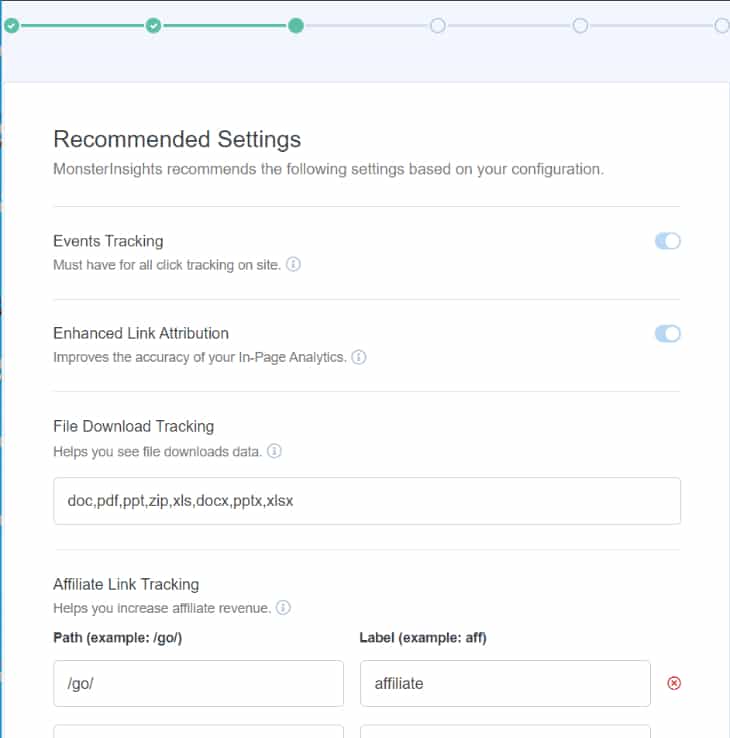
To save your settings, click the save and continue button.
Next, you will see an advertisement for paid addons for MonsterInsights. To skip this step, click on the save and continue button.

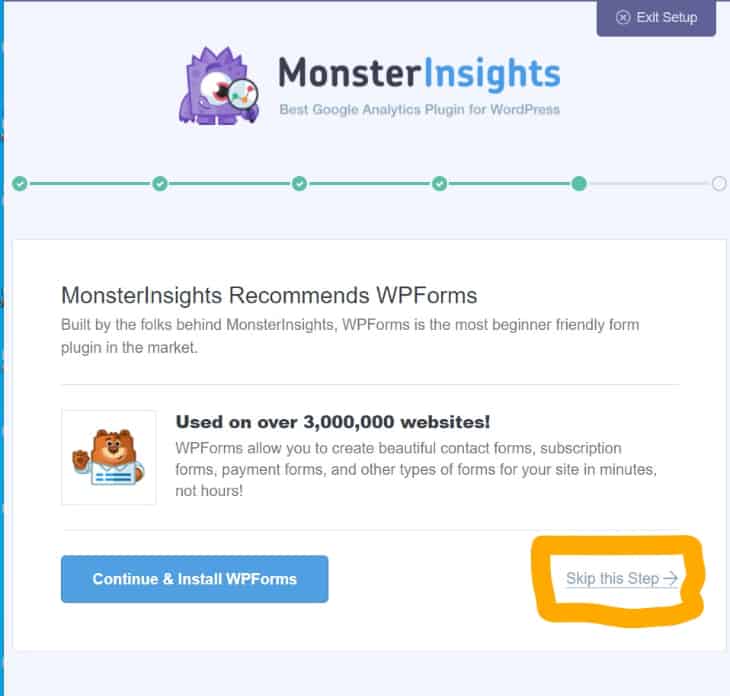
It will then ask you to install the WPForms plugin, one of the best WordPress contact form plugins. You can either install it or click on ‘Skip this Step.’
Now, Google Analytics is successfully added to your WordPress site. It will take some time for google analytics to show on your stats.

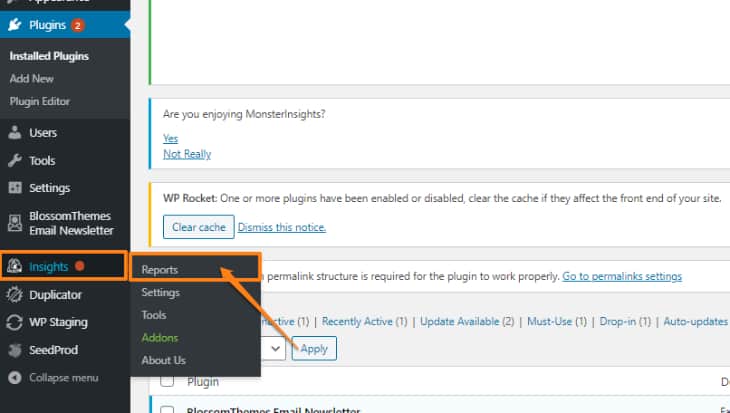
You can now view your Google Analytics reports inside your WordPress dashboard. Go to the Insights » Reports page and check a quick overview of your analytics data.
Adding Google Analytics with Insert Headers and Footers plugin
Insert Headers and Footers is a plugin that lets you insert code like Google Analytics, custom CSS, Facebook Pixel to your WordPress site with ease. Plus, you can add all these without editing your theme files.
Here’s what you need to do to add Google Analytics with Insert Headers and footers plugin:
First, you should install and activate the Insert Headers and Footers plugin.
Next, log in to your Google Analytics account and copy the tracking code for your website.
(Note: The tracking code is the code you copied earlier in Step 4 when signing up for a Google Analytics account.)
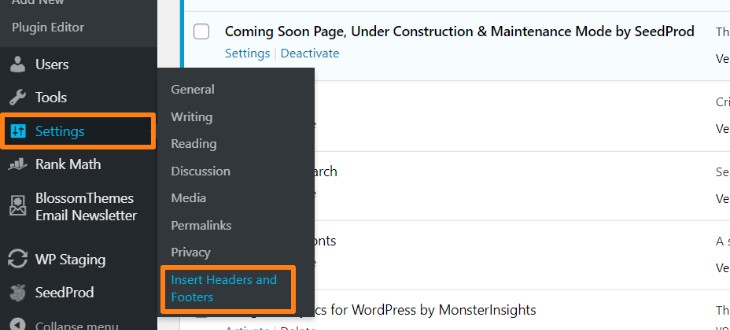
Open the settings page for the plugin.
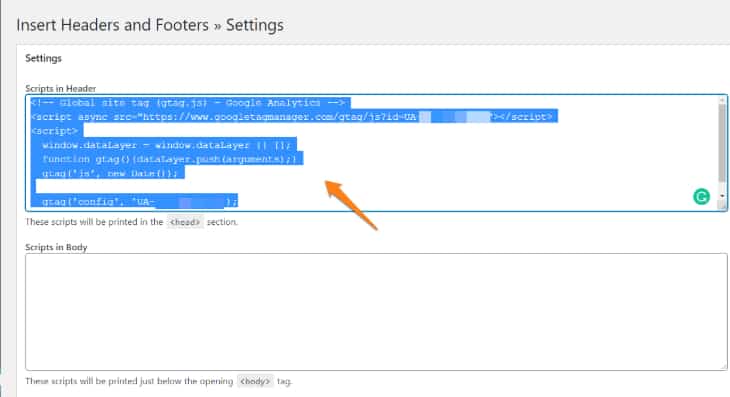
Paste the Google Analytics tracking code on the “headers” section.
Save your changes.
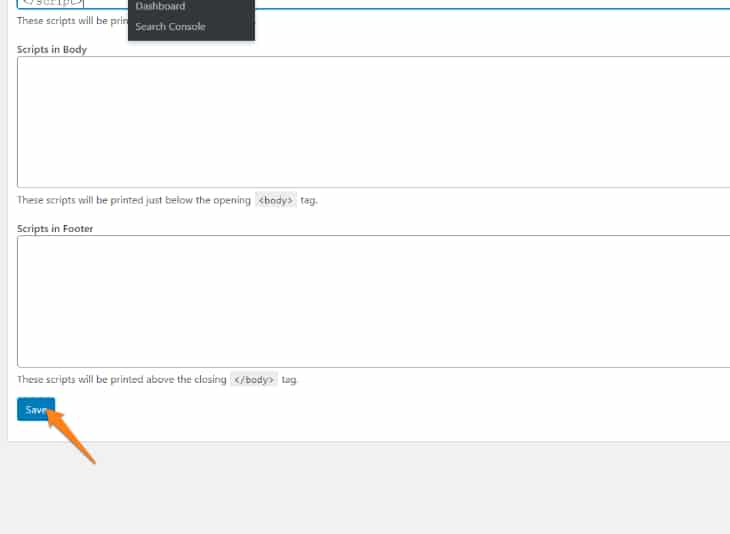
And now, you have successfully installed Google analytics to your Wordpress site.
Adding Google Analytics using Google Tag Manager
Another method to add Google analytics to Wordpress is by using Google Tag Manager.
Google Tag Manager is a tag management system that incorporates scripts for a variety of purposes. It allows you to easily add tags and code snippets intended for traffic analysis and marketing on your website. With this plugin, you don’t have to edit site code in WordPress. Instead, you can easily add and update scripts from the Tag Manager user interface.
For this, you can simply use the free Google Tag Manager WordPress plugin and follow the steps below to add Google Analytics to WordPress.
First off, you need a Google Tag Manager account. Go to Google Tag Manager and create your account.
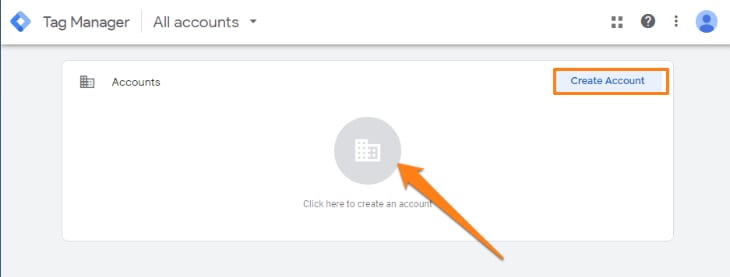
Once you select to create an account, you will be directed to the page as shown in the picture below. Fill in your account details and create your account.
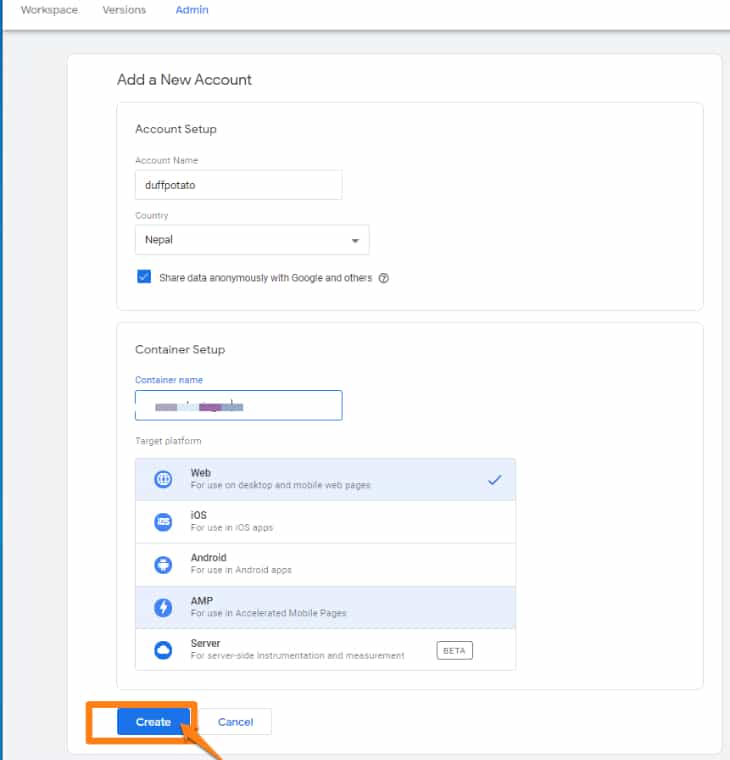
Next, agree to the Google Tag Manager Terms of Service Agreement to continue.
Once you complete the signup process, you will get the following Google Tag Manager snippets. Click on the OK button and get your Google Tag Manager ID.
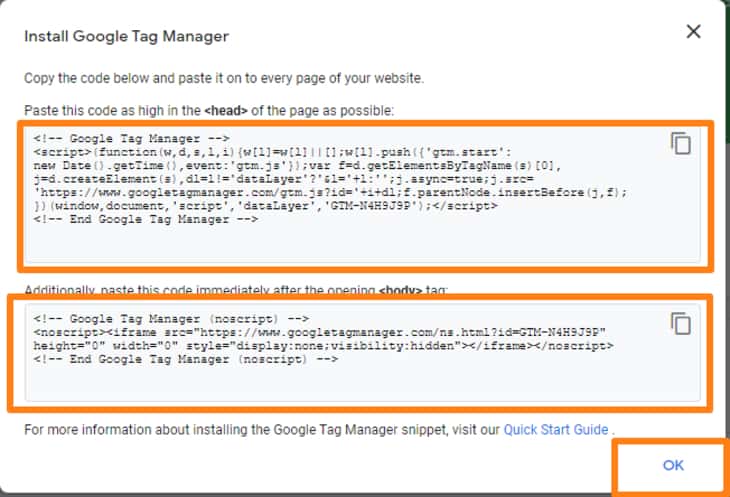
It will be wise to leave the Google Tag Manager tab open. You might require to revisit the site after installing the Google Tag Manager plugin on your WordPress site.
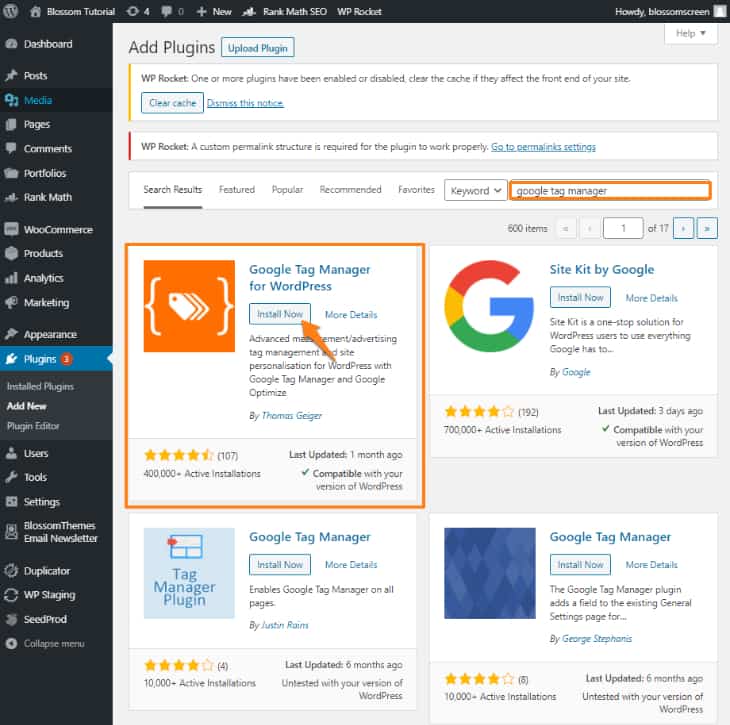
Now, go to your WordPress dashboard to download and activate the Google Tag Manager plugin.
Go to Plugins>Add new.
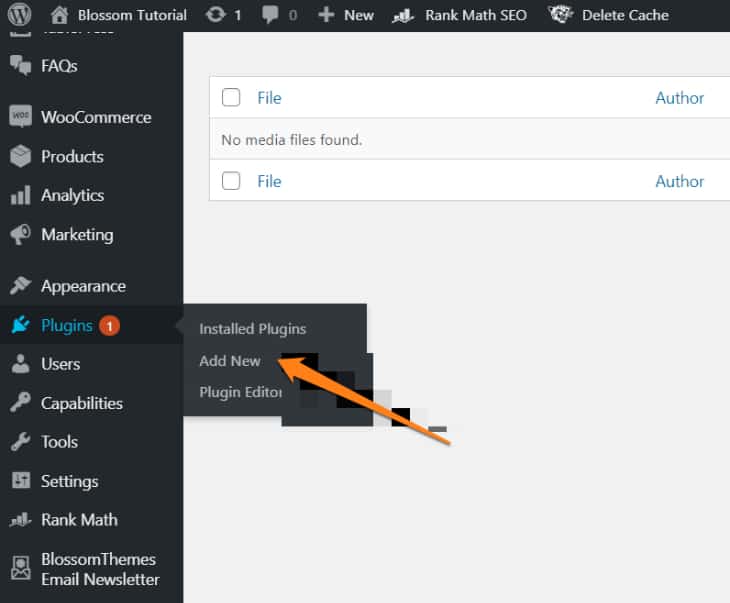
Search Google Tag Manager Plugin, install, and activate it.
Upon activation, a new menu item labeled ‘Google Tag Manager’ under settings will appear on your WordPress admin menu.
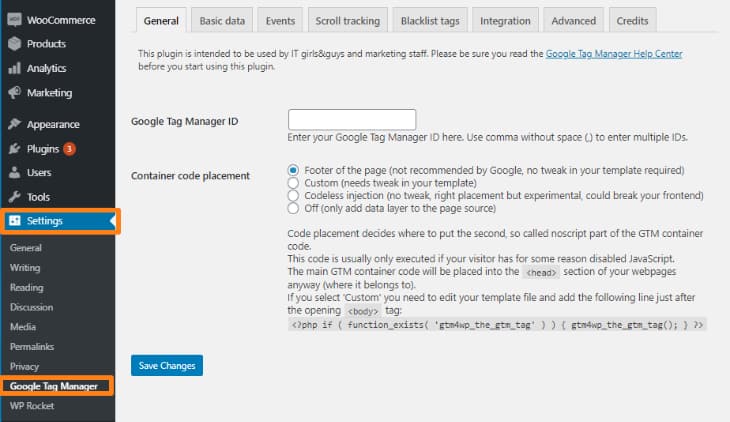
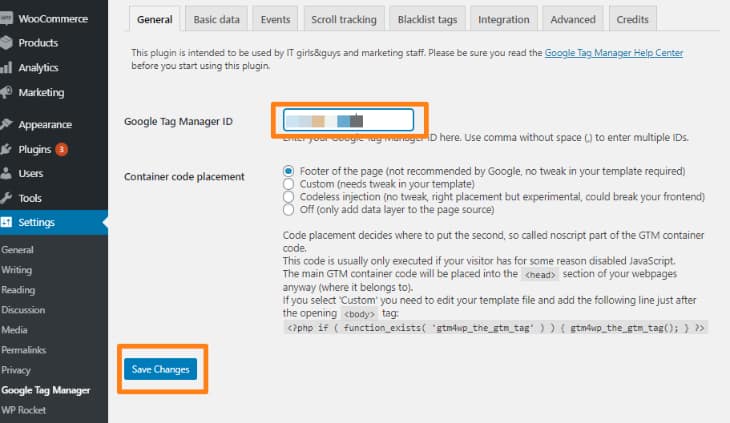
Return to the Google Tag Manager page and copy your Google Tag Manager ID. Paste your ID via Settings> Google Tag Manager under Google Tag Manager ID in WordPress and save your changes.
Now, you have successfully integrated Google Analytics to your site with Google Tag Manager. You can easily access any tag set up in the Google Tag Manager plugin on your Wordpress Site.
- Embed Google Analytics to WordPress without a plugin
Embedding is the trickiest method suitable for advanced users with coding knowledge. This method cannot be relied upon because your code will disappear if you switch or update the theme.
In this method, you will directly edit the code of your site. Even a small misplaced comma can bring your whole website down.
So, the first step is to keep a backup of your website. In case anything goes wrong, you can quickly revert it.
Step:1 Get Google Analytics tracking code.
First, you will need your Google Analytics tracking code that you copied in the beginning at Step 4 (above) while signing up for a Google Analytics account.
If you don’t have the code from the beginning, go to your Google Analytics account. Click on the admin icon on the bottom left corner of your analytics homepage.
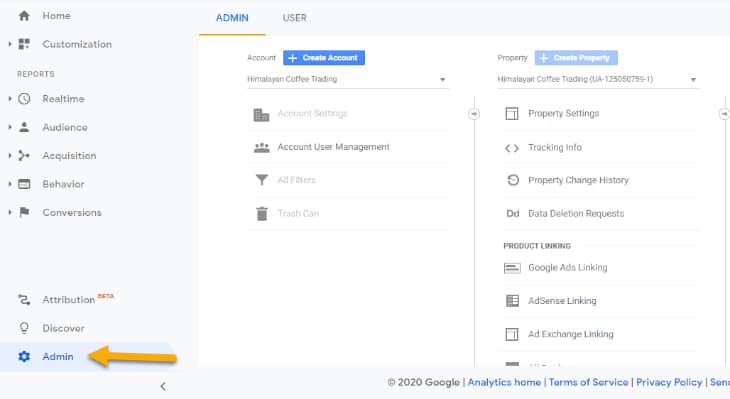
Next, go to tracking info and select the tracking code. It will show you all the tracking details.
Copy the tracking code.
Step 2: Add tracking code to the header.php file
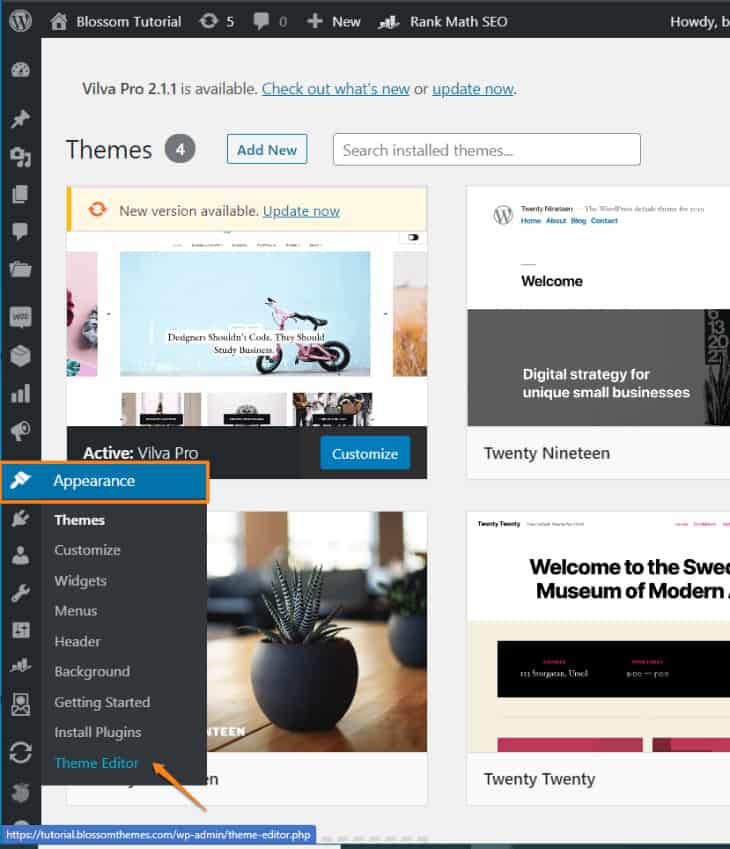
Login to your wordpress dashboard, go to Appearance and select the Theme Editor option.
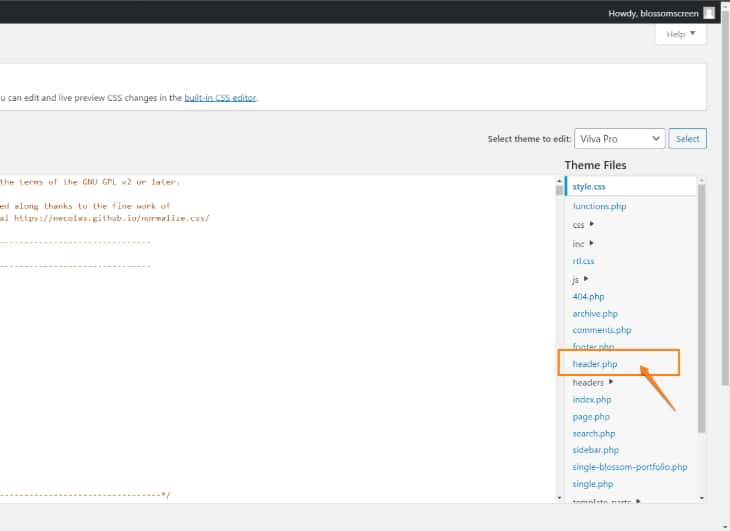
Go to the Theme Header (header.php) file on the right side. A code editor will appear in the middle of your screen.
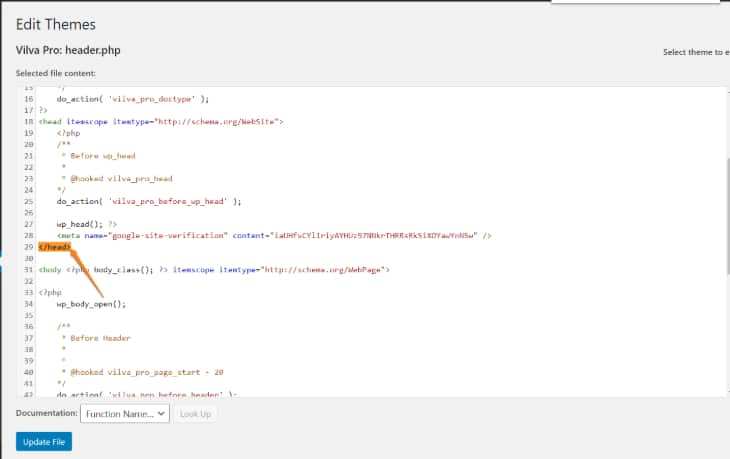
Search for a closing tag (</head>) in the code with Ctrl+F.
Paste the copied tracking code from your Analytics before the closing </head> tag. Select the Update File to save your changes.
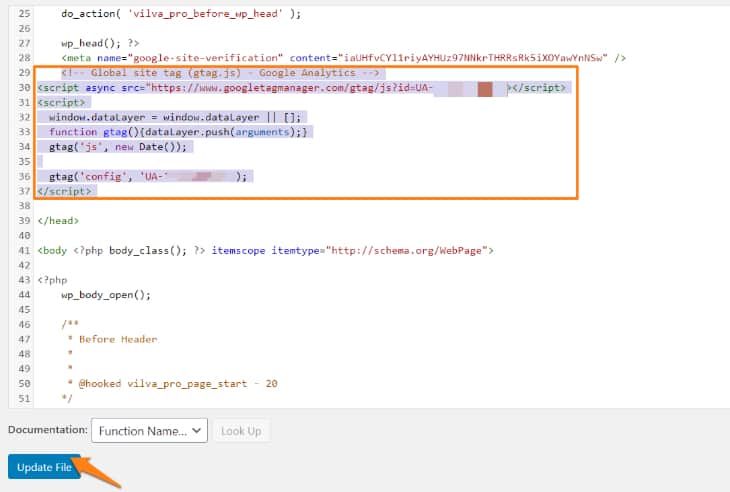
Now you have successfully added Google Analytics to your WordPress site without a plugin.
You won’t see traffic reports immediately. It takes anywhere from 24 to 48 hours for Google Analytics to accumulate new data.
Viewing reports on Google Analytics
After adding Google Analytics to WordPress, you can now sort through the reports.
If you used plugins like MonsterInsights, you could easily find the WordPress analytics data on the left-hand panel.
With Analytics, you can access several reports which include:
- Audience tab: It shows data about your users like age group, gender, and more.
- Acquisition tab: It shows where your users are from, including countries, different social media platforms, and more.
- Behavior tab: It shows what the users do after they visit the site. It records bounce rates, engagement, and more.
- Conversion tab: It shows the success of your website as per your set goals.
If you get stuck on any metric, you can hover over the name to understand what they mean.
Conclusion:
Google Analytics is an incredibly useful tool packed with impressive features at your disposal for free. Adding Analytics to your Wordpress will allow you to improve your website performance, monitor an increase in website traffic, and reach your business goals.