
Did you know that 68% of web visits occurred from mobile phones in 2020?
Likewise, in the first quarter of 2021 alone, mobile phones (excluding tablets) accounted for 54.8% of global website traffic.
As a result, many businesses have included a clickable contact number apart from email address on their websites. The idea is to allow visitors to make phone calls and get in touch with a single click. You, too, can add such a phone link to your website by making a click-to-call link.
Don’t know what we are talking about?
Don’t worry. This article will instruct step-by-step on how to make a click-to-call link in WordPress. As you go along, we will also explain what a clickable number in WordPress is and why you need it.
Lets’ begin with the introduction:
What is a Click-to-Call Link in WordPress?
Basically, a click-to-call link is a clickable link that lets your mobile users make a call to your company with a single click on the contact information you have added to your site. The number of mobile users is increasing and internet visits on mobile phones are considerably high. Thus, click-to-call links are widely used across most websites.
Why Should You Add a Click-to-Call Link in WordPress?
There are various ways for your customers to communicate with your business, such as live chat, email, contact form, and support tickets.
All these are reliable and helpful. However, when people have specific questions or queries, they prefer direct calls. This makes them feel attended to on a personal level and might increase their satisfaction.
If you consider their point of view, being able to contact quickly with a single tap saves their time. In addition, the click-to-call link is more convenient as there is no need to remember and dial the number.
Thus, a click-to-call telephone link is more convenient and an easy way for your visitors to get in touch with your company.
How Does a Click-to-Call Link Work
A click-to-call link is an HTML hyperlink that leads your visitors to connect with you in real-time. HTML 5 includes tel: and mailto: protocols that web browsers can use.
Each browser responds differently to these protocols. For example, some browsers launch the phone app on the mobile phone and automatically add the number on display, awaiting you to click the mobile’s call button. Some other browsers directly make the call, while others ask if making the call is okay when users click the phone number link.
Since the click-to-call link is HTML, you can add it anywhere on your sites, such as the sidebar, header, footer, within widgets, or your content.
Another important advantage of using the click-to-call link in WordPress is in making your marketing specific. You can track phone number clicks on your website and know where your visitors are coming from to your site. You can use this information to create personalized marketing campaigns and show the right information to the right people at the right time.
How to Make a Click-to-Call Link in WordPress
There are three ways to make and add a click-to-call link in WordPress. We have detailed them step-by-step. Read them below:
Method 1: Making a Click-to-Call Link Using a Plugin
Plugins make it much easier to create and add a click-to-call button in Classic Editor, Gutenberg, sidebar, and sticky floating buttons. Here are the steps:
Step 1: Installing and Activating the Plugin
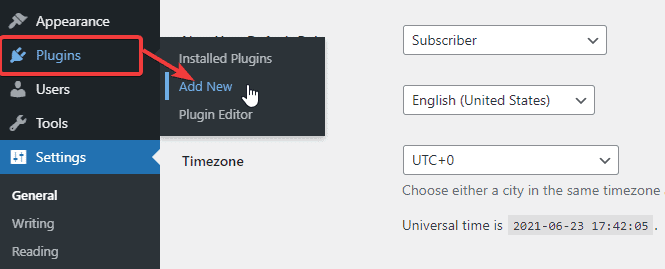
- Go to your WordPress dashboard. Click on the Plugins > Add New option.
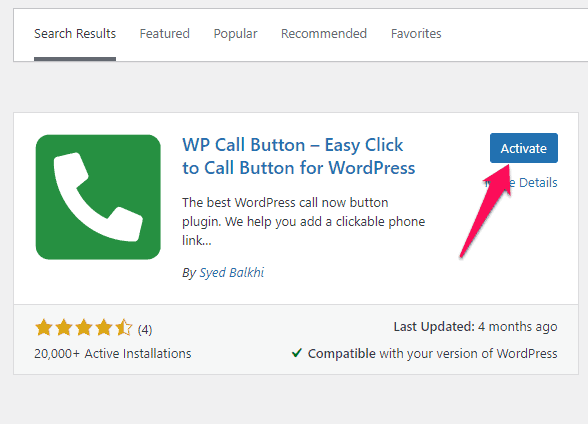
- Search for the “WP Call Button” plugin. Install and activate it.
Step 2: Configuring the Plugin
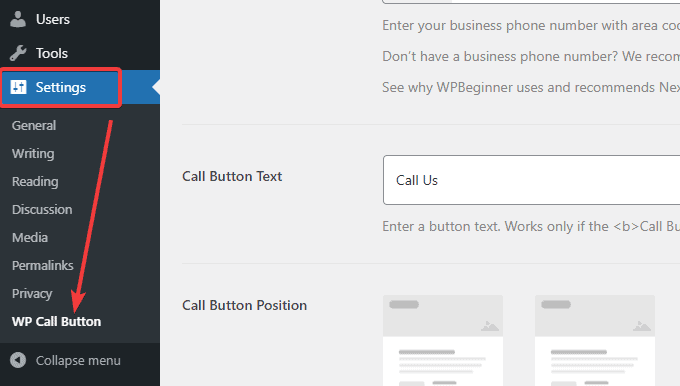
After activating the WP Call Button plugin, you need to configure it. Go to Settings > WP Call Button option on your dashboard.
You can either configure the plugin with the Sticky Call Button or the Static Call Button option. The sticky button moves along with the user as they scroll and browse your site while the static button remains stationary.
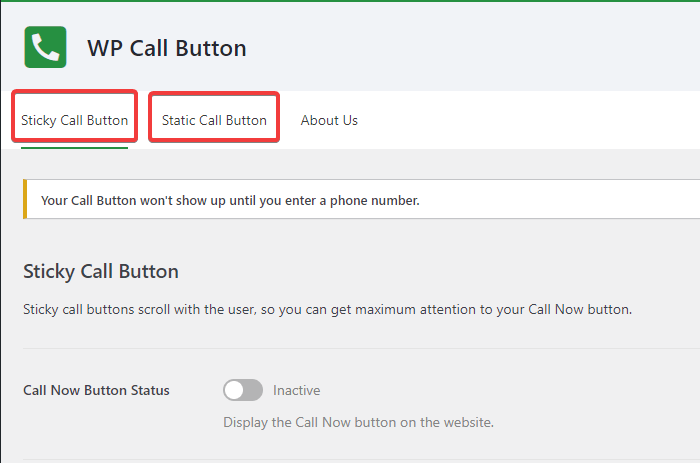
#Configuring Sticky Call Button
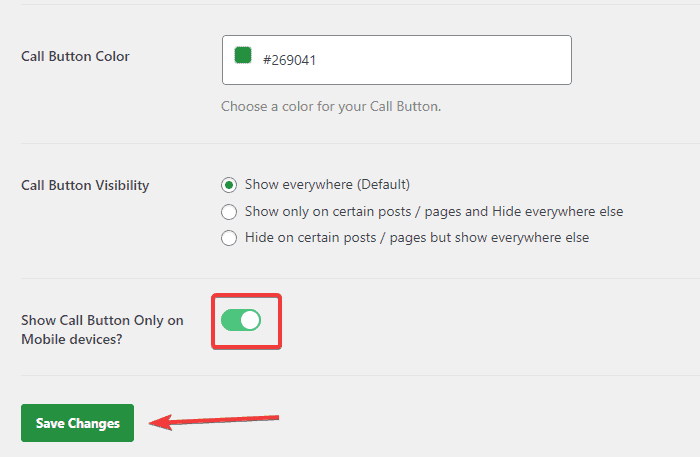
First, toggle on the Call Now Button Status to activate your website’s sticky Call Button feature. You will find four standard settings while creating a Sticky Call Button. Fill in the information accordingly:
- Call Button Text – Type in what your phone number will display as on your site. You can also add your country code.
- Button Position – Configure how the button appears on your website.
- Call Button Color – Select a color for your call button.
- Visibility – Hide the call button on certain pages.
If you want to show the Call Button on mobile devices, not on the desktop, you can toggle on the call button only for mobile devices. Save the change at the end.
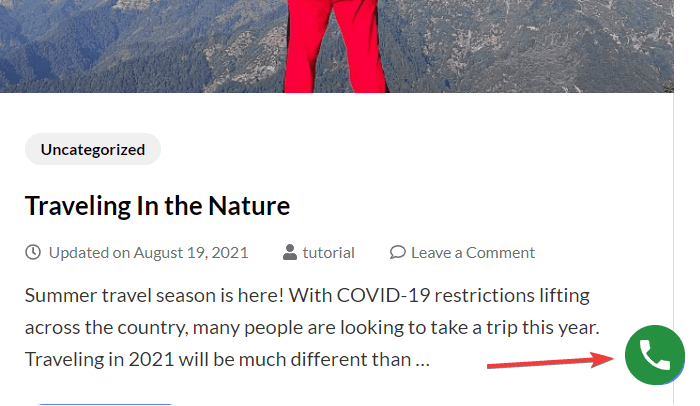
Now, a call button appears on your site that moves along with the scroll.
#Configuring Static Call Button
If you run on WordPress Classic Editor, you need to configure the Static Call Button.
- Go to the Static Call Button tab at the top.
- Now, enter the call button text and select the call button color
- Doing so generates a shortcode at the end. You need to copy it.
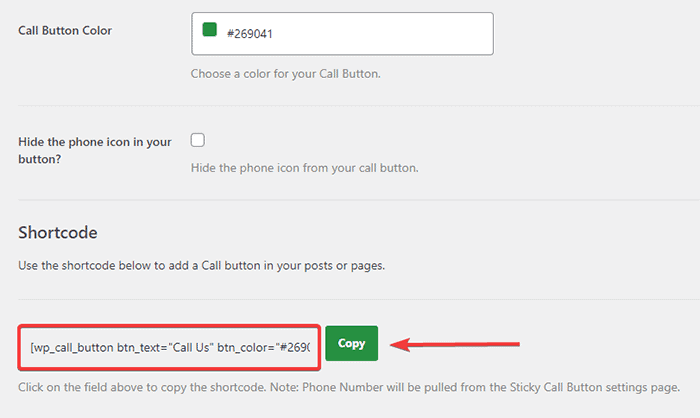
Now, paste the shortcode in your page/post where you want to add the call button. We recommend pasting it on your Contact page. A static call button makes more sense there.
It will look something like this:

You can also publish your call button using the block editor as follows:
- Click on the add icon on your block editor.
- Select the WP Call Button option.
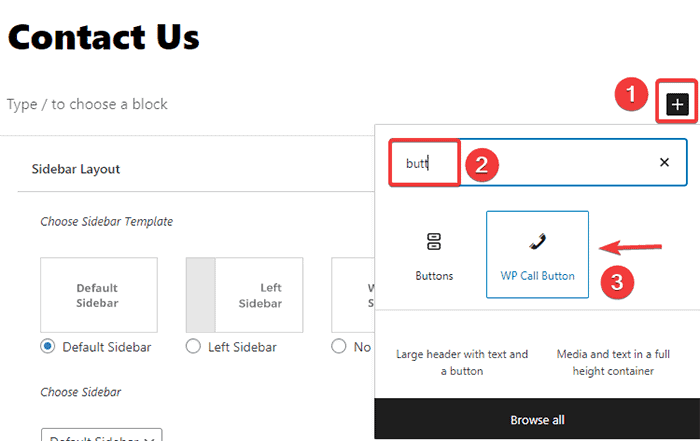
- You can adjust your call button color, font size, position, and more on the right-hand side.
Adding Call Button to Widget
You can also add your call button to widgets such as the sidebar, footer, header, and other places. Here is how:
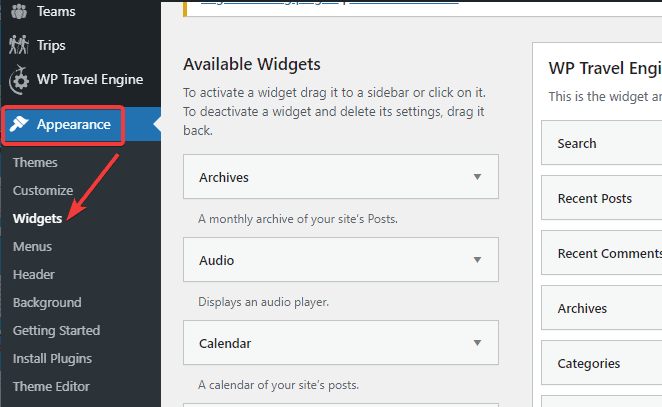
- Go to the Appearance > Widgets on your dashboard.
- Scroll to the WP Call Button widget.
- Drag it to the footer, header, sidebar or other widget areas where you want to add the call button.
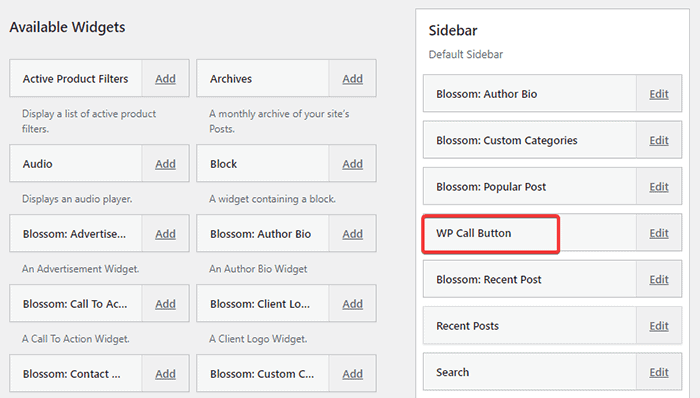
- You can also click on it and select where you want to add the widget.
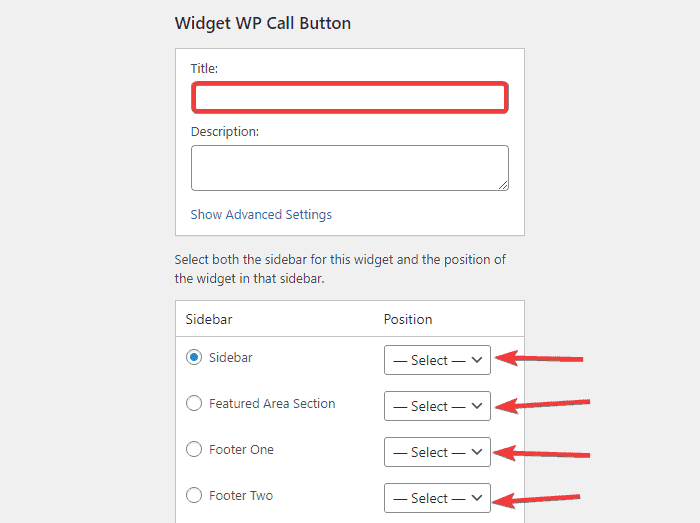
- Click on the Edit button to adjust the title, description, color, and others.
So, this is how you make a click-to-click button using the WP Call Button plugin. It is the easiest and most convenient method to add a call button on your WordPress site. It is a free tool and also integrates with Google Analytics.
Method 2: Adding a Click-to-Call Link With HTML
You can also add a click-to-call link manually using the HTML snippet. This method uses a simple HTML code snippet to open phone links on mobile phones. On Windows 10, it opens Skype, while on Mac, it opens Facetime.
You can add the call button link with HTML as follows:
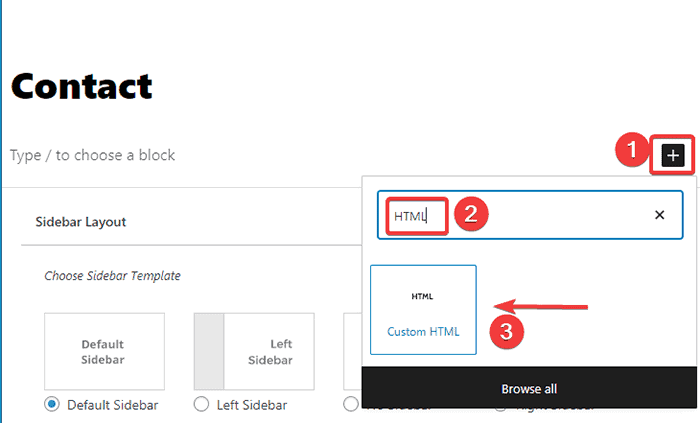
- First, open the post or page where you want to add your business phone number with your country code.
- Add an HTML block.
Now, add the following code snippet in that HTML block:
<!--This link will work on Android and iPhone. It will be visible to desktop users but will result in an error when clicked -->
<a href="tel:+15555551212">+1 (555) 555-1212</a>
<a href="tel:15555551212">Call Me</a>- Finally, publish it to see it on your website.
You can add an icon or image next to your click-to-call link. Here is how:
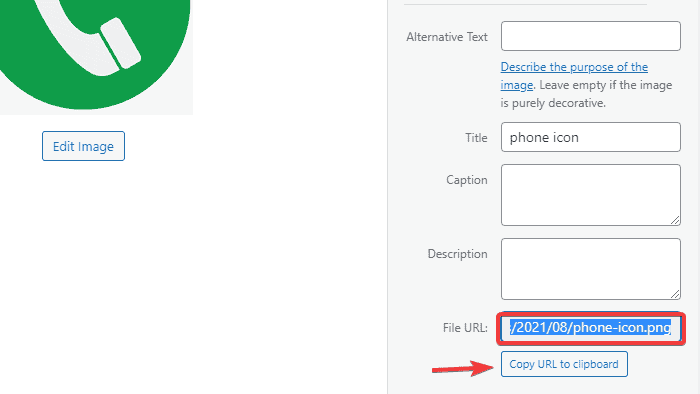
- Go to Media > Add New option on your dashboard.
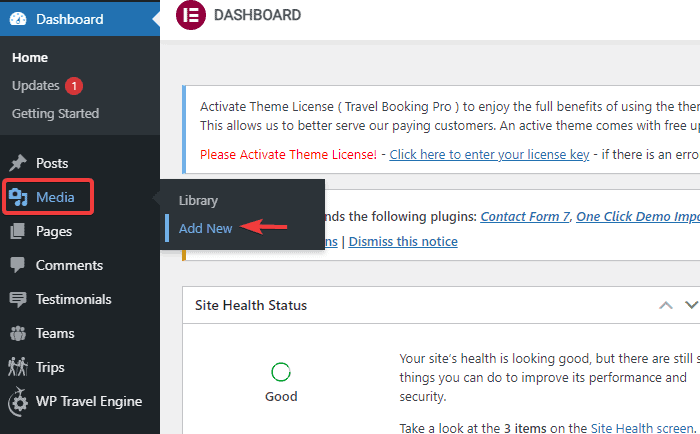
- Upload your icon.
- Now, edit the icon after the upload is complete.
- Copy the file URL from the editing screen.
Finally, go to the post/page where you want to add your call link with an icon. Add an HTML block as before and paste the following code snippet:
<a href="tel:+15555551212"><img src="paste-url-here" alt="Call us" /></a> - Don’t forget to replace the URL here with the one you copied earlier. Then publish it.
Method 3: Adding Click-to-Call link in WordPress Header
You can also opt to add your click-to-call link in your site’s header or navigation menu. This way, the call button will be the first thing your visitors will notice. To add the call link using this method, follow these steps:
- Go to the Appearance > Menus option on your dashboard.
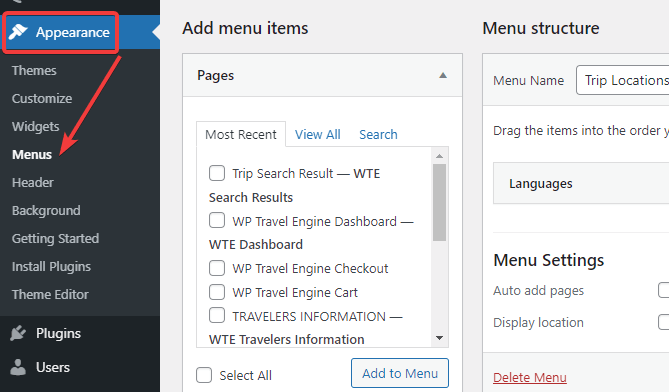
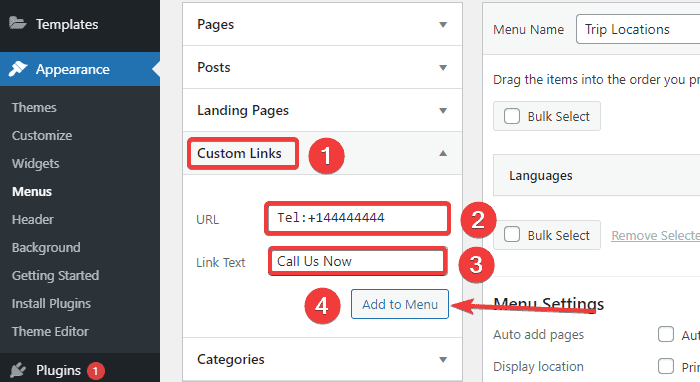
- Click on the Custom Link option from the right-hand side column.
- Enter your phone number in the URL in the “Tel:+144444444” format.
- In the Link Text field, enter the label you want to give to your call link.
- Click on the “Add to Menu” button.
Frequently Asked Questions
How to make a click call link in HTML?
You can make a click call link in HTML by adding the following code in your WordPress HTML block:
<!–This link will work on Android and iPhone. It will be visible to desktop users but will result in an error when clicked –>
<a href=”tel:+15555551212“>+1 (555) 555-1212</a>
<a href=”tel:15555551212“>Call Me</a>
Replace the highlighted part with your business contact number.
How does click-to-call work?
Click-to-call is an HTML link that works with the tel: and mailto: protocols. These protocols allow the browsers to request calls and initiate conversations.
How to add a call-now button to a website?
You can add a call-now button on your website using the WP Call Button plugin or manually enter your WordPress HTML code snippet. We have explained these methods in detail. Check them out.
Conclusion
So, these were the three easy methods of making a click-to-call link in WordPress. We recommend using the plugin as it is a faster, safer, and convenient method. Any level user will find it easier and convenient compared to other methods. However, the manual method also works just as fine. But, you need to work a bit more with the codes here and there.
Which method did you find easy? Let us know in the comments.