If you want to install WordPress on your PC but don’t know the steps, you have landed on the right spot. In this article, we will guide you on how to install WordPress locally on Windows PC using WAMP.
After going through this guide, you will develop your site on WordPress locally before taking it online. But before the steps, we will talk about WAMP and why you should install WordPress on windows.
Why Install WordPress on Windows?
Most of the websites are developed locally on personal and work computers instead of developing them online. You can create and test new WordPress themes and plugins and experiment without affecting a live website if you use a local environment.
Installing WordPress locally on Windows ensures that only you can see the site. Therefore, developing a website in a local environment would be very secure as no one else can access the files you’re working on.
Moreover, you can set up as many test websites as you want simultaneously before moving them to the live server. And since all the files are hosted on the computer, the loading time would also be near about instant. This speeds up the work process for both developers and theme designers.
What is WAMP?
WAMP is an acronym that stands for Windows, Apache, MySQL, and PHP. It is a software stack that installs Apache2, PHP, and MySQL on your Windows Operating System. WAMP acts like a virtual server on your computer. Thus you can easily create web applications in a local environment.
How to Install WordPress Locally on Windows Using WAMP (3 steps)
1. Download and Install WAMP
At first, you will have to download and install the WAMP software on your computer.
- Go to the WampServer Website and then click on the ‘Start Using WampServer’ button. (WAMP offers options for both 32- and 64-bit Windows versions, so download whichever one corresponds with your OS.)
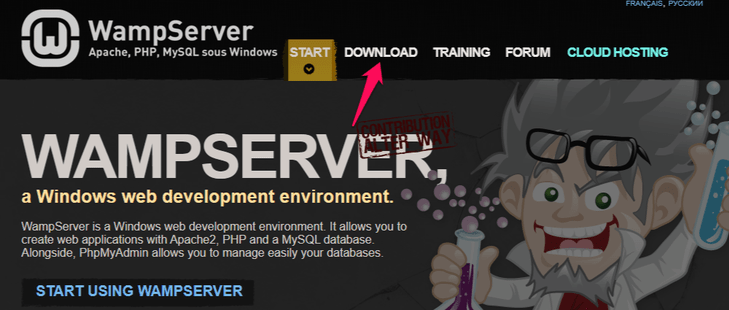
- Click on the WampServer execution file. During installation, you can change the browser setting to any other web browser of your choice.
- Once it is installed, you can launch the WampServer to continue.
2. Set Up New Database For Local WordPress Using phpMyAdmin
Now you need to create a blank MySQL database.
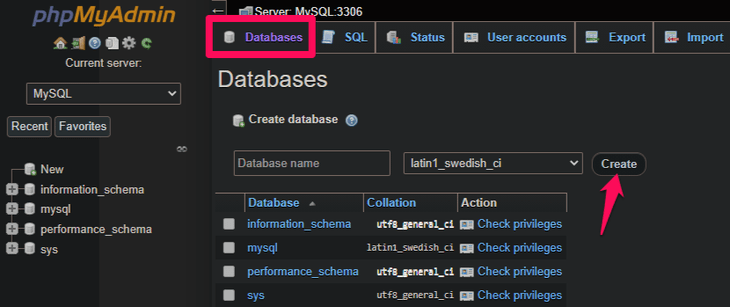
- Click on a green WampServer icon at the bottom right corner of your screen after launching WAMP.
- Then click on phpMyAdmin (a web-based application to manage MySQL databases).

- It opens a tab on your web browser.
- Type ‘root’ within the Username field and leave the password blank, then click on Go.
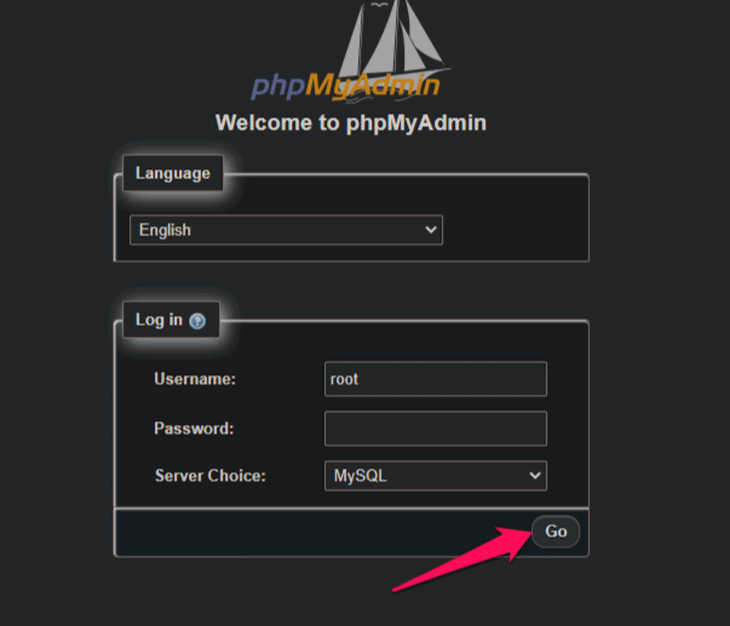
- Click on the ‘Databases’ tab at the top of the screen.
- Now select a name for your database and type it within the ‘Database Name’ field.
- After that, click on the ‘Create’ button.
Note: If the WampServer icon is yellow or red, it means the services (Apache, MySQL, PHP) are not running. You will have to start the services by clicking on the icon before setting up the database.
3. Download and Install WordPress on Your Local Computer
After the database is ready, it’s time to download and install WordPress on your computer.
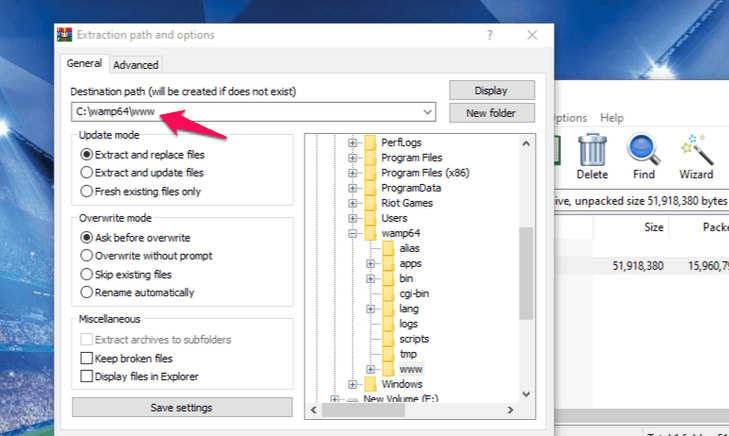
- Go to WordPress.org and then navigate to the download page. (It will download as a zip file.)

- Extract the zip file. Now copy the ‘WordPress’ folder to the directory c:/wamp64/www/ for 64 bit or c:/wamp/www/ if you are using 32-bit.
- Now type in http://localhost/wordpress/ in your browser and select your preferred language to get the WordPress Installation started.
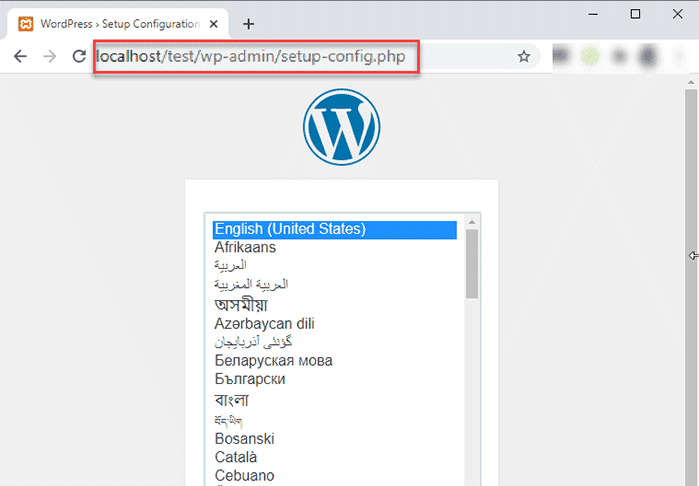
- Click on the ‘Continue’ button.
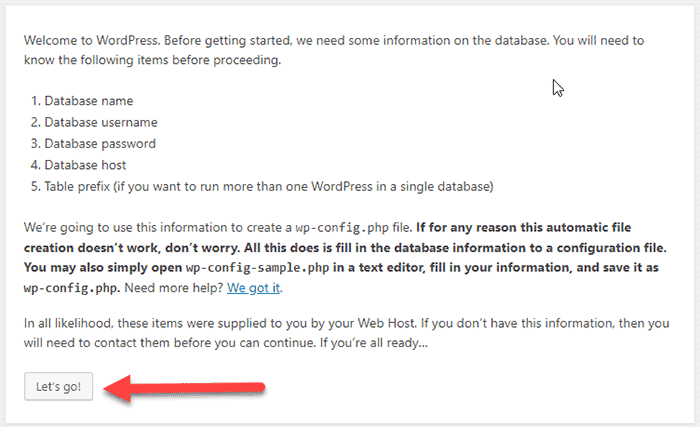
- Once you have read the database setup information carefully, go ahead and click on the ‘Let’s go’ button to continue.
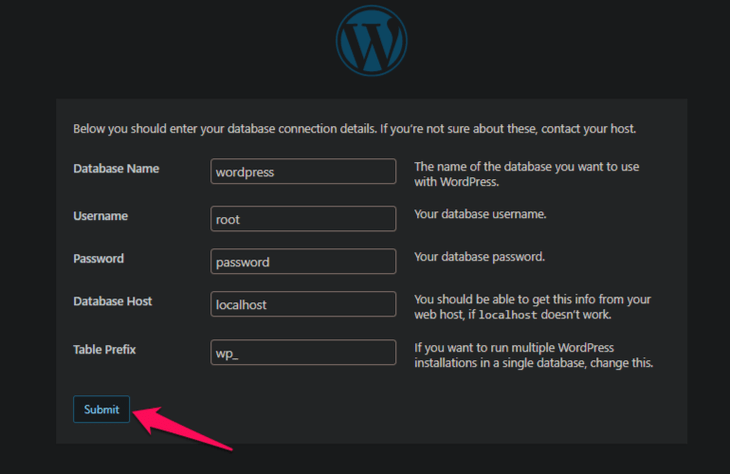
- Enter the name of your database, the username, and the password that you used before. We used “root” as the username with no password earlier.
- Click on the ‘Submit’ button. WordPress will now create a configuration file for you in the backend.
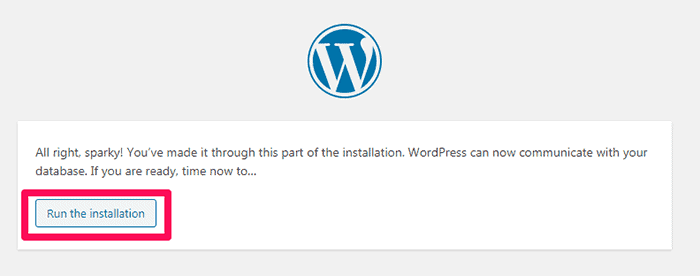
- WordPress will direct you to run its installer if everything is working fine. Go ahead and click on the ‘Run the installation’ button to continue.
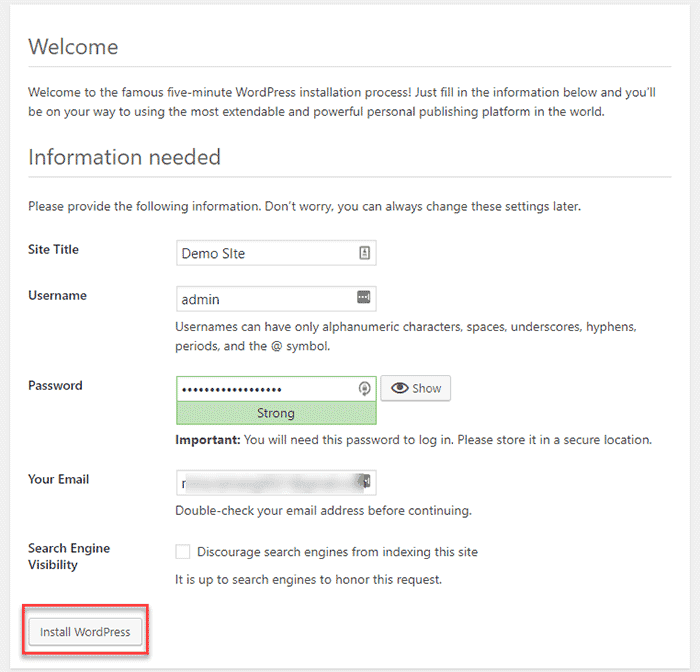
- After that, you need to choose a title for your site and set your admin username, password, and email.
- After you’re ready, click on the Install WordPress button, and a success message will appear.
- Now you can proceed to your WordPress dashboard by clicking on the ‘Login’ button or by going to http://localhost/wordpress/wp-login.php.
You have now successfully installed WordPress on a Windows PC using WAMP.
Conclusion
So there you have it. These were the three easy steps on how to install WordPress locally on a Windows PC using WAMP. All you need to do is download and install the WAMP, set up a new database, and then install WordPress.
For other methods to install WordPress, check out our guide on How to install WordPress locally Using XAMPP
We hope this guide has helped you to install WordPress locally on your Windows PC using WAMP.
Frequently Asked Questions
Q. Do I need to install WordPress on my PC?
If you are a developer or want to build a theme, plugin, or test some WordPress features, you need to install WordPress on your computer. However, if you are a beginner running a site for your visitors to see, you don’t need to install WordPress on your computer.
Q. How do I install WordPress locally on Windows 10?
Follow the steps below to install WordPress locally on Windows 10:
• Download WordPress package
• Install the WordPress
• Set your database and password
• Install the dependencies of Windows 10
• Configure the settings
• Finish.
Q. Can you run WordPress locally?
Generally, the local installation of WordPress is for testing or developing certain WordPress features. We have mentioned the steps to install WordPress locally on a Windows PC using WAMP in the above sections. Check them out.