Installing XAMPP and WordPress locally is an excellent idea if you want a development site for testing and other purposes.
XAMPP is a handy tool that lets you run a website from your own computer. Once you install and set it up, you can install WordPress with just a few clicks.
Moreover, if you are used to developing your websites on a live server, you would be fascinated to shift to a local development environment like XAMPP. With impeccable development speed and exceptional reliability, you can never go back to the old ways.
Most of the WordPress developers and website owners often install WordPress locally on their computers. They do this to test new releases, themes, plugins, and updates before using them in production.
Now, you’ve got some idea why installing XAMPP and WordPress locally is important; it’s time to explore the process involved. For your utmost convenience, we have done some homework and created this detailed how-to guide.
Here, we will guide you step by step on how to install XAMPP and WordPress locally on Windows PC. Furthermore, you can also go through the steps of setting up WordPress multisite locally with XAMPP.
Before we begin with the all-important details, check out this thorough guide on How to Install WordPress Locally on a Windows PC Using WAMP.
What is XAMPP?
In general, XAMPP is a local server that you can install on your computer to mimic an actual web server. It is cross-platform because it works on multiple operating systems.
The name XAMPP itself is an acronym of cross-platform (X), Apache (A), MariaDB (M), PHP (P), and Perl (P). XAMPP is super convenient to install and use. It installs everything you need to run WordPress. On top of that, you can use XAMPP to create local installations of other website solutions like Drupal, Joomla, PrestaShop, PHPBB, and OpenCart.
The good thing about XAMPP is, it comes with other useful tools like Mercury mail server, phpMyAdmin (for database administration), OpenSSL, Apache Tomcat (for running JAVA code), Webalizer (for web server log analysis), and FileZilla FTP server.
Why XAMPP for WordPress?
XAMPP lets you set up new WordPress installs with a few clicks. Besides, it is hosted locally on your computer. So, you can quickly upload your changes and see them live on the browser.
The current recommended WordPress requirements include:
- PHP version 7.3 or greater
- HTTPS support
- MySQL version 5.6 or higher / MariaDB version 10.1 or higher
- Apache or Nginx server
Thankfully, XAMPP checks all the boxes listed above. It is incredibly reliable, easy-to-use, and works on all major platforms.
Why Install WordPress Locally on Windows PC?
When you talk about website development, most of them are developed locally on personal and work computers instead of online. Using the local environment is very important as it lets you create and test new WordPress themes and plugins and experiment without affecting the live website.
This is one of the main reasons why installing WordPress locally on Windows PC is very important. Developing a website in a local environment is very secure as no one can access the files you’re working on.
The following are the reasons why you should install WordPress locally on Windows PC:
Testing:
Installing WordPress locally on Windows allows you to test upgrades, tweaks, and other customizations safely.
Website Staging:
The local WordPress website can be used as a WordPress staging site. Once you make the modifications you want, you can upload them to your live website.
Development:
The local version of WordPress is the best environment to create and modify different WordPress themes and plugins.
Offline Access:
A local installation of WordPress doesn’t need an active internet connection. As a result, you can access your local installation even if your connection goes down or if you are in a remote place and have no internet access.
Security and Privacy:
Security and privacy are both maintained when you install WordPress locally on your computer. You can only access a local WordPress installation on your PC. As a result, this is more secure than a WordPress website installed online.
Speed:
Comparatively, local WordPress installations run quicker than their online counterparts. Installing it locally saves you ample time.
Steps to Install XAMPP and WordPress Locally
Now, let’s begin the installation and setup process of XAMPP and WordPress on Windows PC:
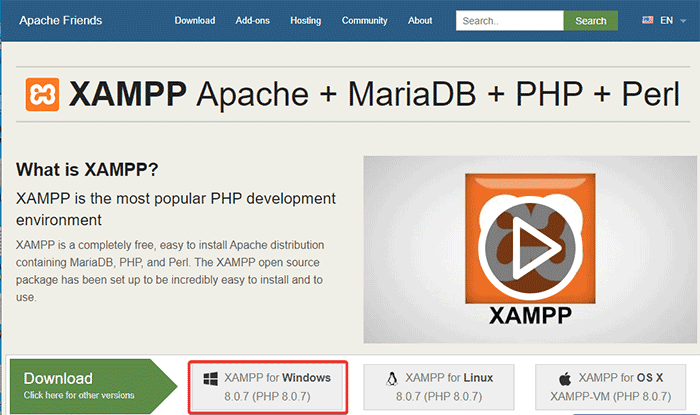
Step 1: Download XAMPP and Install it on Your Computer
For the first step, go to https://www.apachefriends.org/ and click on the XAMPP for Windows button to download XAMPP on your Windows PC.
You need to wait for a bit as the file size is around 155 MB.
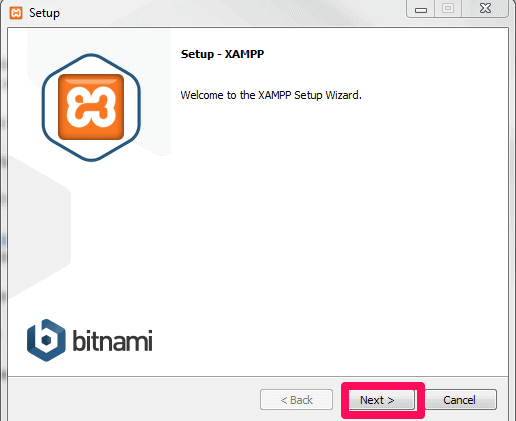
After the download finishes, run the .exe file to launch the XAMPP installer. Click on the Next button to continue.
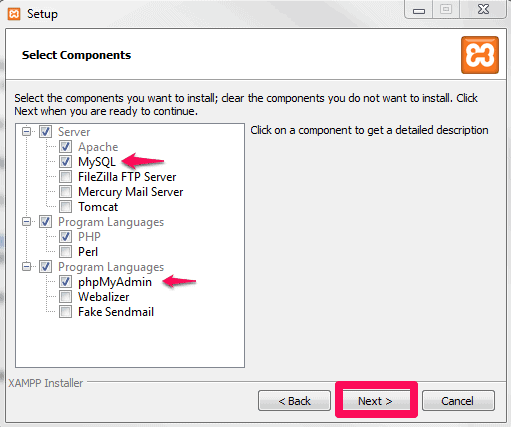
In the next step, you should select the server and program language components you want to install. All components are already selected by default. As you don’t need every element to install XAMPP and WordPress, just tick on MySQL and PHPMyAdmin and click on the Next button.
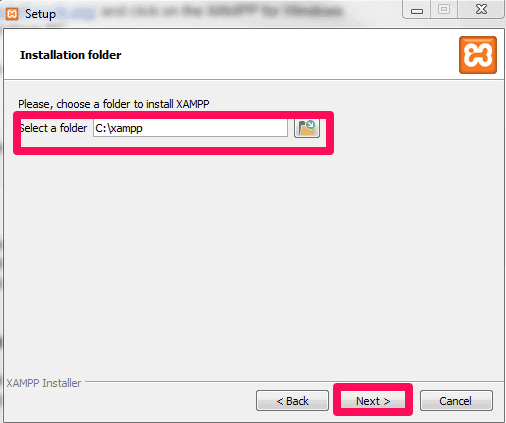
Next up, you need to select the folder where you want to install XAMPP. It’s better to leave it as the default. Click on the Next button to proceed.
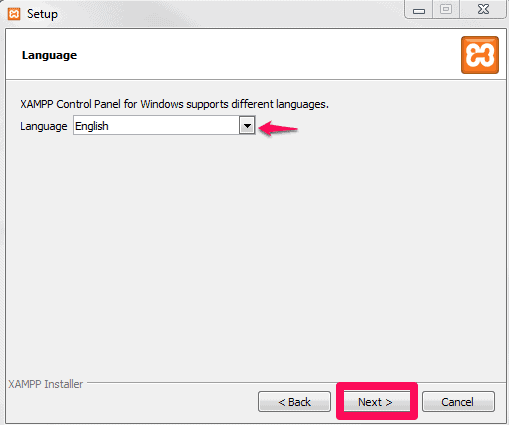
Once you get redirected to the next screen, select your preferred language, and click on the Next button.
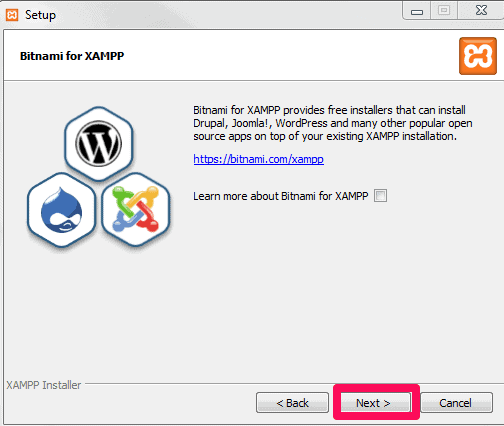
Next up, you will get a prompt related to the information about Bitnami for XAMPP. As you don’t need this to install XAMPP and WordPress, uncheck the option and click on the Next button.
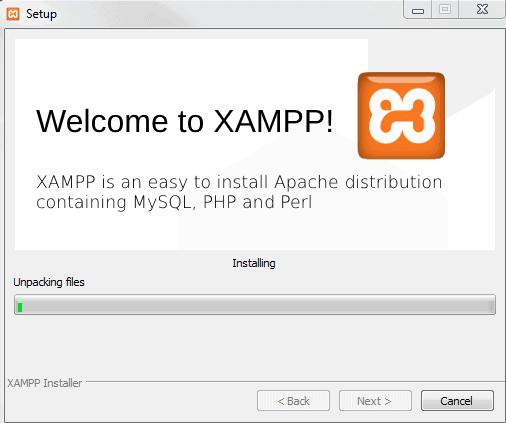
On the next screen, you can see the message. The setup is ready to begin installing XAMPP on your computer. Click on the Next button and wait for few minutes until it gets completely installed.
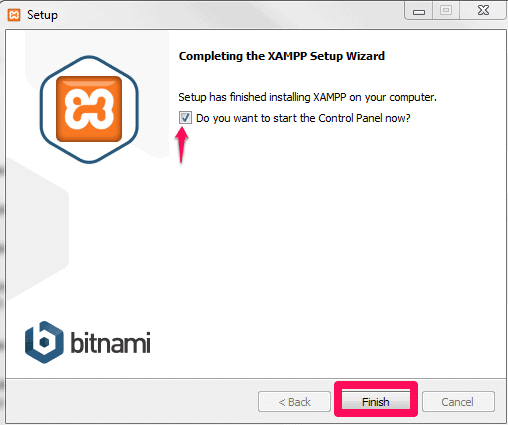
Once the process completes, you can click on the Finish button and launch the control panel to start working with XAMPP.
Step 2: Run the Modules and Test Your Server
You need to run two modules: Apache and MySQL to install XAMPP and WordPress properly on your Windows PC. You can easily start both modules from the XAMPP control panel as shown in the figure below:
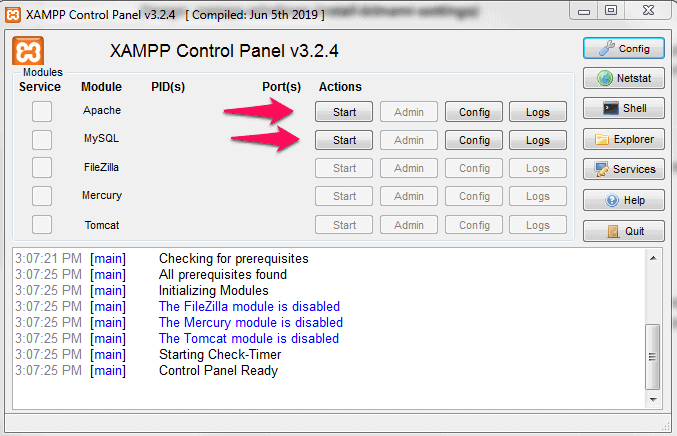
Once you start the modules, you can see their status turn to green.

After that, you can now check if your local server is working or not by going to http://localhost/ in your web browser.

If you see a screen similar to the above, you are good to go. Now, it’s time to add the WordPress files and get your WordPress website up and running on XAMPP.
Step 3: Adding WordPress Files
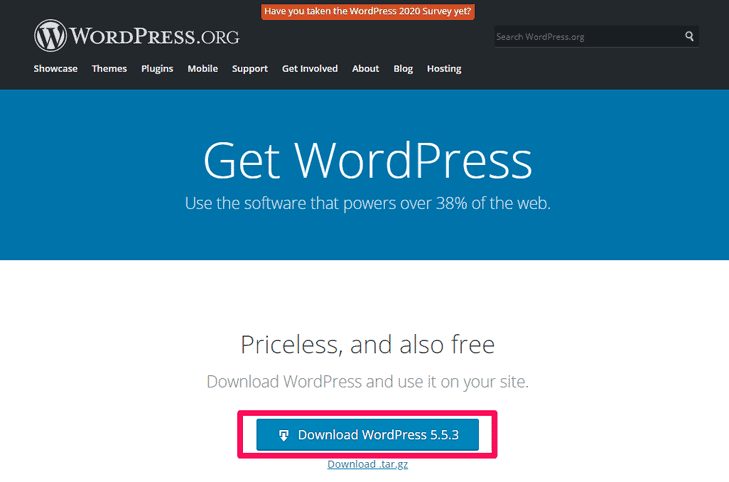
To start adding WordPress files, first, you need to download the latest version of WordPress from https://wordpress.org/
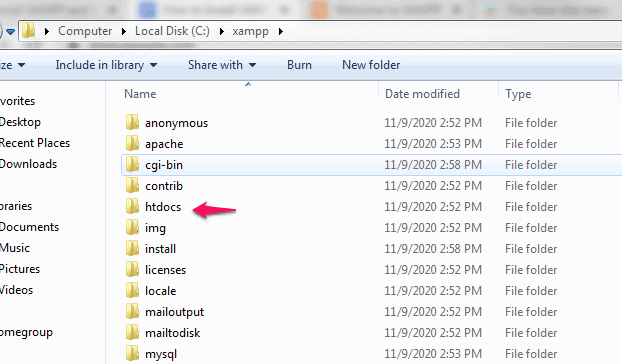
After that, explore the folder where you installed XAMPP and find the htdocs subfolder in that main folder.
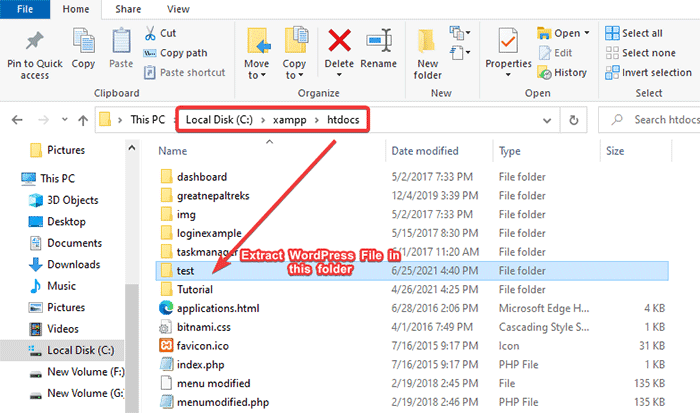
Inside the htdocs folder of XAMPP, create a new folder for your test site. The folder name you create becomes the sub-name used to access your site. For instance, if you name the folder test, you can access your site by going to http://localhost/test.
Once you create the folder, extract the WordPress.zip file that you downloaded a while ago in that folder.
Now, you need to create a database for WordPress in the next step.
Step 4: Create a Database for WordPress
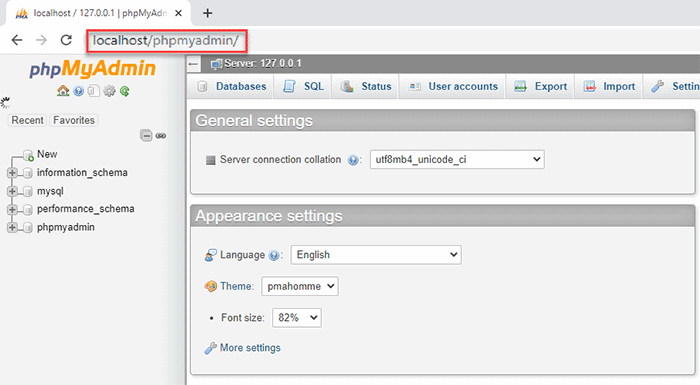
In the next step, you have to create a MySQL database for your WordPress install. To do that, make sure the MySQL module is active from the control panel and then visit http://localhost/phpmyadmin/ from your browser.
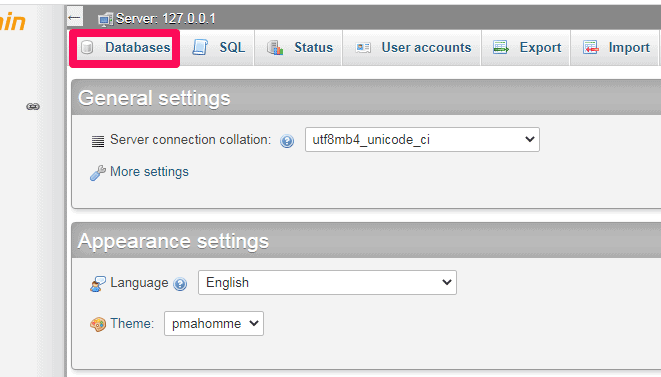
Now, click on Databases at the top.
Once you are redirected to the database creation menu, enter your database’s name and click on the Create button.
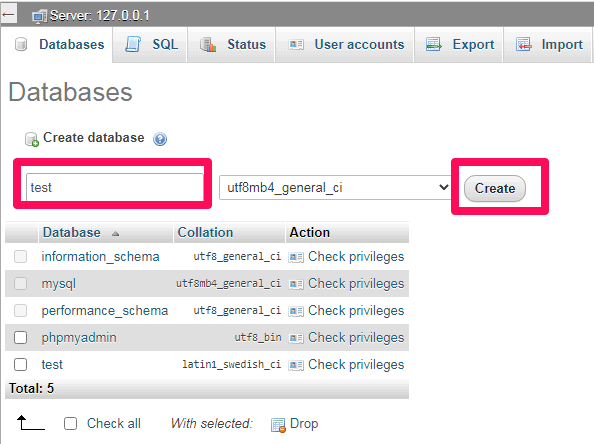
Make sure to remember your database’s name as you need to use it for the next step.
Step 5: Install WordPress Locally Using On-Screen Installer
Now, you are set to install WordPress locally on your Windows PC. For that, you need to access the folder where you previously extracted your WordPress files. Enter this URL on your browser:
http://localhost/FOLDERNAME
In our case, the folder name is test. Hence, the URL becomes http://localhost/test.
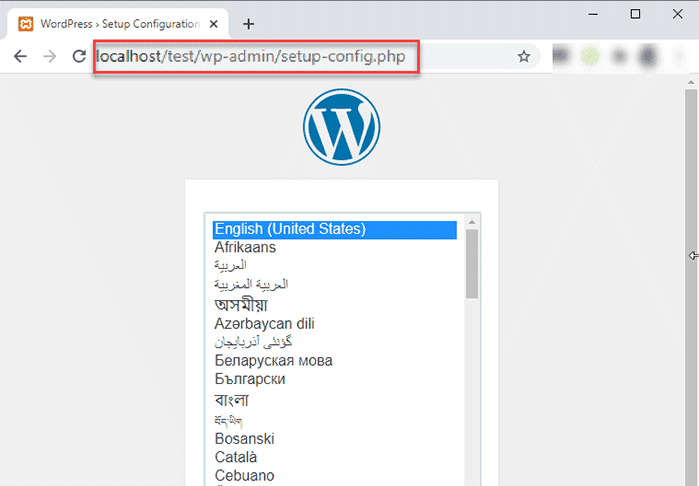
Now, select the language you prefer and click on the Continue button to go to the next step.
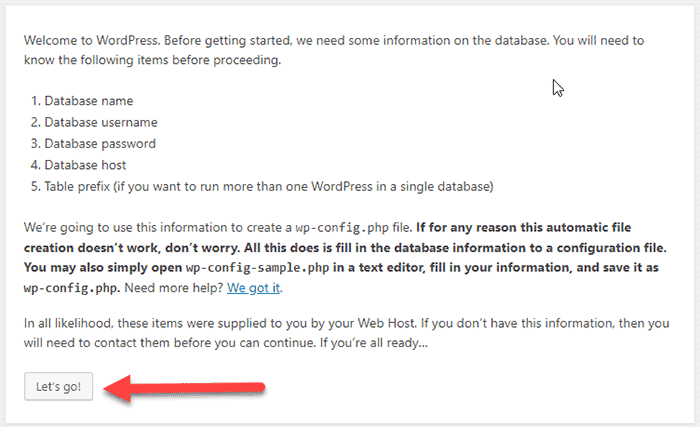
In the next step, you can go through some important instructions regarding the upcoming steps and then click the Let’s go button to proceed further.
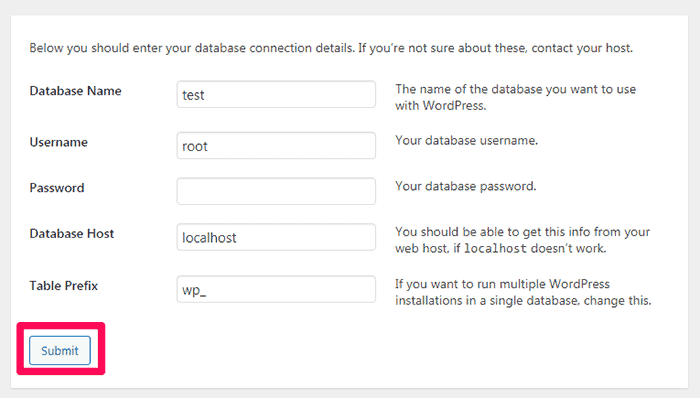
Now, this is the most crucial part of the installation process. Here, you need to input the name of the database that you created earlier and fill up the information as shown below. Once you input all the information, click on the Submit button.
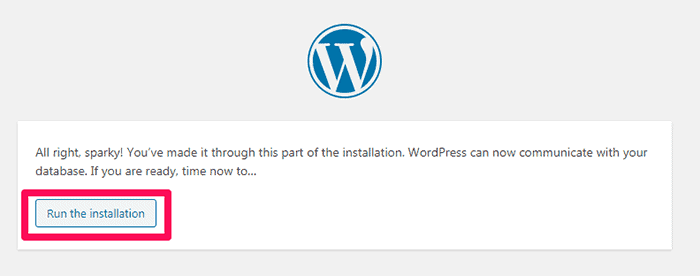
Next up, click on the Run the installation button to proceed.
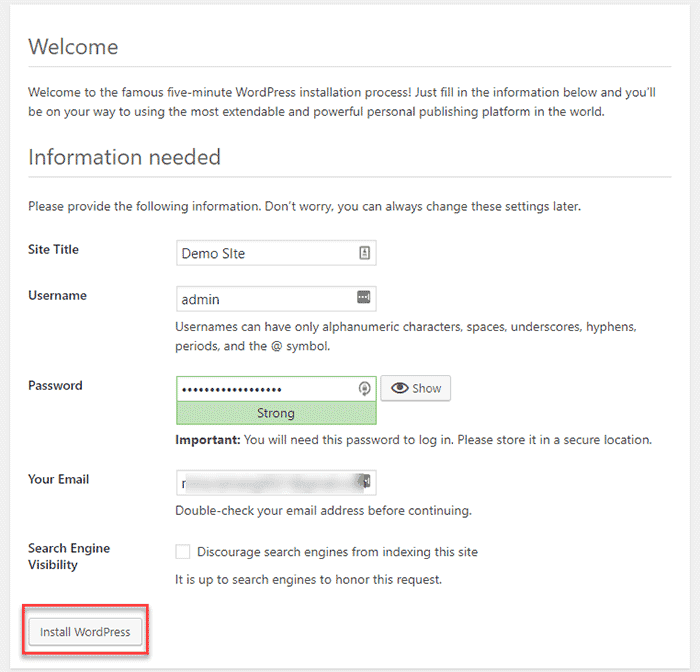
In the next screen, input the details like site title, username, password, and email, and then click on the Install WordPress button to complete the installation process.
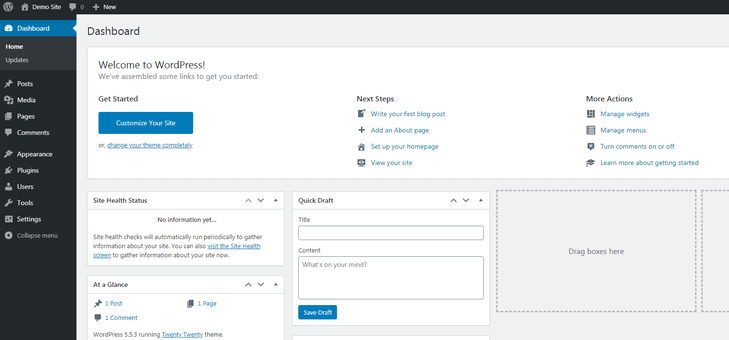
Now, you can easily log in to your WordPress dashboard with the username and password you set earlier. For that, go to http://localhost/FOLDERNAME/wp-login.php
There you go! You have successfully installed WordPress locally on your Windows PC. Your WordPress dashboard should appear similar to this:
Steps to Setup WordPress Multisite Locally With XAMPP
Follow these steps to setup WordPress multisite locally with XAMPP:
Step 1: Enable WordPress Multisite in Your wp-config.php File
To initiate the process, open your wp-config.php file and add the following line of code as shown in the image below. To access the wp-config.php file, go to the folder where you installed XAMPP and redirect to htdocs -> FOLDERNAME -> wp.config.php.
Line of code to include:
define('WP_ALLOW_MULTISITE', true);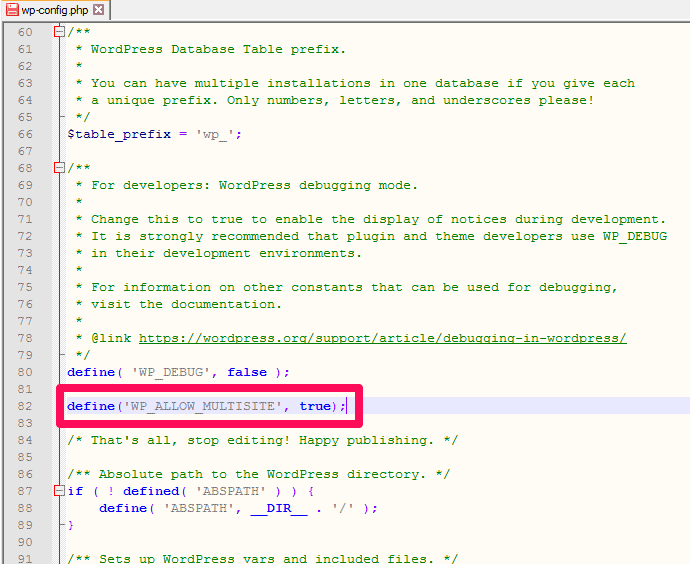
Note: You can edit the config file simply using Notepad++ or Sublime Text.
Step 2: Setup Your Multisite Network
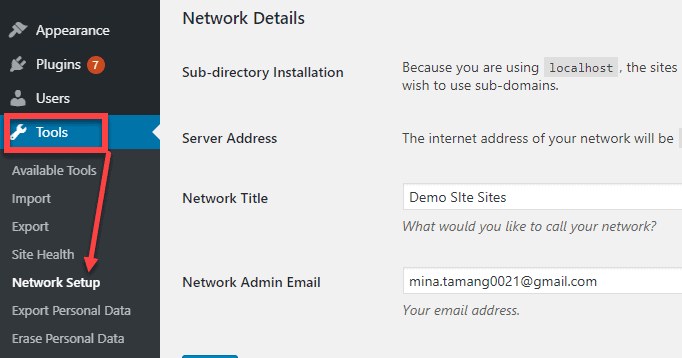
Now, login to your WordPress dashboard and then redirect to Tools -> Network Setup from the left sidebar.
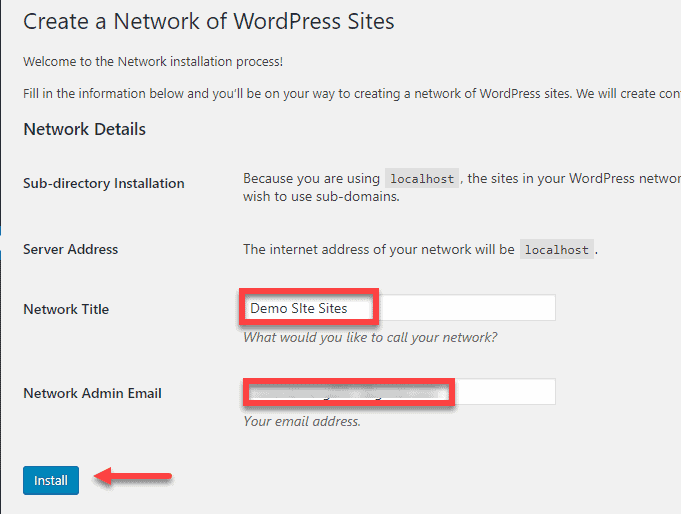
On the next step, enter the name of your multisite network and your network admin email address. After that, click on the Install button to continue.
Next up, WordPress will prompt you to edit your wp-config.php and .htaccess files. You need to add the codes provided by WordPress in the respective files.
Now let’s show you how you can edit these files in the next step.
Step 3: Edit wp-config.php and .htaccess Files
Open your wp-config.php file (xampp -> htdocs -> FOLDERNAME -> wp.config.php) and add the code given by WordPress before the line reading /* That’s all, stop editing! Happy publishing. */
Lines of code to include:
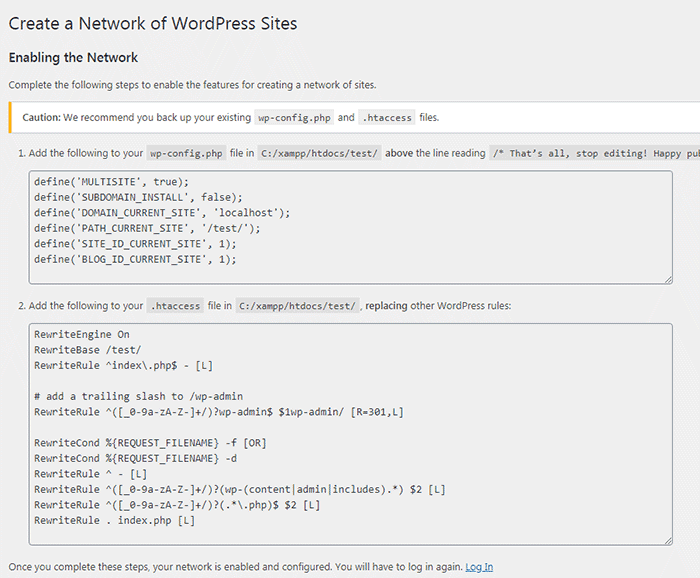
define('MULTISITE', true);
define('SUBDOMAIN_INSTALL', false);
define('DOMAIN_CURRENT_SITE', 'localhost');
define('PATH_CURRENT_SITE', '/test/');
define('SITE_ID_CURRENT_SITE', 1);
define('BLOG_ID_CURRENT_SITE', 1);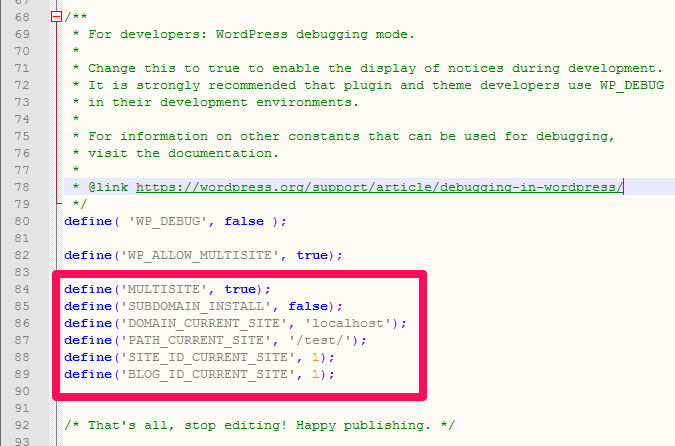
Next up, open .htaccess file (xampp -> htdocs -> FOLDERNAME -> .htaccess) and replace all of its code with the one provided by WordPress.
Lines of code to include:
RewriteEngine On
RewriteBase /test/
RewriteRule ^index\.php$ - [L]

# add a trailing slash to /wp-admin
RewriteRule ^([_0-9a-zA-Z-]+/)?wp-admin$ $1wp-admin/ [R=301,L]

RewriteCond %{REQUEST_FILENAME} -f [OR]
RewriteCond %{REQUEST_FILENAME} -d
RewriteRule ^ - [L]
RewriteRule ^([_0-9a-zA-Z-]+/)?(wp-(content|admin|includes).*) $2 [L]
RewriteRule ^([_0-9a-zA-Z-]+/)?(.*\.php)$ $2 [L]
RewriteRule . index.php [L]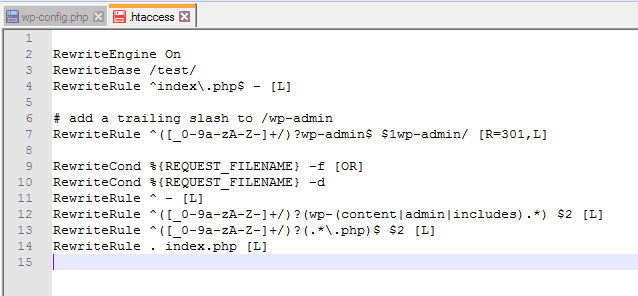
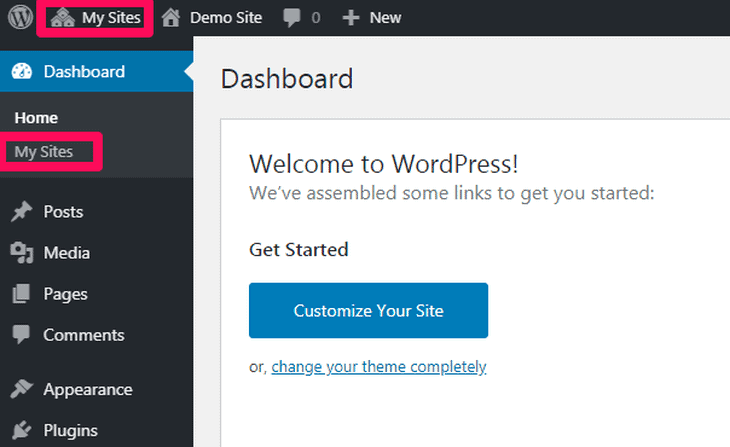
After you complete all of these processes, you will have to log in again to your WordPress dashboard.
Once you log in, you will be able to access individual sites in your multisite network from your dashboard.
Steps to Install WordPress Using Bitnami
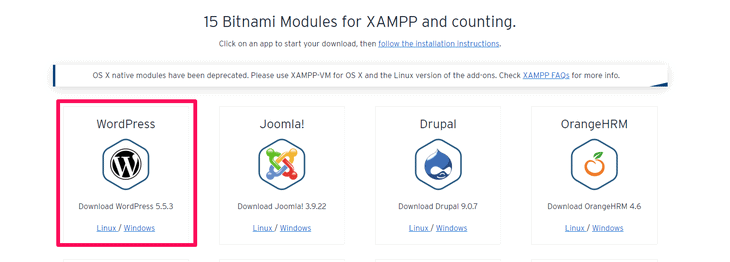
Bitnami is an application package that simplifies the process of installing popular open-source applications. As we have mentioned earlier, while installing XAMPP, you can see the promotion of this solution, which is also referred to as an all-in-one tool.
You can download the Bitnami WordPress Module from the Bitnami Modules for XAMPP page as shown in the image below:
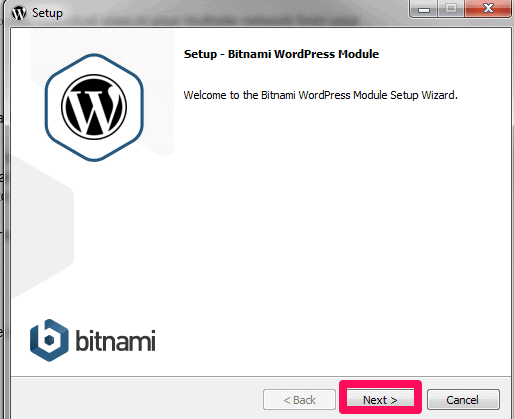
Once the file gets downloaded, run the setup wizard then select your preferred language and press the Next button.
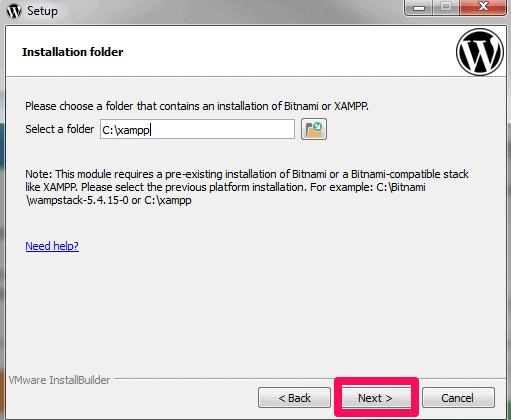
In the next step, you need to select the folder where XAMPP was previously installed. Click the Next button once you locate it.
Next up, fill in the details, and Bitnami will create your WordPress admin account.

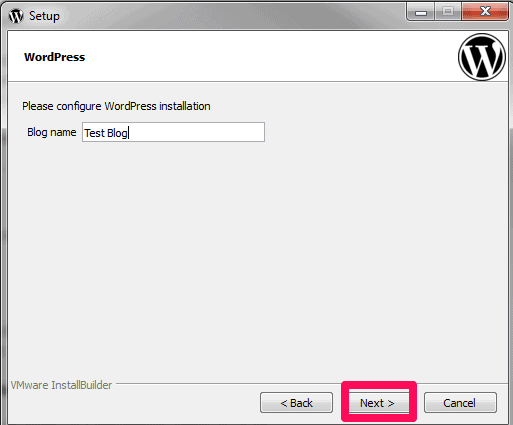
Now, simply enter the name of your WordPress installation and click the Next button.
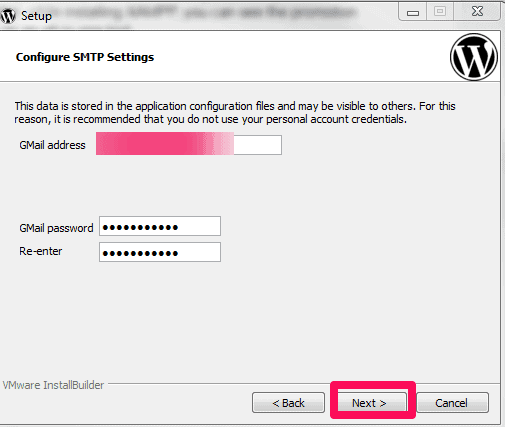
In the next step, you can choose from two options: Gmail and custom email provider. If you select Gmail, you should enter your Gmail address and password. Likewise, if you select a custom email provider, you need to enter all your email provider’s SMTP connection information.
Here, we will show you by selecting Gmail.
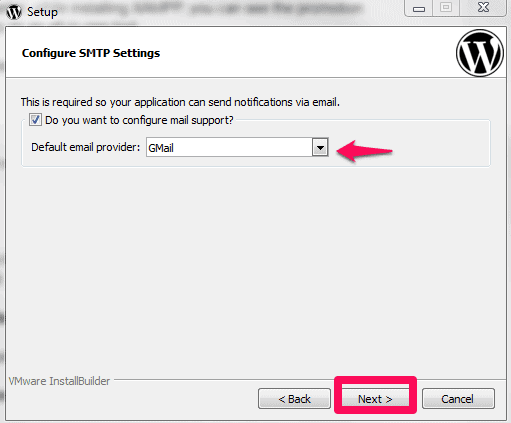
Now, enter the Gmail address and password and click the Next button.
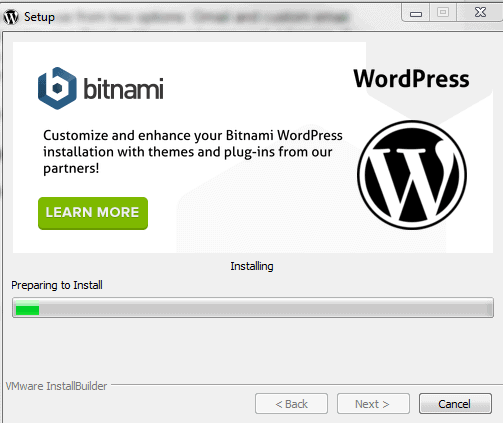
Now, wait till the setup wizard completes the installation of WordPress.
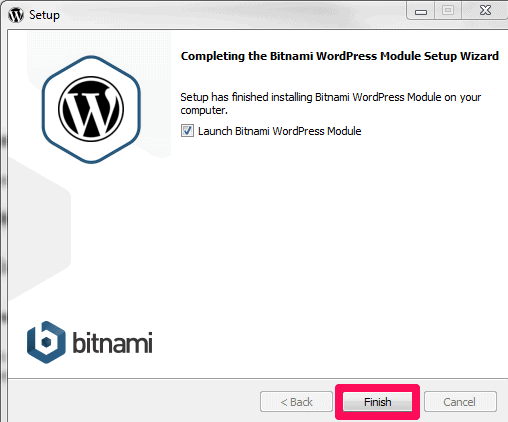
Once the installation completes, click the Finish button to launch the Bitnami WordPress module.
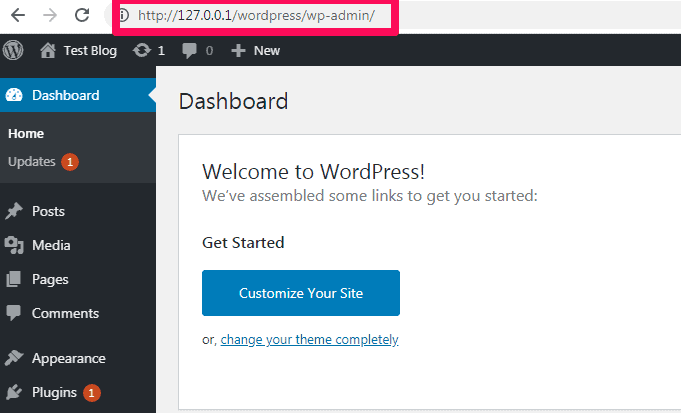
There you go! Now you can access your website with the URL shown in the image below:
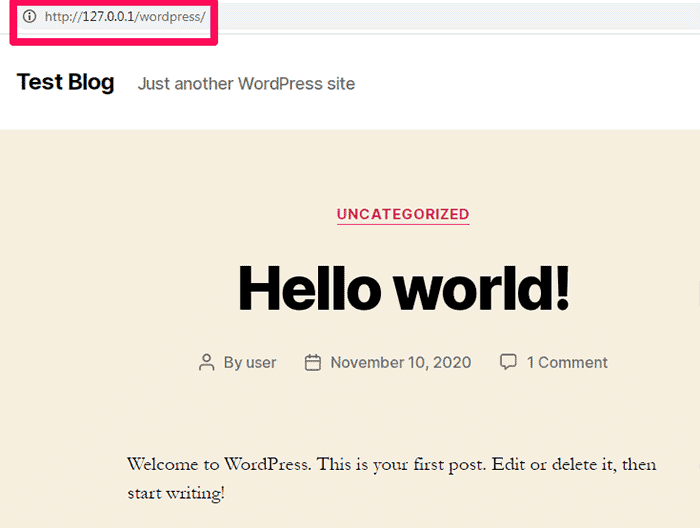
You can access your WordPress dashboard with this URL:
http://127.0.0.1/wordpress/wp-admin/
FAQs (Frequently Asked Questions)
Should you use XAMPP and WordPress for staging?
Running WordPress in your localhost is a perfect way to experiment and try out different things with WordPress. However, we do not recommend using it as an actual staging site for a live website.
The reason is that it has a different hardware configuration than your live website. As a result, it’s not sure if something that works on your XAMPP installed WordPress will also work on your live production site. The preferred way to create a WordPress staging site is to use a subdomain or your host’s staging service.
What are the notable benefits of installing WordPress locally on Windows PC?
Well, there are many benefits of installing WordPress first on your computer before moving it online. Some of them are included below:
1. Time-Saving and Flexibility
Creating a new WordPress website from scratch takes a lot of time. If you choose to set up and design WordPress on a live server, you would spend hours online to get your WordPress website up and running.
Thankfully, when you install WordPress locally, you only require an internet connection when you want to push your WordPress website online. You can work smoothly without any barrier the whole time, even when you are offline.
2. Minimizes Downtime:
It’s always risky to make drastic changes, like modifying a WordPress theme on a live website. Sometimes, it could break your website, which negatively affects your website’s uptime and reputation. To mitigate this issue, you need to test the changes offline using local WordPress and only make the changes live after everything seems alright.
3. Faster Development:
When you install WordPress locally, it allows you to test themes and plugins quickly. You can carry out these tasks without breaking anything on your live website. This also speeds up your website development process.
What are the main components of XAMPP?
When you run the XAMPP setup, you encounter a window that urges you to select different installation components. Although you don’t need everything for WordPress installation, there is no harm in knowing the purpose they serve. Here are all of the components of XAMPP:
• Apache: Apache is an essential component of XAMPP. It is an HTTP web server that is necessary to run the website.
• MySQL: MySQL is the database server that is necessary to create databases.
• FileZilla FTP Server: This is used to set up an FTP (File Transfer Protocol) server.
• Mercury Mail Server: This server is used for setting up a mail transport system.
• Tomcat: Tomcat is a handy application server that runs Java-based web applications.
• PHP: PHP is one of the essential components for installing WordPress. It is a server-side scripting language that is used for creating dynamic web pages.
• Perl: Perl is another programming language widely used by programmers for writing CGI scripts.
• PhpMyAdmin: This is a crucial component that handles the administration of MySQL.
• Webalizer: Webalizer is a log file analyzer that generates statistical reports about how many people visit the website and what they look for.
• Fake Sendmail: It is used to test email transfer in the localhost. Fake Sendmail becomes important if you are working on a project that involves sending emails.
Among these components, you should choose Apache, MySQL, PHP, and phpMyAdmin for a WordPress installation.
Why do you require a local WordPress site?
A locally-hosted WordPress site is only accessible by people on your network. As a result, this type of site can serve as a safe environment in which you can easily test new features and troubleshooting methods. Local WordPress websites are best for:
• Creating new themes and plugins
• Staging website
• Website debugging and troubleshooting
Why should you create a WordPress testing site?
Creating a local WordPress site for developers and site owners is a common practice. It provides you the ability to test WordPress without having to create a live website on the internet. You have sole access to your local websites on your personal computer. This offers you plenty of options to experiment with, such as different themes, plugins, test WordPress features, and learn all WordPress basics.
If you already run a WordPress site, you can create a local copy of your WordPress site directly on your computer. This lets you test new updates before you decide to implement them on your live website.
The main reason to create a WordPress testing website is to root out compatibility issues between your tools, themes, plugins, and WordPress core before adding them to your live site. By creating a copy of your website, you can easily host it locally on your PC, do test runs on it, and migrate it back whenever you want.
Our Say
It’s a useful practice to install XAMPP and WordPress locally on your computer. With XAMPP, you can easily develop and test your WordPress website rather than doing it the hard way on a live site.
Once you know how to install XAMPP and WordPress locally on Windows PC, you can test various features, try out different themes and plugins, and experiment with many other aspects before making your website live. Also, you can Install WordPress Locally Using Wamp and try various features.
We hope that you found this thorough guide helpful. Don’t forget to pass the comments if you have anything to share about the topic. We have a whole comment section to read your thoughts.