Believe it or not, the face of education is changing rapidly with growing internet technologies and web.
The Internet is used in so many ways to improve the education system, and one of them is by creating an educational/school website.
But, I guess you already know it, else why would you be here, right?
In case, you are still not motivated enough to create a website for your education institution, here are some points that might help.
- It doesn’t cost much, at least if you develop it using WordPress. You can create a professional looking fully functional Education website in $59 if you exclude hosting cost. Basic hosting plan cost around $4 per month.
- You don’t need to hire a pro! WordPress is pretty easy to use. To be honest, when you reach the end of this article, you will understand the basics of WordPress.
- With WordPress, you can get your educational website ready in an hour, if you follow this step by step guide.
- A school website can effectively contribute to organize the working process of your educational establishment, expand the field of activity, and grow the reputation and recognition of your institution among the teachers, students, their parents, and school administration.
So, if you’re motivated and want to create an educational website for your school, college, institute, online portal, or education hub, stay with me. I will guide you through the entire process step-by-step.
Before we begin, let’s have a look at the most famous types of educational websites and their important elements.
BTW, these are some educational websites created using WordPress.
Table of Contents
- Three Types of Educational Websites
- What Do You Need In An Educational Website?
- Basic Steps To Create an Educational Website
- Step 1. Think of a Domain name
- Step 2. Register Domain Name and Get Hosting Plan
- Step 3. Install WordPress
- Step 4. Install a Beautiful WordPress Theme
- Recommended Themes for Educational Website:
- Step 5. Install WordPress Plugins
- Some WordPress Plugins for School Websites
- Step 6. Add Content to Your School Website
- Conclusion
Three Types of Educational Websites
- A School or College Website gives the information about the school, students, teachers, courses, and classes they offer.
- An Online Education Portal offers study materials, live classes, and tutorials for students.
- A Membership Website for Education is the one where students can login and take their classes online, see their grade information, and submit their assignments. Instructors can create, manage courses, take online and offline classes for their students, and monitor the students.
So which type are you creating? Let us know in the comments!
What Do You Need In An Educational Website?
These are some of the elements that most of the educational websites have in common.
- Home Page – It is the front page of the website where you can put school’s logo, images, important notices, and events information.
- About page – You can give information about the history of your school, the location, certification, etc. through this page.
- Courses – In this page, you can give detailed information about courses your school offers.
- Faculty bio and information – Here, you can give information about the teachers and team members of your education institution.
- Registration form – This form is for students to sign up for classes in your school.
- Contact form – You can create an inquiry form for prospective students and site visitors to contact your school.
Sit back, relax, and think about the elements you want to include in the educational website you are about to create. But, don’t think too much, you can easily add/modify later.
So, without any due, let’s start our edventure!
Basic Steps To Create an Educational Website
- Find the appropriate domain name for your educational website
- Register the domain name and get a hosting plan
- Install WordPress
- Install a nice, attractive, and responsive educational WordPress theme for your website
- Customize the theme to create a desirable look and feel
- Install relevant plugins
- Add content and information
Now, I will go through the entire process in detail.
Step 1. Think of a Domain name
The first step is to choose a domain name for your educational website. The name is the identity of your brand and represents your educational institute, hence is important. Normally choosing a Domain name is a daunting task and takes up most of the time. Since this is your educational website, it won’t be very difficult. The name of your school, college, educational institute or educational portal itself can be the domain name of your website.
Once you are ready with your prospective domain names, go to Namesilo to check for their availability. Enter the possible names in the search box.

If you want a ‘.com’ domain for your educational portal, you can check for its availability at Namesilo. Once you find a domain name at Namesilo, don’t register it there. I will guide you to get a domain name for free in the next step.
But, if you are a registered school in the US, you can get a ‘.edu’ domain which is limited to accredited degree-granting institutions of higher learning. You can register a .edu domain at EduCause. For countries other than the US, you can register a .edu domain at country code top-level domain (ccTLD) registrars.
Step 2. Register Domain Name and Get Hosting Plan
A web host is a place where all the contents of your website reside.
Web hosting companies offer you a certain amount of storage and bandwidth for a price. Web hosting service allows your website to be displayed on the Internet. Thus, it is important to use a reliable web hosting service. For starters, I would recommend using a shared hosting plan because it is cheap and easy to use.
For a reliable experience, we recommend using Hostinger or Bluehost for web hosting. These WordPress hostings are relatively cheap, very reliable, and WordPress-ready.
Moving on, let’s look at Hostinger as an example to learn more about how reliable hosting helps make a great educational website.
Advantages of Hostinger for Educational/School WordPress Websites:
- Hostinger offers cost-effective hosting plans suitable for various needs.
- It provides a free domain, aiding in establishing an online presence.
- It offers round-the-clock customer support and ensures prompt issue resolution.
- It also provides WordPress-specific features for enhanced performance.
- Hostinger ensures fast and reliable website access with worldwide data centers.
- It provides Cloudflare protection, a malware scanner, and unlimited SSL certificates.
- It also offers a free automatic website migration tool.
- The 99.9% Uptime guarantees reliable website availability.
- It offers a 30-day money-back guarantee if customers are unsatisfied with the service.
- It provides comprehensive website management solutions, including domain registration and email setup.
How To Get Hostinger’s Web Host and a Free Domain?
Step 1: Go to Hostinger by clicking here.
Step 2: Choose your desired plan. The free domain is available in Premium, Business, and Cloud StartUp plans.
In this step, you can click “Add to Cart” to move further. This step will lead you to the registration page.

Step 3: Choose a billing term suitable for you.
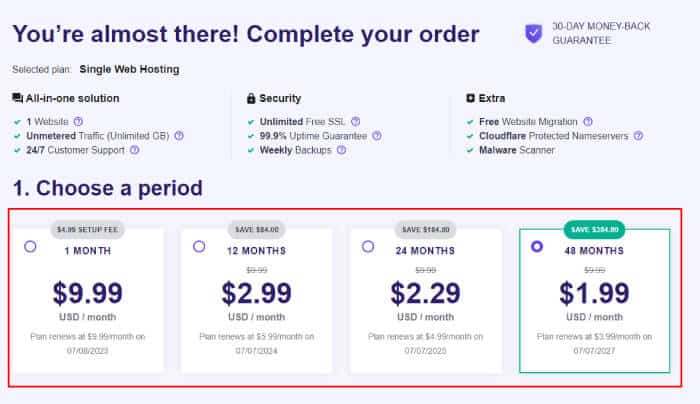
Step 4: Create your Hostinger account with an email address or your Facebook or Google account.
Step 5: After entering your email information, you can now enter your preferred payment method. Hostinger accepts a wide variety of well-known credit cards and payment processors.
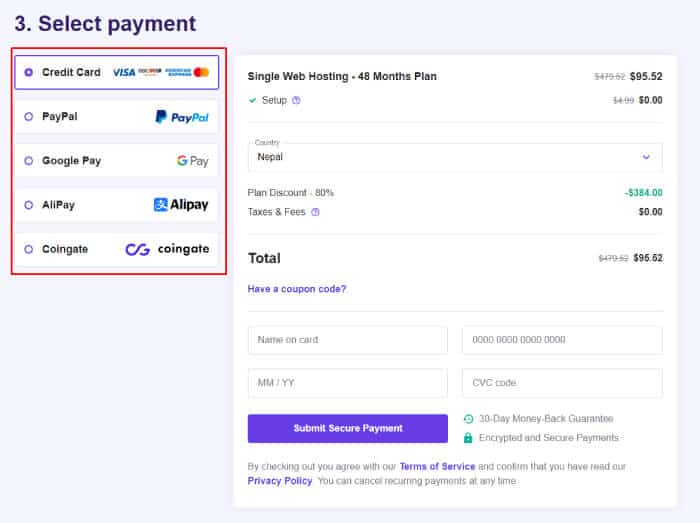
Step 6: Claim your free domain. After you are done with your payment procedure, you will get to choose your free domain name.
The following are the domains with different extensions that Hostinger offers:
- .com
- .online
- .site
- .webspace
- .space
- .tech
- .store
- .blog
- .net
- .org
- .info
- .co
- .biz
- .us
- .club
Step 3. Install WordPress
We will use WordPress to build the educational website.
WordPress is a great platform for creating any educational website and an excellent content management system. You can create a fully functional website without ever understanding a single line of code, and that too for FREE.
And creating an educational website is super easy with WordPress.
Once you register with Hostinger, you can install WordPress with a few clicks.
First, log in to your Hostinger account. Check your email for the login info. You get an email with login instructions after you successfully register at Hostinger.
Then, follow these easy step-by-step instructions by Hostinger. Your WordPress website will be ready in a few steps.
CHEERS!
Now you have an educational website of your own.
Now, let’s proceed to makeover the WordPress website and give it an elegant and professional look.
Before that, we need to access the WordPress admin panel and make some changes in the settings.
Type http://yourblogname.com/wp-admin on your web browser to access the admin panel of your WordPress. Login with your credentials (username or email and password).
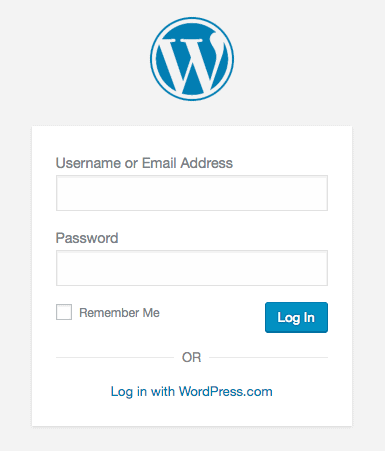
After you login, you will be directed to the WordPress Admin Panel. This is where you will personalize your website and add pages and post.
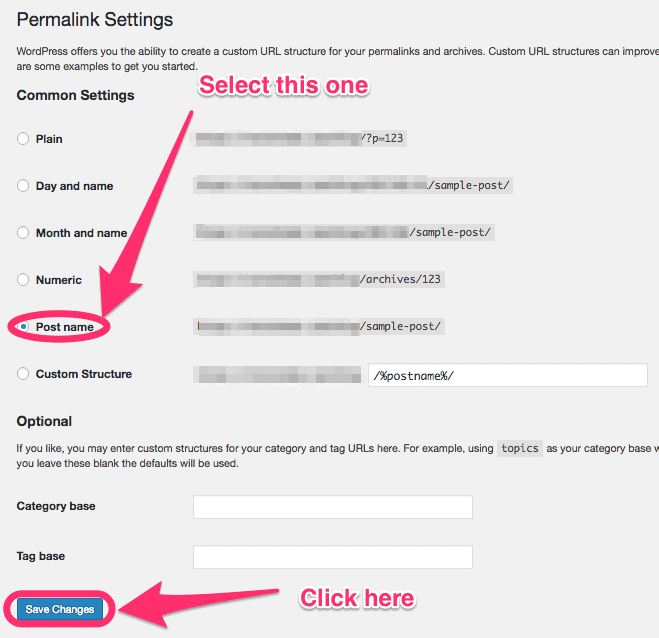
On the Dashboard, go to Settings and click on Permalinks.
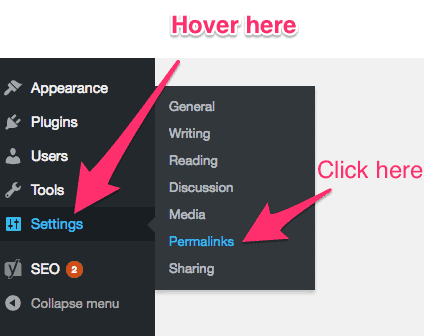
Then in the Custom Settings, select “Post Name” and click Save Changes. This step is necessary to create your URL’s readable.
Step 4. Install a Beautiful WordPress Theme
In WordPress, you can easily change the appearance, layout, and design of your blog with WordPress themes.
You just have to find a good looking theme that suits your purpose and install it on your website. And, in no time, your website will look beautiful.
Before you install any theme, here are a few things to look for while choosing a WordPress theme.
- Design: The layout and features of the theme affect the look and feel of your website. You should select a theme that looks clean, professional and suits your educational website type.
- Designer: Poorly coded themes will result in many technical errors. Also, they lower the performance of your website and limit your website’s ranking on search engines. So, it’s important that you know if the designer of the theme is experienced enough and the theme has good reviews.
- Responsiveness: The theme should be responsive i.e. it should be optimized for every type of electronic devices – Computer, Mobile, Tablet. You don’t want to miss audience on any platforms.
- SEO Ready: If a theme is Search Engine Optimization (SEO) ready, your website will rank higher in Google Search results. Thus, more people will have access to your website, which is good for popularity. To check if a theme is SEO ready, go here and paste the URL of the theme. If a theme has many errors, avoid the theme. A theme with few errors is better for SEO.
- Support from the developer: This applies only to the Premium themes. When you buy a Premium theme, check how responsive the support team is.
I also recommend you to refer to this blogpost on how to choose a WordPress theme to select a theme for your website.
For this guide, I’m going to pick Education Zone WordPress theme because it is free and has all the important elements for a school website. You can find some of our education WordPress themes here.
How to Upload the Theme in Your WordPress Dashboard?
First, login to the WordPress Dashboard https://yourwebsitename.com/wp-admin.
Then, go to Appearance → Themes.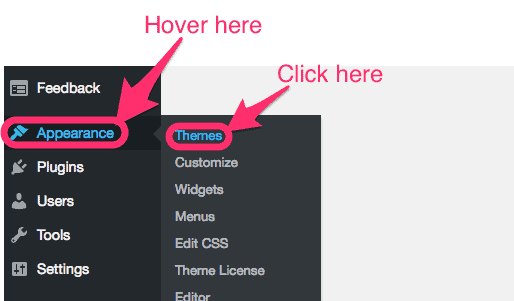
Click on the Add New button at the top.

We can install WordPress themes by two methods – directly from the WordPress Repository (for free themes only) or by Upload Method.
How to Install and Change the Theme from WordPress Repository
After you click on Add New, WordPress Repository shows you the list of featured themes on the dashboard. Search for Education Zone or a theme of your interest in the search bar, and click Install. WordPress will then install the theme on your site.
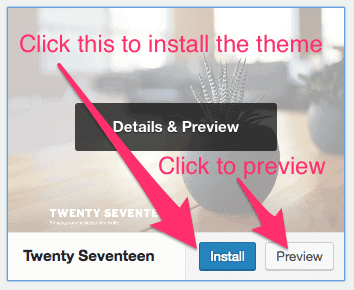
Now, click Activate to make it the default theme of your educational site.

How to Install and Change the Theme by Upload Method?
Download the Education Zone theme or any other education WordPress theme that better suit your requirements before you proceed to this step.
After you click on Add new, click Upload Theme to upload your theme to the site.
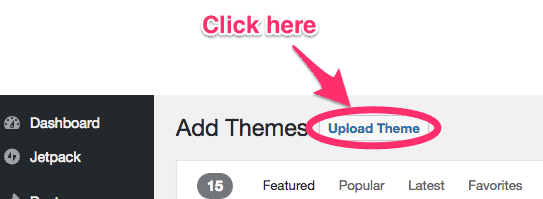
Then, click Browse and select a theme from your computer. The theme should be in “.zip” format.

After the theme is successfully uploaded, click the Install Now button. Your theme will be ready in few seconds.

Finally, click on Activate to activate the theme on your school website.

Congratulations!
You have successfully installed an educational theme on your website.
You can now customize it and use its features to build your own official school website. If you installed the Education Zone theme, you can move ahead with personalizing the theme by following this Education Zone theme documentation.
I have also listed three best themes for an educational website. All the listed themes have free versions too. You can try out the free versions first before you go Premium.
If you find the free versions intriguing and if you really want to build an educational/school website, investing few bucks on a quality Premium theme is truly a good investment. Read here for 7 reasons to choose a Premium theme.
Note: All the themes listed here are made by our team. We have lots of beautiful themes for various purposes. However, the list contains only the themes that are appropriate for an educational website/blog. All our themes are designed and coded by experienced designers. All the themes are responsive and SEO ready. And, you get a first-rate support from our designers.
Recommended Themes for Educational Website:
Education Zone Pro
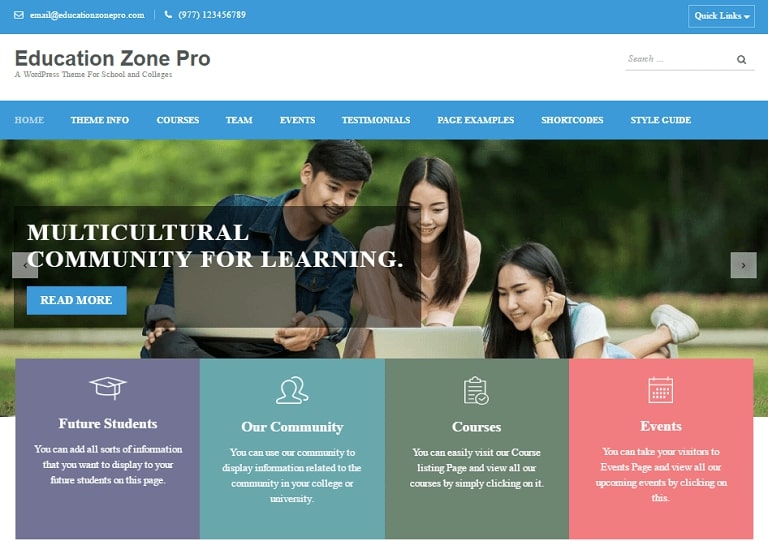
Education Zone Pro is an exquisite theme made for educational institutions and colleges.
This theme allows you to a build an information website of a school which includes courses offered, team information, articles and blog posts by students, school news, upcoming school events, school’s newsletter, etc.
The theme comes with many added customized pages, headers, widgets and other tools that can be easily customized to build an institution website that has a clean, professional design and features to professionally communicate your message to your prospective students.
Here are some of the attractive education templates from Education Zone Pro.
1. University

This template captures the spirit of academics in a sophisticated, user-friendly online environment.
Thanks to its contemporary design, it efficiently draws attention to academic offerings, professors, campus life, and research prospects.
The layout’s user-centred approach makes sure that important information is accessible with ease, boosting user engagement and contentment. Additionally, due to its full responsiveness, it offers an effortless browsing experience on all platforms.
2. Smart Education

Rara Themes created the “Smart Education” starter template to address contemporary educational institutions’ changing requirements.
It provides easy navigation between course offerings, teacher biographies, and resources.
Additionally, Smart Education is dynamic and adaptable, meeting the unique demands of every educational institution while maintaining maximum device performance.
Smart Education is a great theme for institutions looking to enhance their online presence because of its emphasis on effective content delivery and a compelling user experience.
3. Pre School
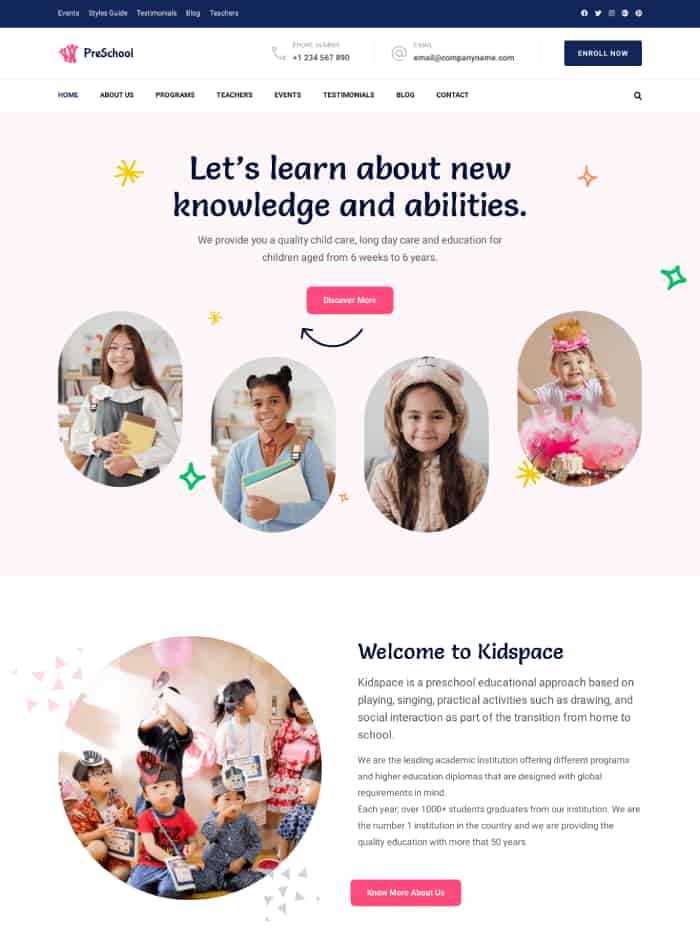
The Pre School starter template by Rara Themes beautifully reflects the vibrant world of early education.
The design’s colourful yet elegant aesthetic satisfies the young audience while preserving professional standards.
The template presents essential information in a user-friendly way, including curriculum details, teacher biographies, and event updates. With “Pre-School,” early learning institutions can design a fun, instructional digital environment that reflects the joy of learning.
4. Kidspace
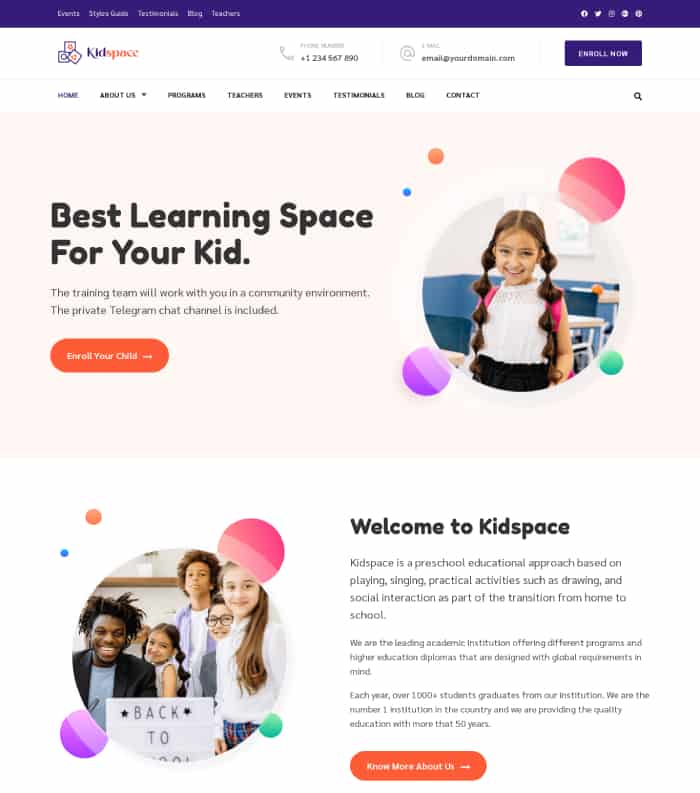
The Kidspace starter template is a comprehensive solution for preschool educational institutions.
This theme allows educational institutions to showcase their achievements, programs, and the benefits of choosing them.
The template also includes sections for parent testimonials, upcoming events, and a gallery, providing a complete package for an engaging and informative website.
5. Education Zone Pro Modern
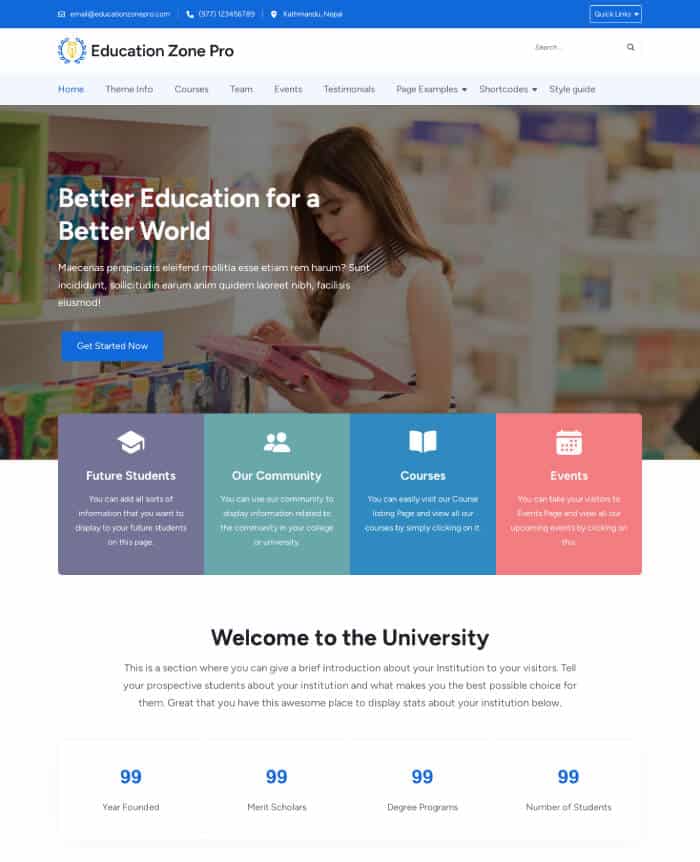
The Education Zone Modern Pro is a versatile theme for educational institutions.
It provides sections for showcasing future students, community, courses, and events. The template also highlights featured courses in various fields like business, design, hospitality, and grammar.
It also features a section for the institution’s team members, adding more credibility to the institution.
6. High School

The High School starter template from Education Zone Pro is designed to showcase the strengths of a high school institution.
The template highlights the school’s unique approach to experiential learning and personalized paths. It features a section for student success stories and faculty members, adding a personal touch to the website.
With sections for upcoming events and latest articles, it ensures that visitors are kept up-to-date.
7. Tutor

The Tutor starter template from Education Zone Pro is designed for online learning platforms. It provides a comprehensive showcase of various courses across multiple disciplines such as business, design, and hospitality.
The template offers a video banner for students to understand the overview of the educational institutions.
The template includes sections for expert instructors, student testimonials, and latest articles, providing a holistic view of the learning platform. This theme also has sections for recommended courses.
Preschool and Kindergarten Pro
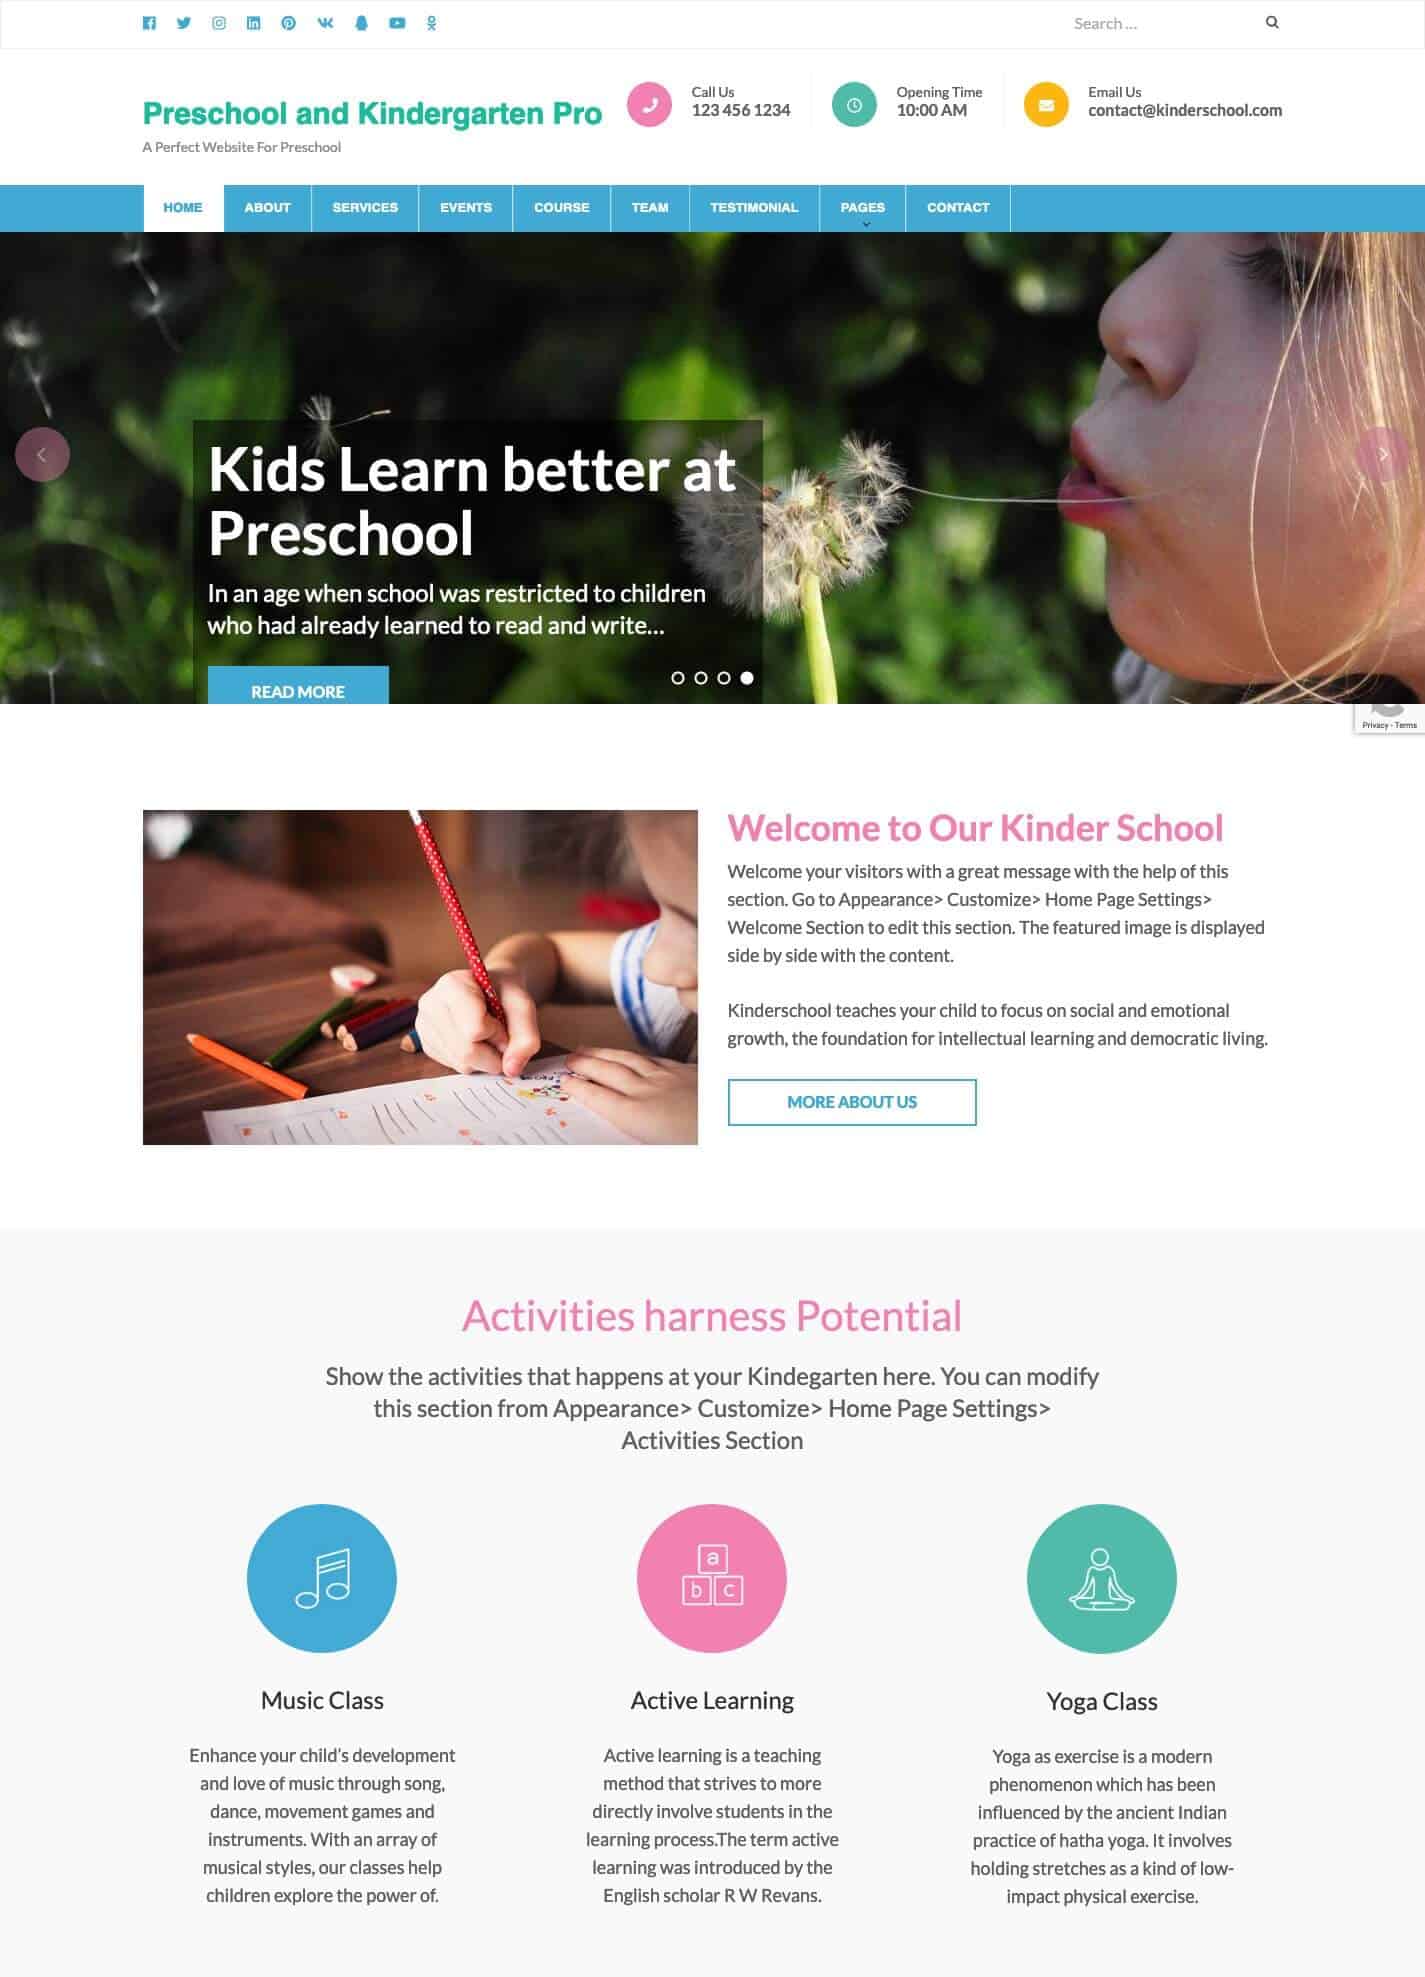
Preschool and Kindergarten Pro is a kid-friendly, easy to use WordPress theme with amazing features and beautiful design.
The easy navigation and simple user interface on this theme attract the users and provide better user experience. This theme allows you to create recreational as well as educational activities for kids, blog posts about the events, manage photo galleries, and better communicate with prospective parents.
The theme comes with 7 predefined pages, 8 predefined header layouts, 16 Custom widgets, Multi-language compatibility and extensive documentation that allow you to personalize your website conveniently. The theme has all the tools, features, plugins and widgets to quickly set up your fully functional educational website for Kindergartens, Preschools, and Educational institutions.
Rara Academic Pro
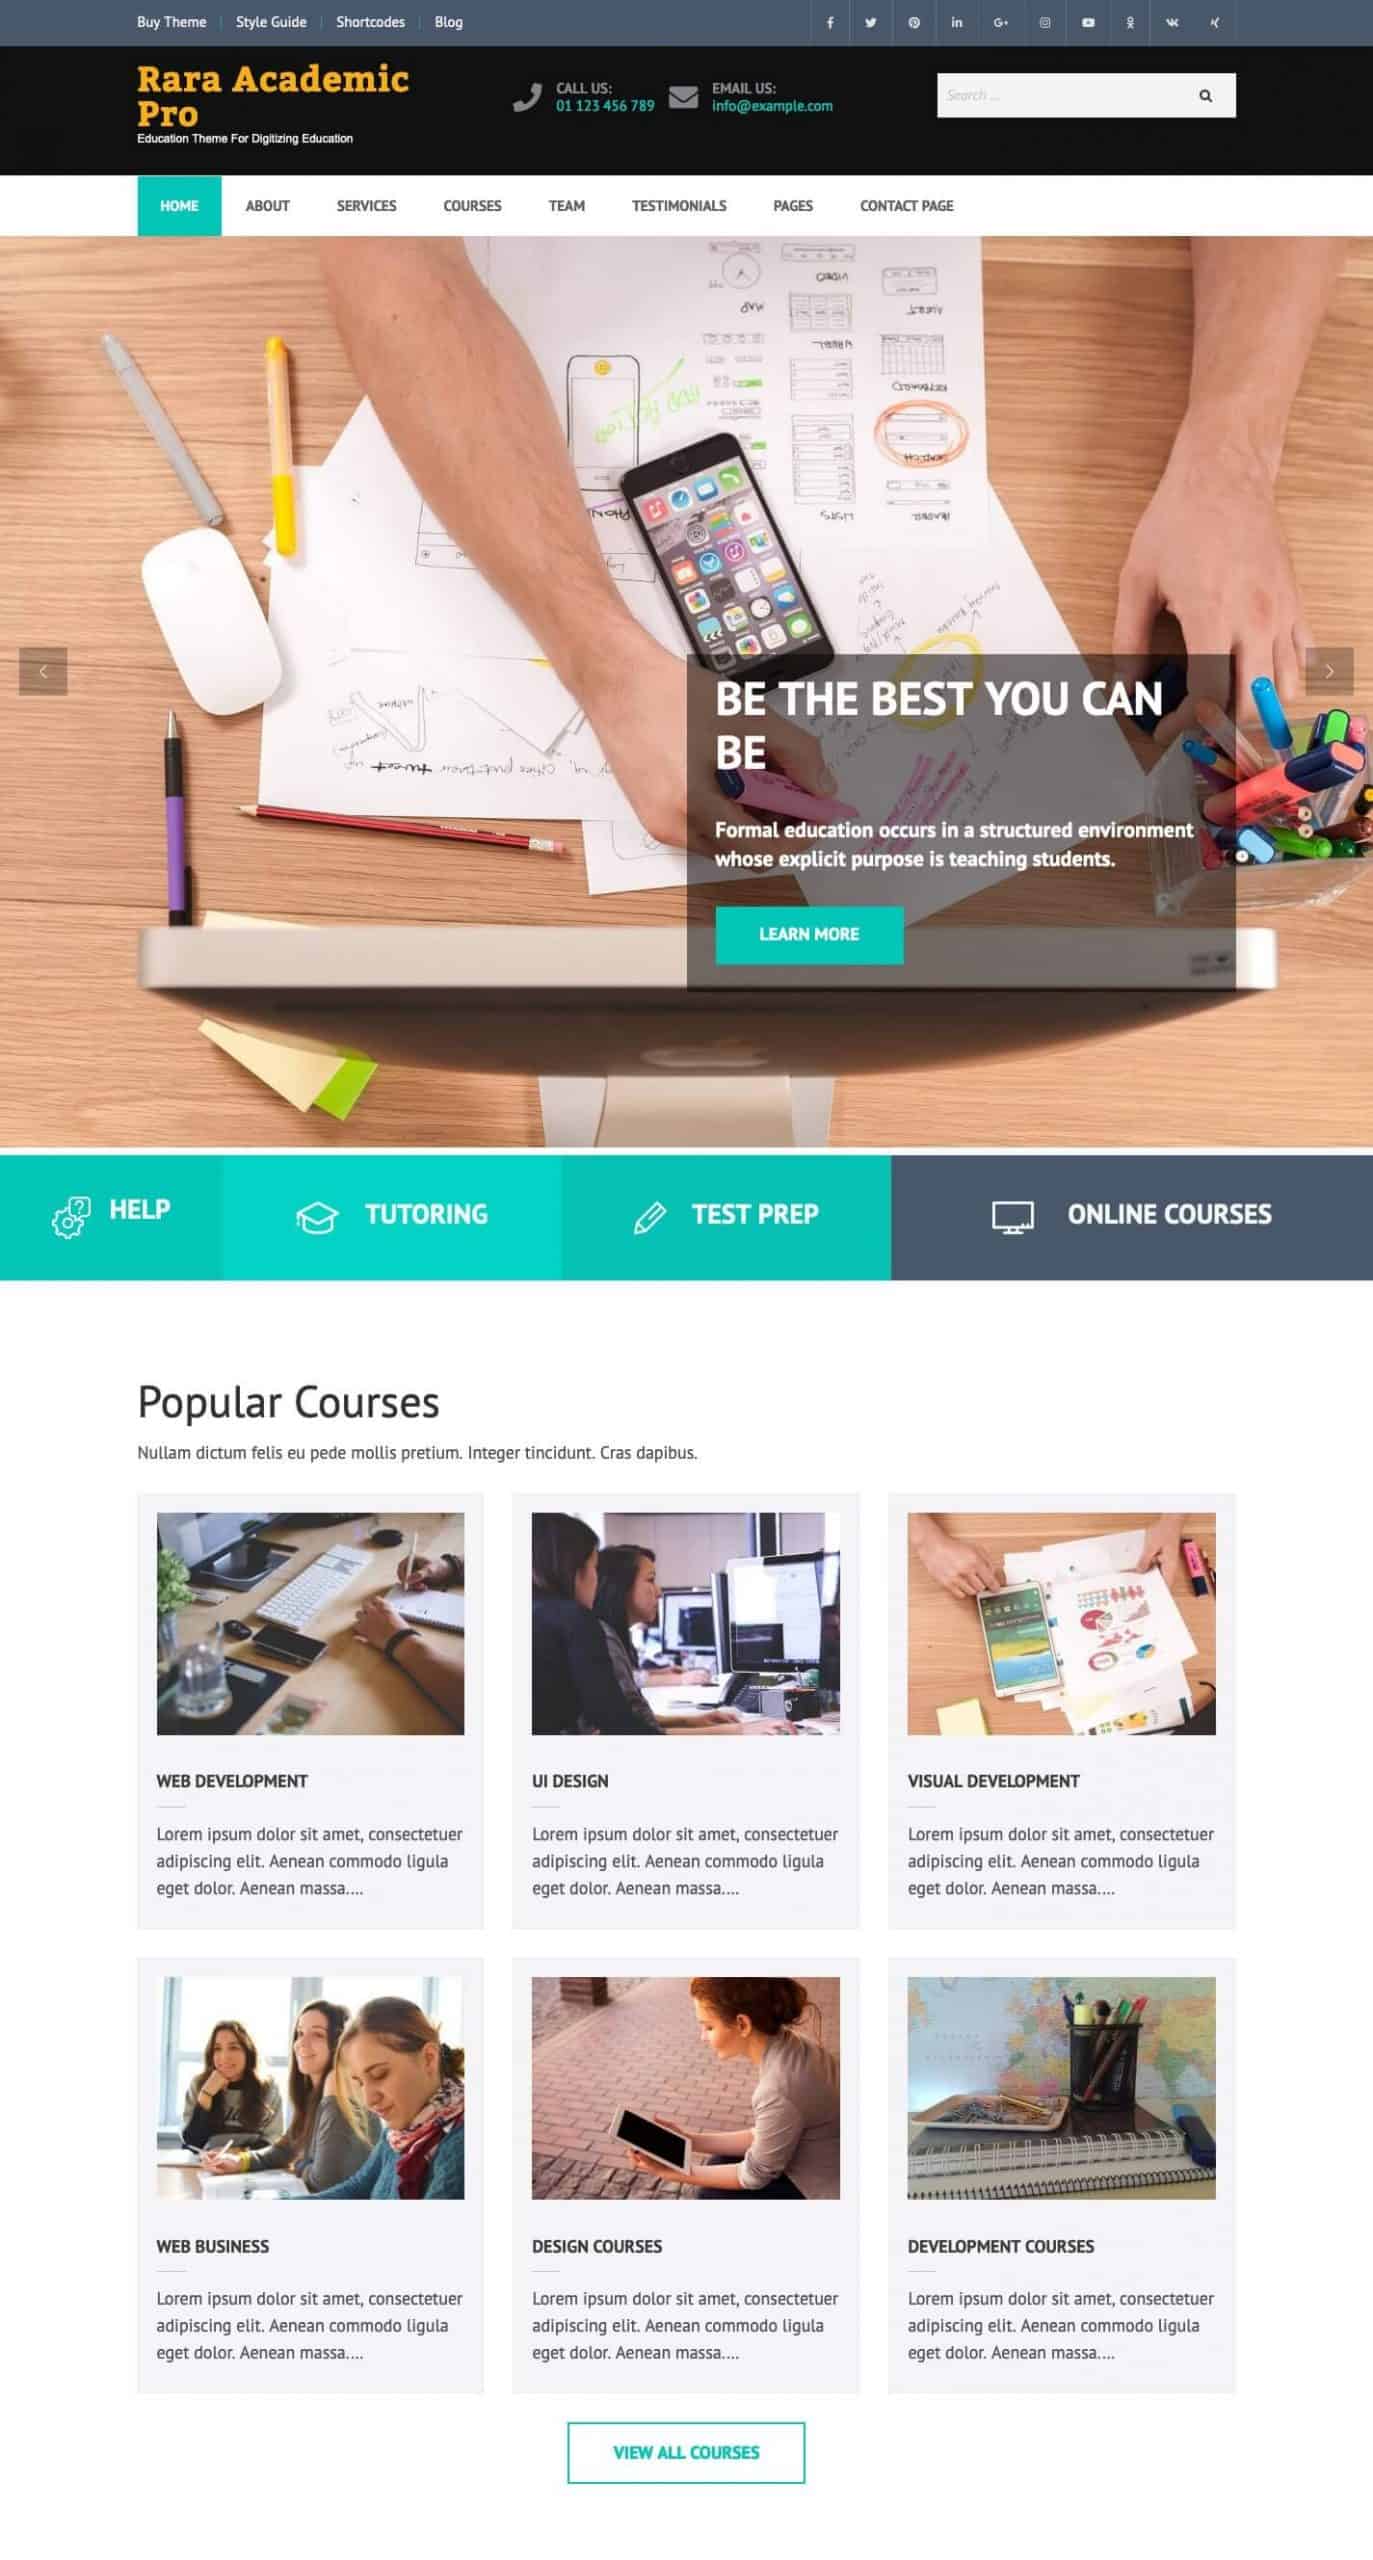
Rara Academic Pro is beautiful theme designed with a clean, professional look for Educational Portal, Training Center, Courses hub, College, Academy, University, School, and Kindergarten.
This theme allows you to create unlimited courses, online classes, or build an open online library while being scalable and accessible.
The theme comes with 9 predefined header layouts, 6 predefined pages, 13 Custom widgets, attractive blog layout, multi-language compatibility and extensive documentation, that allows you to build a seamlessly professional looking website for your institution. The theme features plenty of room for educational information, custom post types, events and custom pages to communicate the message to the visitors.
Eduma

Eduma is another great Education WordPress Theme you can find easily on the ThemeForest marketplace with thousands of users all over the world.
+20 responsive demos from schools and academies to online courses are available to test and import within a click. In particular, Eduma is compatible with the top LMS plugin, LearnPress, which is free to download on WordPress.org. The theme uses an Elementor builder integrated with an amazing mega menu.
Additionally, you can also customize the look according to your own taste. Eduma comes bundled with Slider Revolution to make your education site even more engaging. You can also use the online documentation, get free updates, and contact their excellent support.
Other goodies include WooCommerce compatibility, event manager, multilingual-ready, bbPress, BuddyPress, and many more.
All of these themes are responsive, well coded, speed optimized, and SEO ready. Furthermore, once you buy these themes, you can use it on any number of domains for free for a lifetime. Besides all these features, you will also get great support from experienced developers if you run into any issues.
Step 5. Install WordPress Plugins
School plugins are bits of software that can be uploaded to extend and expand the functionality of your educational WordPress site.
The plugins I am going to list below will help you create and manage the courses, allow students to enroll and provide the means for instructors to evaluate student’s work, receive payments for the classes, and provide a delivery system for the classes.
How to install a WordPress Plugin?
First, login to your WordPress admin panel. http://yourwebsite.com/wp-admin
Then, click on Plugins.
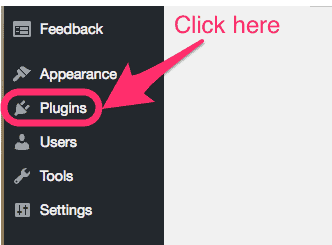
Then, click on Add New.

After that, on the search bar type the name of the plugin you want to install. I searched for teachPress.

Then, click on Install Now button to install the plugin.

The installation will take few seconds. You will see Installing.. written on the button.

Finally, click on the Activate button to activate the plugin on your site.

Once the plugin is activated, you will see the list of your plugins.

Some WordPress Plugins for School Websites
Now, let’s talk about some of the School WordPress Plugins that every educational website should use.
LMS By Masteriyo
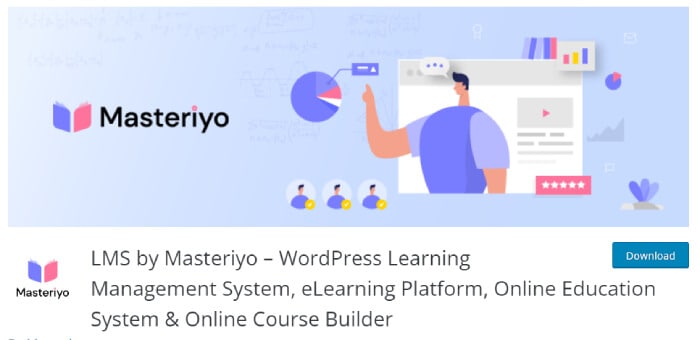
Masteriyo is an innovative WordPress plugin that redefines the e-learning landscape. It opens the door to a world of educational possibilities by providing a platform that is not only user-friendly but also robust and versatile.
This powerful tool is packed with features like course creation, student management, and detailed tracking of student progress, ensuring a seamless online learning experience for teachers and students.
Designed to be highly intuitive, it enables you to quickly build immersive courses featuring quizzes, assignments, and even automated grading.
The LMS also integrates smoothly with other popular tools, allowing you to create an enriched, interactive learning environment. Masteriyo’s LMS empowers you to build, manage, and deliver online education that meets the highest digital learning standards.
LearnPress
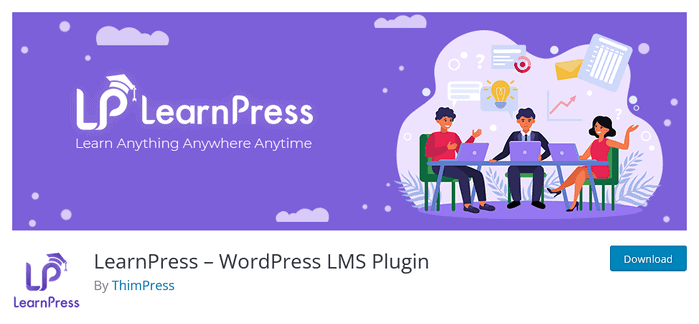
LearnPress is the best free LMS plugin with more than 100,000 active installs on WordPress.org. Even though it’s free, it’s still very effective. LearnPress helps you to create multi-level online courses and sell them on your site easily without touching any code. LearnPress is absolutely suitable for any level.
What’s more? LearnPress supports different payment gateways like PayPal, Braintree, Stripe, etc. Moreover, you can create multiple instructors for managing one course as well. WooCommerce, content dripping, paid memberships, WooCommerce, certificates, commission, and grade book add-on is included. However, you would need to pay to get these extra features.
Tutor LMS

Tutor LMS is a freemium LMS plugin having a unique course builder that allows you to create courses right from the frontend. The entire course can be built from the same course builder page, including all lessons, quizzes, and assignments. It also supports multi-instructors and has a robust quiz builder with 10 very interesting question patterns.
Moreover, you get access to its customizable certificates, course preview options, and robust eCommerce systems to create any monetization model.
SureMembers

SureMembers is hands down the best plugin for creating an educational website. With its user-friendly interface and robust features, it’s a game-changer for educators and institutions alike.
One of the standout features of SureMembers is its intuitive course creation tools. Whether you’re offering online classes, tutorials, or training programs, you can effortlessly organize and structure your content. The customization options are extensive, allowing you to tailor the look and feel of your site to match your brand.
What truly sets SureMembers apart is its seamless integration of membership and e-commerce functionality. You can easily set up paid memberships, sell courses, and manage subscriptions all within the same platform. This makes it an ideal choice for entrepreneurs looking to monetize their expertise.
SureMembers also boasts excellent support and a community of users, ensuring you never feel stranded while building your educational website. If you’re serious about creating a successful online learning platform, SureMembers is the plugin that can make it happen.
LearnDash

LearnDash supports multi-tier courses which allow you to easily create courses with lessons, topics, quizzes, and categories. You can give user assignments and then approve or comment on them.
It also comes with quiz and test management tools with multiple choice questions. You can easily set prerequisites for students such as finishing a lesson first before going to the next lesson.
LifterLMS

LifterLMS is a learning management system which supports multi-tier courses with training modules, lessons, categories, etc. This plugin works like a membership website where the students register or purchase a course. This upgrades their membership level, and then they can access the relevant content.
It also comes with built-in shopping cart functionality, which you can use to sell your courses.
teachPress

teachPress is a course management and BibTeX compatible publication management system. It is optimized for the needs of professors and researchers. It adds two tabs to your dashboard: course and publications.
You can create courses and student accounts from the course tab. Further, you can describe the publications that will be used for the course from the publication tab. It can be a book, booklet, article, chapter, presentation, online, etc.
CoursePress

CoursePress allows users to easily create and share courses with quizzes, videos, and audios. You can make courses that are primarily videos, allow users to upload and download content, and create a discussion board where students and facilitators can exchange ideas. CoursePress lets you make free as well as paid courses.
Sensei
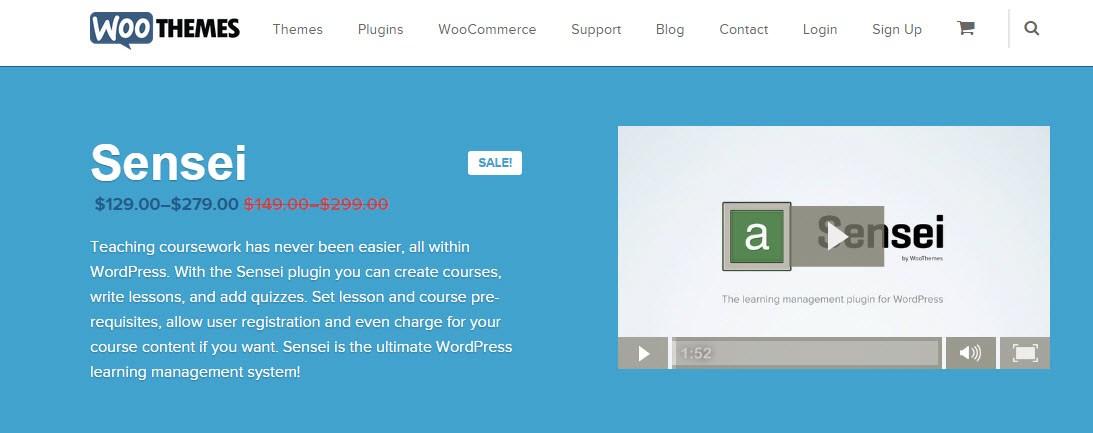
Sensei is a teaching coursework WordPress plugin which allows users to create courses, write lessons, and add quizzes for the courses. You can set course prerequisites, register users, and charge for your courses if you want. Sensei also offers you to get an analysis of who is taking your course and how are they progressing.
WPCourseware

WPCourseware is an e-learning tool, which has a simple drag and drop functionality that makes it easy to create courses. This plugin includes features like student progress visualizer, course outlines, and customizable email notifications. It allows you to create a wide variety of quiz types, including multiple choice, true and false, open ended, or you can make students upload a file as their answer.
Choose the plugin that meets your requirements. Besides, educational plugins, you should also add plugins for SEO, Security, Performance, and Backup.
But, DO NOT overload your educational website with Plugins.
Step 6. Add Content to Your School Website
Wow! Celebrations are at hands. Your website is now almost ready.
Now, add the relevant content to your website and you will have your own full-fledged educational/school website.
To add posts, go to Posts> Add New on your admin Dashboard.
To add pages on your website, go to Pages> Add New on your admin Dashboard.
Content You should add on a School Website
- Information about the school and its contacts. You should give brief information about the school, its establishment, certification, their aim and motto, courses they offer, etc. You should also provide the contact data of your school, its address, telephone numbers, Google Maps location etc.
- Classes and Courses. A section providing information about the classes and courses offered by the school. It is important to mention both the summary and details of the courses, number of students’ enrolling in a particular class and a particular course.
- Gallery. It pictorially showcases various important school activities, events, achievements, etc.
- News and Events. They include photo reports of the recent or upcoming activities, seminars, workshops, articles, announcements etc. They also include the awards, education, and career enhancement training.
- Student’s info page. This is a section where you can add the personal information of the students, their achievements and progress, and their exam details.
- Faculty members. This section includes the personal information of all the teachers, the course they teach and their years of experience.
- Parent’s testimonial. In this section, you can add parents’ views towards your school and its activities.
- Why Choose Us Section. You can display the achievements of your school, post photos of your school, teachers, and outstanding graduates and tell the prospective parents and students why they should choose your school.
- Students Success Stories. This is where you can display your students’ achievements, skills and success story.
- Blog/Newsletter where the students’ articles, creativity, and writings are published either daily or monthly or annually.
Conclusion
Phew! If you really came all the way till here along with me, I assume you got your website ready.
You now have a fully functioning educational/school website with all the necessary tools.
Feel free to customize your site the way you want. Play around with the themes, plugins and design your very own educational website.
Here are 11 things you should do after installing WordPress for the first time.
Let us know about your favorite themes and plugins in the comments below!





thanks
Just wanted to know how much will it cost to create an online education portal. What are the criteria?