
Learning to customize your website’s typography is a pretty basic aspect of creating and running a website. It can change your website’s whole feel and make a big difference in how visitors interact with your customers.
So, it is necessary to know how to add custom fonts to WordPress. Choosing the right font creates a distinct look for your website, allows you to build your visual brand, and boosts readability and visitor engagement.
There are thousands of fonts available online that you can use, many of them free of cost. This article will talk about adding fonts from two of the most popular web fonts databases to your website — Google Fonts and Adobe Fonts, also known as Typekit Fonts. These font libraries include thousands of web fonts that you can download.
There are countless other font libraries on the internet alongside these, and we will talk about those too.
Here are the ways you can add these custom fonts to your website:
How to Add Custom Fonts to WordPress
1. Add Google Fonts Using Plugin
If you plan to use Google Fonts to stylize your WordPress website content, then there is a handy tool that directly connects your WordPress Customizer with the Google Fonts database. Easy Google Fonts is that’s free and allows you to use Google Fonts without having to work with any code.
- For this method, install the Easy Google Fonts plugin first. Once the plugin is set up, you will find a new option called ‘Typography’ in your WordPress Customizer (Appearance > Customize).
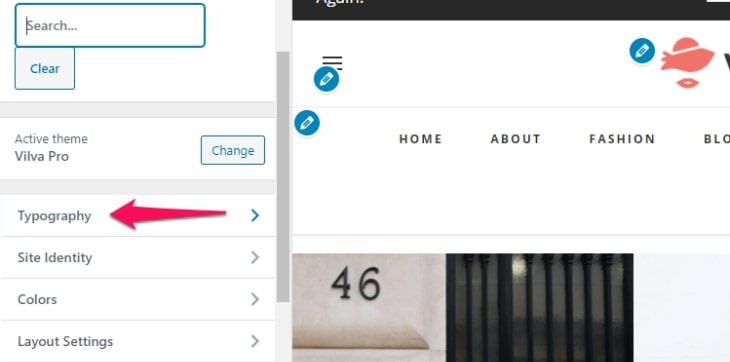
2. Once you go to the Typography option, you will find different default content sections or font controls that you can customize. You can find the font settings for that particular group by clicking on ‘Edit Font.’

The font settings are quite extensive and allow you to customize virtually every aspect of your text to create the desired font style, like font size and more. You can change the font for that particular text category from the Font Family option under the Styles tab.
Under the Appearance tab, you can find other common options, like Font Color, Font Size, and Line Height.
There are some in-depth visual controls under the Positioning tab, like Margin, Padding, and Border.
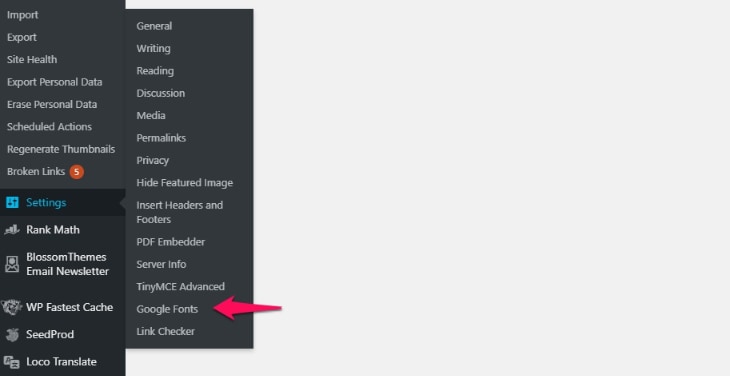
3. Now, your website might also require special attention to certain text categories that may not be addressed by the default font controls provided by this plugin. Maybe you just want the same typography settings for all your headings and want a single category to control all of them. You can create custom font controls by going to Settings > Google Fonts.
4. Go to the Manage Font Controls tab, and click on ‘Create a Font Control.’
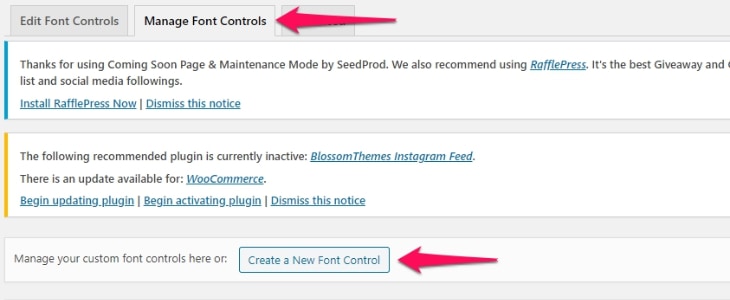
5. You will be asked to provide CSS Selectors to define this particular category. Then, click on ‘Safe Font Control’ to create the new category/font control.
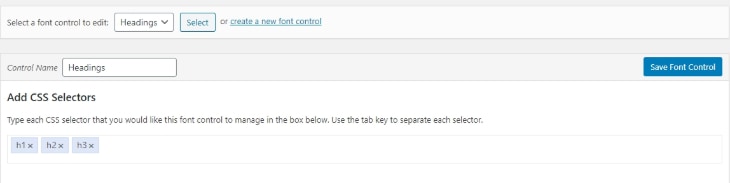
6. The custom font controls can be found at a different location than the default ones. Go back to the WordPress Customizer and click on the Typography option. You will find that there are two categories — Default Typography and Theme Typography. The custom font controls will be found under the Theme Typography option.

2. Add Google Fonts Using Code
- If you want to add your Google Fonts to WordPress without a plugin, you can add code to your theme files. You might want to create a child theme for this so that you can revert the changes if you do not like them.
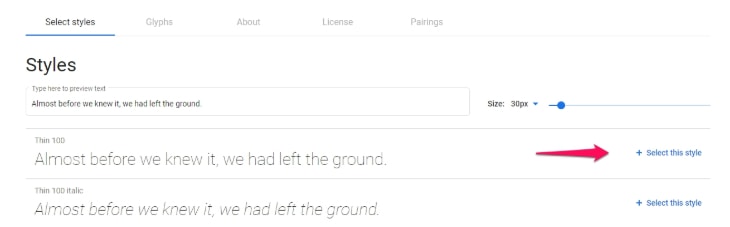
2. Go to the Google Fonts website and find the font that you like. You will find the different styles of each font in the font’s page. Click on the ‘Select this style’ button for the desired style. The font you selected will be saved for use in a special section. At the top right of the page, there is a button to view your selected fonts. It opens up a sidebar with two tabs. Click on the ‘Embed’ tab.
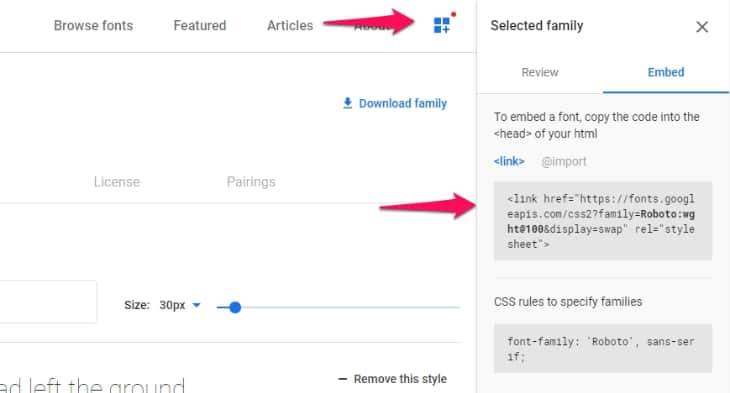
3. Copy this embed link and paste it in your header.php file, right before the <body> tag.
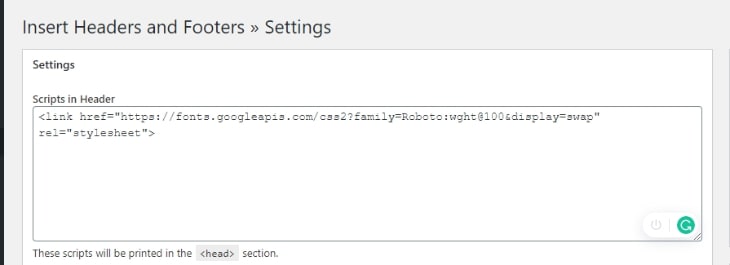
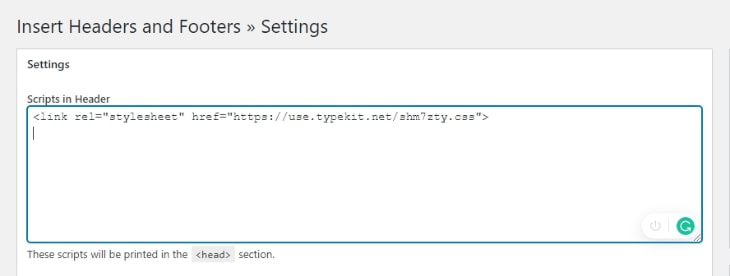
4. If you don’t want to deal with the hassles of working with theme files, then there is a handy plugin called Insert Headers and Footers that easily adds code to your theme files. You can use this plugin through its own section in the settings bar titled ‘Insert Headers and Footers.’ Simply paste the code in the ‘Scripts in Header’ box.
3. Add Adobe TypeKit Fonts to WordPress
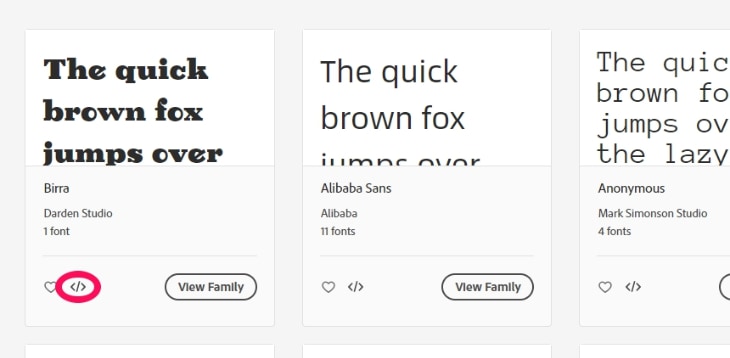
Adobe has another impressive library of custom fonts with a free version and a paid one. Before you start using their fonts, you need an account on the Adobe Fonts website. You can start browsing the available fonts from the Browse Fonts page.
- Once you log in to the website, you can use the fonts you like by clicking on the </> button.
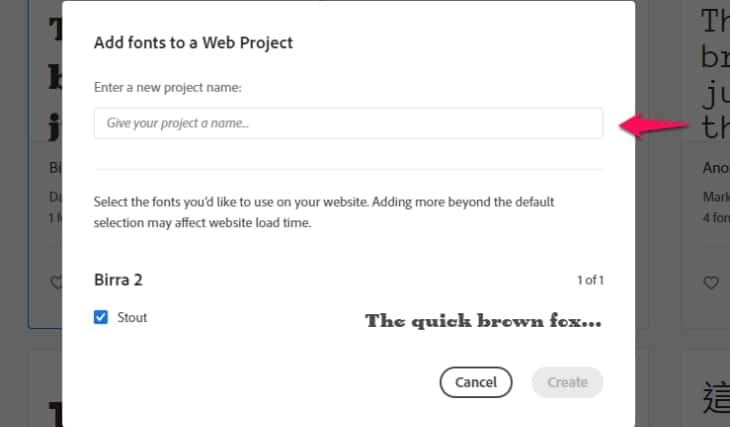
2. To get the embed link, you need to create a web project on Adobe Fonts and add the chosen font to the project.
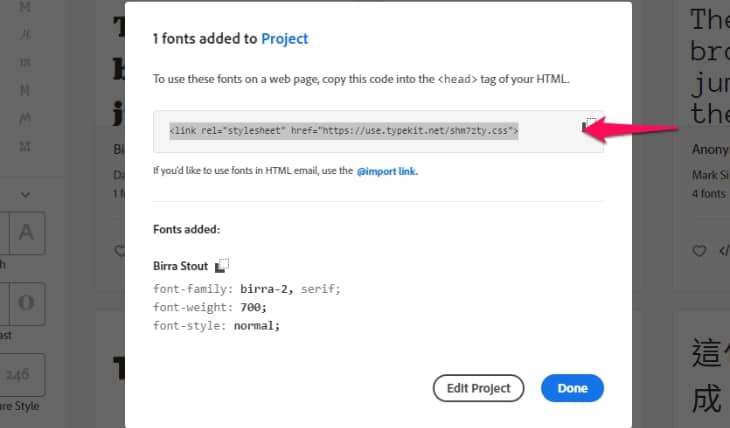
3. Like the process with Google Fonts, you have to paste this embed link to your theme’s header.php file before the <body> tag.
4. You can avoid working directly with theme files by using Insert Headers and Footers plugin. Simply go to the Insert Headers and Footers option in the Settings bar and paste the embed code to the ‘Scripts in Header’ box. This will import the TypeKit fonts you have chosen.
Some Other Custom Fonts Libraries
While Google Fonts and Adobe Fonts are some of the most popular databases for web fonts out there. But, there are many other font libraries that you can explore for downloading the right fonts for your WordPress website. Here are some that you can explore:
How to Add Other Custom Fonts Using Plugin
There is a handy plugin called Use Any Font that allows you to skip the hassles of adding custom fonts manually. It provides you with a simple interface through which you can add new fonts right from your dashboard and assign your custom fonts to desired elements.
How to Add Other Custom Fonts Manually
If you want to add your desired fonts manually, then you will need to upload your font file to your WordPress directory. Use a child theme for this in order to build a layer of security in case you don’t like the new look or some unwanted changes create bugs in your website. The child theme will allow you to revert the changes easily.
Download your desired font from any font library like TemplateMonster. Then, go to wp-content/themes/your-theme/fonts and upload it to the Fonts folder using an FTP client. If there is no Fonts folder, then create one.
Once the font file is uploaded, you will need to import the font using your stylesheet. Add the following code to your style.css file:
@font-face {
font-family: Custom Font;
src: url(http://yourwebsite.com/wp-content/themes/twentynineteen/fonts/AguafinaScript-Regular.ttf);
font-weight: normal;
}
You need to replace the font-family with the name of the font you wish to import and URL with the URL of your website.
Conclusion
By following the above steps, you can easily add custom fonts to your WordPress website with minimum hassle. There are thousands of web fonts that you can use just from Google Fonts and Adobe Fonts databases. With the right choice of custom fonts, your website can gain a different charm, engage visitors better, and create a better aesthetic relevant to your topic.