
Adding drop-down menus in WordPress is a neat way of displaying the list of items on your site. They make your site look organized, give a techy touch to the overall appearance, and make your website highly navigable for users.
The best part – it only takes a few minutes to learn how to add drop-down menus in WordPress.
Isn’t it exciting?
In this short beginner’s guide, we will explain what drop-down menus are, how they work, and how you can create a drop-down for your website. To finish it up, you will also learn how to edit drop-down menus to fit your needs.
So, without further ado, let’s get learning.
What is a Drop-down Menu in WordPress ?
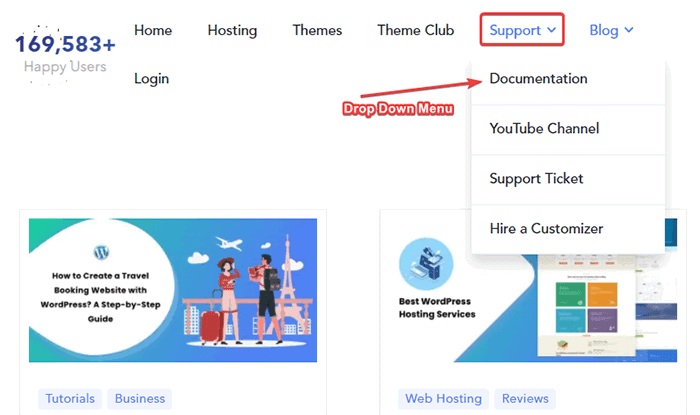
A drop-down menu is basically a part of the menu management system that adds links to the navigation menus. If you are unaware of the navigation menus, they are the links to your website’s main pages. They are usually located at the top of the page, as in the example below:

Since adding multiple links on the navigation menus may seem messy and congested, drop-down menus help arrange things neatly. You can add multiple links to the navigation menu and show your visitors what you are offering using the drop-down menus. Visitors will see the menu link when they hover over the primary menu, as in the following example:
So as you can see, adding drop-down menus lets you save the limited-space issue and give an organized look to your WordPress website.
Why Should You Use Drop-down Menus in WordPress?
If you have a brand new WordPress site and are just getting started with a new blog, you may not have many web pages. But as your site grows, you start adding multiple content and products. Then, you need to add more menus to your website for a better browsing experience.
However, too many menus lined up seem messy and somewhat unprofessional. Also, you cannot miss out on including them as well. This is where you need the drop-down menus.
Drop-down menus will help you add the items without cluttering the navigation menus. They let you efficiently utilize the limited space.
Here are the main reasons to use drop-down menus in WordPress:
- They let you organize the items neatly on the navigation menu.
- You can efficiently utilize the space.
- Drop-down menus make your site look more detailed and professional.
- You can arrange the menus based on the hierarchy of topics.
- It makes your website highly navigable and enhances the browsing experience.
How to Add Drop-Down Menus in WordPress?
Creating and adding drop-down menus is easy. With a few clicks here and there in WordPress, you can do it in just a few minutes. Here are the steps:
Step 1: Creating a WordPress Menu
First, you need to create the menu to add it to your navigation menus. Here is how to do it:
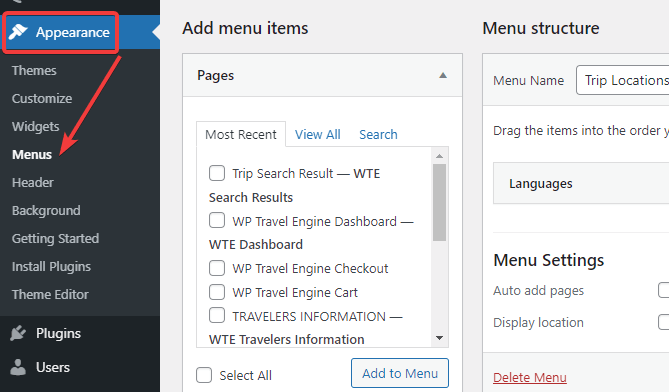
- Log in to your WordPress dashboard.
- Go to the “Appearance” and click on the “Menus” option.
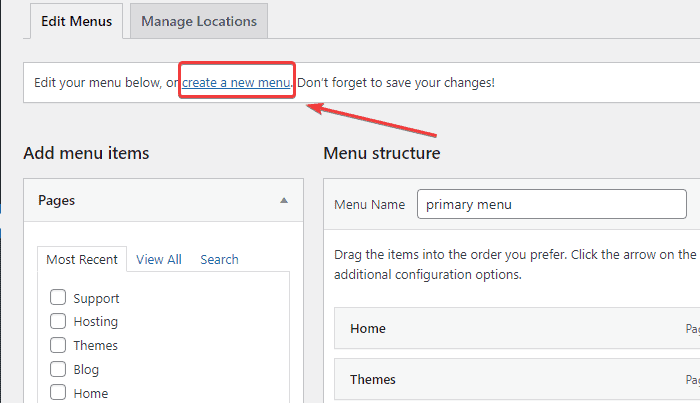
- You will see a “Create a New Menu” link at the top. Click on it.
- Enter the menu name in the given field and click on the “Create Menu” button below.
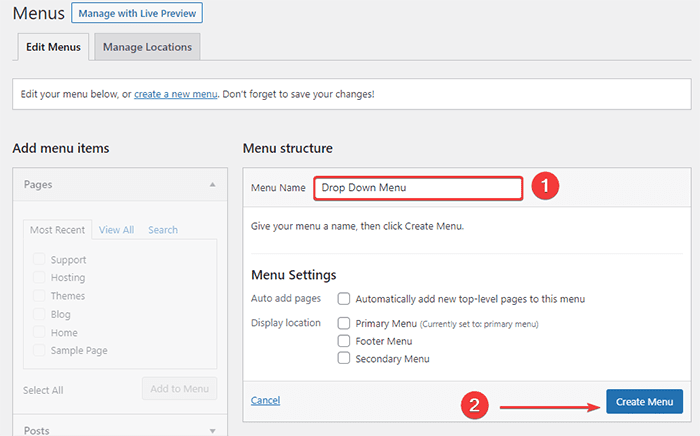
After doing this, WordPress creates a new menu for you. However, it is an empty menu. You still need to add items to your menu. For that, let’s move on to the second step.
Step 2: Adding Items to the Menu You Created
After creating a new menu, you should now add items to it. Menu items are simply the links to various pages or sections on your website. Such links make it easier for visitors to navigate around your site. Here is how you add items to the menu:
- To the left side, you will see a section named “Add Menu Items.” In that section, you will see a list of pages that you can add to the menu.
- Select the pages you want to add to the menu you created.
- After that, click on the “Add to Menu” button below.
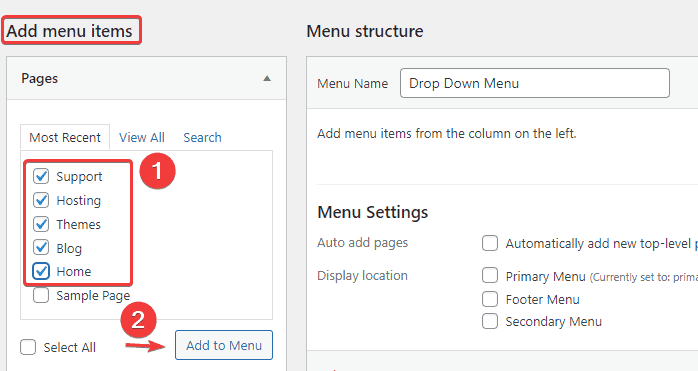
- You will see the pages you selected appear in the “Menu Structure” section.
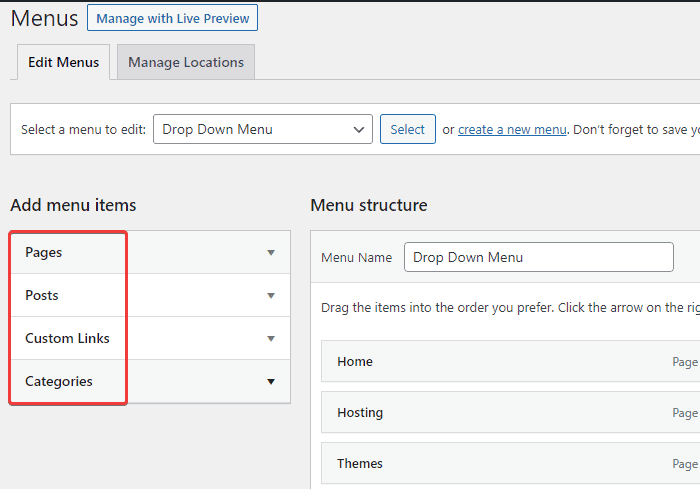
- You can also add posts, landing pages, custom links, and other options to your menu. Instead of the “Pages,” expand the respective section from the “Add Menu Items” section. Then, add it to your menu as you did earlier.
- Click on the “Save Menu” button at the bottom once you are done.
Step 3: Creating Drop-down Menus by Arranging Sub-Items
After adding the pages/posts/custom links to the “Menu Structure,” you need to make it a drop-down. Otherwise, all those items will appear as regular items in the navigation menu. You can create a drop-down menu by using the parent-child structure.
The parent item is the main heading item that will host the sub-items. Likewise, the child items are those links that appear once the user hovers over the parent item. Here is how you do it:
- Click on the item that you want to make the child item.
- Now drag it under the item that you want to make the parent. However, make sure to drop the child item slightly towards the right.
- WordPress assigns the “sub-item” tag to the child item you just created. You can add as many sub-items as you want on the respective parent item. After you are done, click on the “Save Menu” button below.
Step 4: Publishing Your New Drop-Down Menu
Even after creating the drop-down menu in “Menu Structure,” it will still not appear on your website. It is because you have only created the menu and have not yet published it. Thus, you need to publish it.
Here is how you do it:
- After adding all the items in the menu, scroll down. You can find Menu Settings at the bottom.
- You will see a “Display Location” then click on the “Primary Menu.”
- Click on the “Save Changes” button below.
- The drop-down menu now appears on your site.

How to Edit Drop-Down Menu in WordPress
You have learned how to add drop-down menus in WordPress. With time, you may need to make changes to it. Here is how you can edit the menu you created:
1. Removing a Sub-Item for the Drop-Down Menu
To remove an item from the drop-down menu, follow these steps:
- Go to Appearance > Menus on your WordPress
- Make sure that you are on the “Edit Menus” tab.
- In the “Menu structure,” click on the drop-down arrow by the side of the item you want to remove.
- Click on the “Remove” link.
- Save the changes.
2. Reordering the Items
If you need to rearrange the order of the menu items, follow these steps:
- First, drag the item to position it where you want from the menu editor.
- Simply drop the item. Save the changes once you’re satisfied.
3. Removing the Drop-Down Menu
In case you want to remove the whole menu:
- Select the menu that you want to delete from WordPress.
- You will see a “Delete Menu” option at the bottom. Click on it.
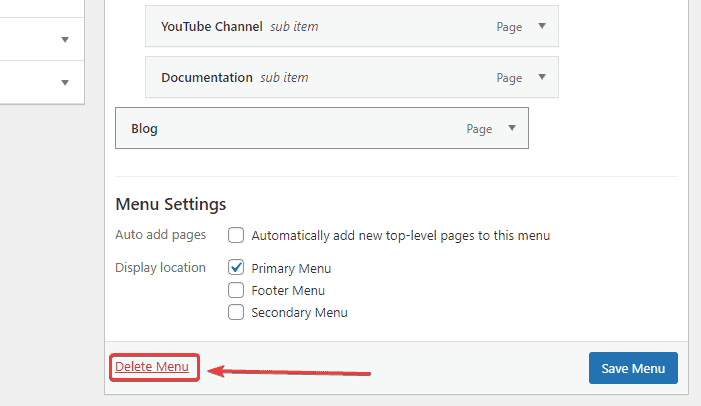
Simple as that!
Some Useful Tips to Create Interactive Drop Down Menu
The Navigation Menus are user-friendly features to have on your site. Users can easily find what they are looking for without wasting any time. So, using navigation menus correctly on your site will help readers find their way around your site.
Here are a few tips on creating interactive and structured Drop Down Menus for your website:
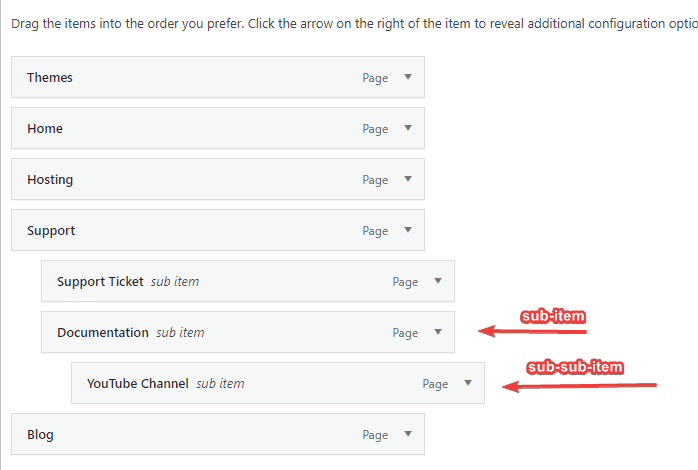
1. Creating Multi-Level Drop Down Menus
You can also add an item under another sub-item to create multi-level drop-down menus. Such menus are commonly found on e-commerce websites or websites with many pages.
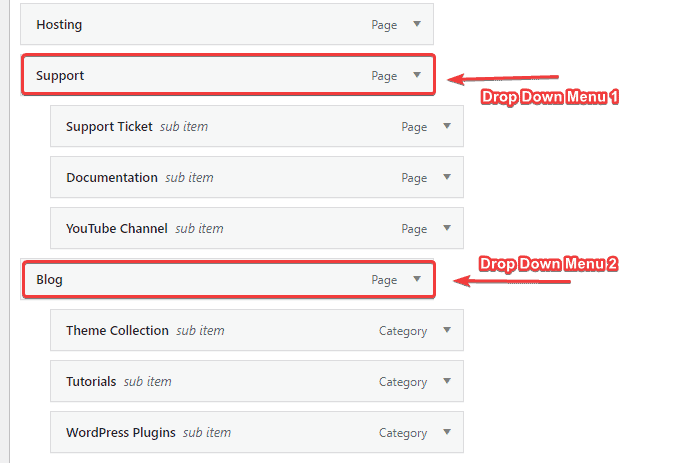
2. Creating Multiple Drop-down Menus
You can create multiple drop-down menus in your main menu bar to link various pages of your site.
3. Creating Menus with Live Preview
Many WordPress themes offer a customizer that gives a live preview while customizing the theme. Creating your site menus with a live preview will give you a vivid idea of how it will look in the front-end.
- Go to the Appearance > Customize option on your WordPress dashboard to access the customizer.
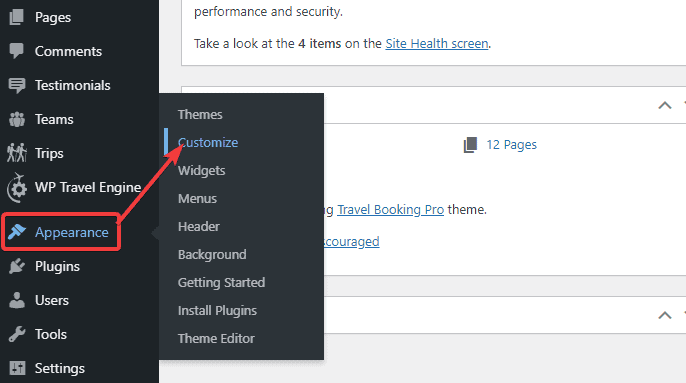
- You will see the Menus option on the customizer. The location of this option may vary according to the theme you use.

- Here you will find the option to create a new menu or drag the menus to make it primary, secondary, or tertiary. Adding, removing, and ordering menu items is the same as explained in the above steps.
4. Creating a Large Drop-Down Mega Menu
The general drop-down menus only show a limited sub-menus. However, you can also show the full structure of your site when users hover over the main menu. Here are the steps:
- First, you need to download and install the one of the Mega Menu plugin from wordpress.org. Then, activate the plugin.
- Go to the setting option of the plugin and make necessary changes.
Wrapping Up
You see, it only takes a few clicks and some minutes to add a drop-down menu in WordPress. However, the number and location of the menus you can add may differ from theme to theme. So, make sure to choose the right one for your site rather than just opting for a popular theme.
Nevertheless, adding drop-down menus is a great way to improve the browsing experience for your users. They make your site look well-organized as well as ease the navigation around your website.
We hope you found this beginner’s guide helpful. Make sure to write your feedback in the comment section below.
You may also check how to add widgets to WordPress.