Do you want to add new features to your WordPress website but don’t have the coding skills?
Don’t worry. You are only a widget away from meeting your needs.
There are unlimited widgets available in the WordPress community. The right widget can help you add the features you want for your site with a few clicks. However, to enjoy such privilege, you should first know how to add widgets to WordPress. That is what you will learn in this guide.
To begin with, we will first answer what widgets are and when to use widgets in WordPress.
We also have some important tips at the end of this guide. So, make sure to stick with us till the end.
What are WordPress Widgets?
Widgets are stand-alone content snippets that live outside the page or post content’s flow. Widgets work as extensions that you can add to your website’s sidebar or footer area. They contain information, media, or navigation that separate from the discrete post or page.
Most of the WordPress themes specify widget areas in the custom sidebar and footer area. However, you can also set custom widget areas in specific locations, such as between content, header, or home page.
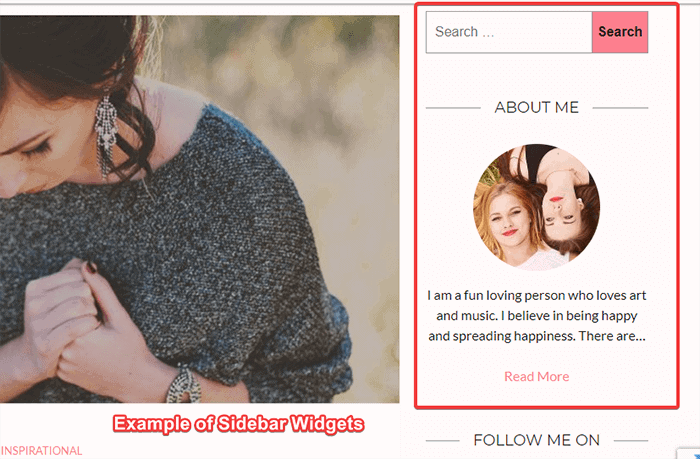
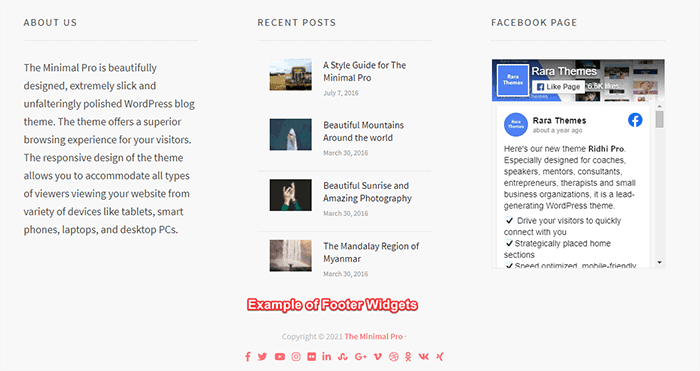
Here is our test site showing the list of widgets on the sidebar and footer:
In essence, widgets are website-ready applications that help to add greater functionalities to your website.
WordPress offers a bunch of preloaded widgets so that you can use them on the go. In the meantime, you can also add widgets by installing plugins.
With such extensive options, you can cover every topic such as search, maps, media, social media, and more.
When to Use Widgets in WordPress?
Whenever you want to add extra features to one or more pages on your website, you can use widgets. Widgets are particularly useful if you want to show content on every page, such as popular posts, recent posts, and even a CTA button.
Sidebar widgets are more popular and prominent than the footer widgets as not all the users scroll your site till the last. Thus, sidebar widgets are suitable for skimmers as well. You can add a CTA or the latest post widget on your sidebar. Likewise, you can add a social media feed on the footer.
If your theme allows, you can also add videos and other relevant media to improve the browsing experience.
Examples of Widgets in WordPress
Here are some of the frequently seen WordPress widgets. These examples will help you better understand widgets’ possibilities in WordPress.
1. Recent Posts Widget
The Recent Posts is one of the most commonly used widgets in websites, especially blogs. This widget lets you showcase a list of your most recent blog posts. You can place the widget on your sidebar or footer.
Similarly, you have the option to set the number of posts to show on the widget and control different widget settings like setting a proper widget title.
2. Recent Comments Widget
If you want to show your new visitors the number of your audience and their engagement with your content, the Recent Comments widget can help you out.
The Recent Comment widget lets you display the latest comments on your website. It allows your new visitors to see those comments and join the discussion instantly. You can even set the number of comments to display and give it a title.
3. Call to Action Widget
You can use a Call-to-Action (CTA) widget to encourage your visitors to take action. The action may be making a purchase, subscribing to your newsletter, scrolling to a certain section, or clicking a link.
Your CTA widget can be a simple button, an image, or text. You can even set the number of CTA buttons, add a title, and select the color.
4. Navigation Widget
You can use the Navigation widget to encourage your visitors to navigate around your website. It is easy to create the main navigation menu and a custom navigation menu on your site. You can then add that menu to a widget area.
Adding the navigation widget in the footer area proves to be handy for mobile users. This way, your visitors don’t have to scroll all the way to reach the main menu after finishing a post.
5. Media Widget
By using the Media widget, you can add media such as images to your sidebar or footer. Media widget is an effortless tool to bring your site to life. It makes your site look appealing and will help in user retention as well.
You can display an image on your sidebar and footer. You can even use it as a link. Also, you can use the video widget to stream videos from Vimeo or YouTube in your widget area.
6. Social Media Widget
Using the Social Media widget is a great way to increase your online influence. You can add your social media profiles to your sidebar or footer and encourage visitors to like/follow you.
WordPress also offers separate social media site widgets such as Facebook, Twitter, Snapchat, and more. You can use them to link your website with individual social media platforms.
7. Shopping Cart Widget
If you are running an online shop using plugins such as WooCommerce, adding a Shopping Cart widget is a good idea. It helps your visitors easily navigate to their cart and improves user convenience.
8. Form Widget
You can add a Form widget on your footer or sidebar location to let your visitors contact you. A popular example of such a form is the newsletter subscription form. The widget is similar to the Contact Form Widget.
There are also plugins such as Contact Form 7 and Gravity Forms that add form widgets on your WordPress.
9. Map Widget
If you want to give out the physical location of your business to the visitors, a Map widget comes in handy. This widget makes your site look professional and also adds to a convenient browsing experience.
You can use various map plugins to add the map widget on your WordPress.
10. Search Widget
The Search widget is a simple yet extremely useful widget in WordPress. It is a built-in feature in WordPress. By adding this widget on your sidebar or footer, you can make it easier for your visitors to search for things on your website.
Available Widgets in WordPress
WordPress offers some default widgets as a built-in feature. It saves you time to find the most used widgets for your site. Here are the pre-installed widgets in WordPress:
- Archives: This widget links to the archives by month.
- Audio: It lets you embed a podcast, song, or other audio clips on your site.
- Calendar: It enables you to add a calendar of your posts.
- Categories: It enables you to add a list of your blog categories and link them to the archive pages.
- Custom HTML: It gives you the flexibility of adding whatever you want by pasting or typing the HTML such as Google Forms.
- Gallery: It lets you display a gallery of your images on your WordPress.
- Image: You can display an image for the media library using this widget.
- Meta: It shows the metadata such as RSS feeds and login links.
- Navigation Menu: It lets you show the main or a separate navigation menu.
- Pages: It lets you show a list of your website’s pages along with links.
- Recent Comments: You can show the list of recent comments on your site.
- Tag Cloud: It lets you add tags in a cloud format along with the relevant links.
- Video: You can embed video clips from YouTube, Vimeo, or other streaming platforms.
- Recent Posts: You can display a list of your recent posts and encourage people to read them.
- Search: You can add a simple yet very useful search bar using this widget.
- Text: This widget lets you add any information in text form.
Finding the Right Widget for Your WordPress
We are sure that you now know the different available widgets in WordPress. Now, here are some tips for finding the right ones for your WordPress website:
- Figure out exactly what features you need to add to your site. After that, list out the widgets that offer those features.
- Identify the widget from the built-in list on your WordPress. It may differ depending on the theme you use.
- If your built-in list does not have the widget you are looking for, you can check in the plugin directory. Go to Plugins > Add New. Search for the right plugin that would do the job. The chances are that the plugin you install may add a widget on your site.
- If you still cannot find the solution to your needs, search for premium plugins. You can take recommendations from the WordPress community.
How To Add a Widget to WordPress Site
Now that you are sure of the particular widget you need, let’s learn how to add that widget to your WordPress:
You can add a widget to WordPress in four different ways:
- Using the drag-and-drop interface
- Using the Add Widget button
- Using the accessibility mode
- Using the theme customizer
- Using plugins
Method 1: Using the Drag-and-Drop Interface
It is the easiest way of adding a widget to your WordPress. You can simply select the widget you want to add from the built-in list then drag it to the appropriate area.
Here’s the complete process of adding a widget using the drag-and-drop interface:
- Go to your WordPress admin dashboard.
- Click on the “Appearance” option from the left-hand admin panel.
- Click on the “Widgets” option.
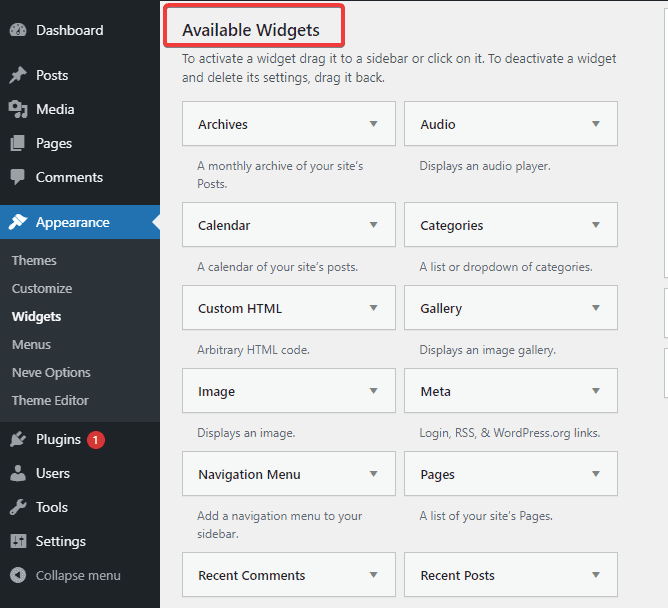
- You will see a list of available widgets that you can add.

- Now, drag the widget you want to add to the available area.
The area where you can drop the widget depends on the theme you use. Some themes offer more areas, while some have fewer. However, adding the widget by the drag-and-drop interface is the same for any theme.
Note: The order you drop the widget is the order they appear on your site. Here’s an example:
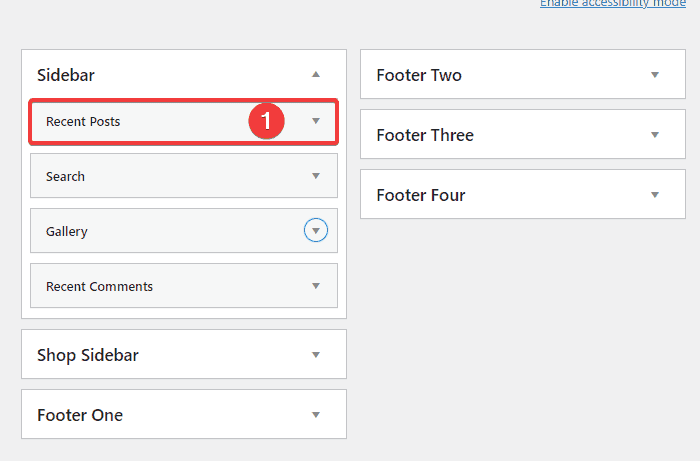
Here, we have dropped the Recent Posts widget above the Search widget. Thus, the Recent Posts comes first on our website and then the Search widget.
If you are not comfortable with the drag-and-drop method, you can click a few buttons to add widgets all the same. Read in the next method below.
Method 2: Using the Add Widget Button
For those struggling with the drag-and-drop interface, you can use this method.
Here’s the complete process of adding a widget using the Add Widget button:
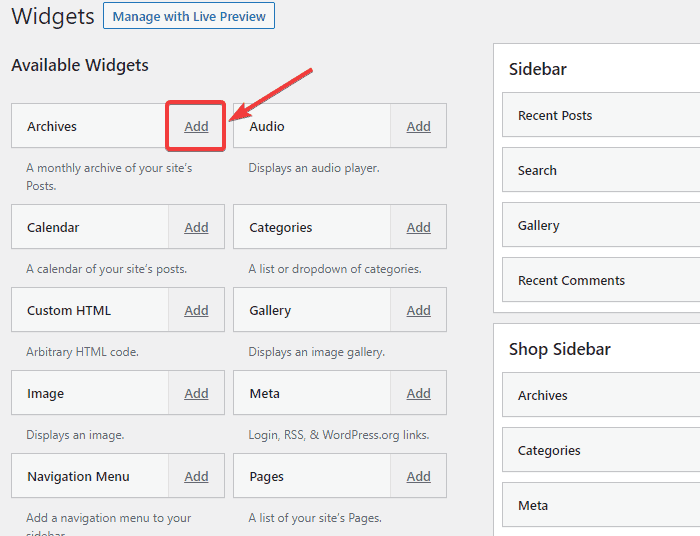
- Follow all the steps of the first method. However, instead of dragging and dropping the widget which you want to add, click on it.
- Doing so will drop down a list of options where you can add the widget.
- Select the area where you want to add that widget.
- Click on the “Add Widget” button.
Method 3: Using the Accessibility Mode
To add widgets to WordPress using this method, you need to enable the accessibility mode on your dashboard first.
Here’s the complete process of adding a widget using the accessibility mode:
- Go to your dashboard.
- Go to Appearance > Widgets.
- On the top right corner, you will see the ‘Enable accessibility mode’ option. Click on it.
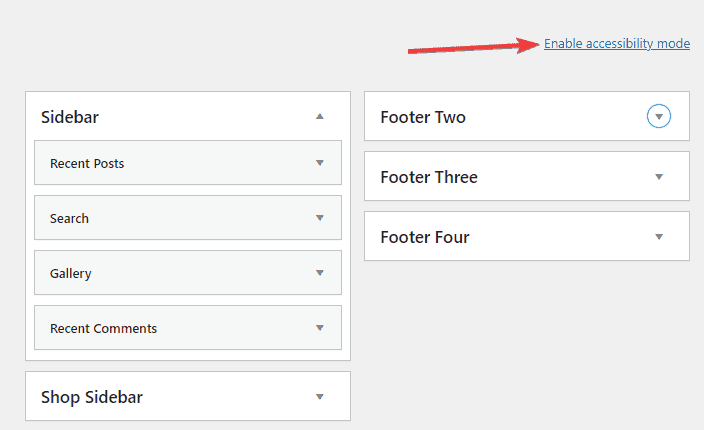
- You will now see an ‘Add’ button next to all the available widgets.
- Click on the ‘Add’ button next to the widget you want to add.
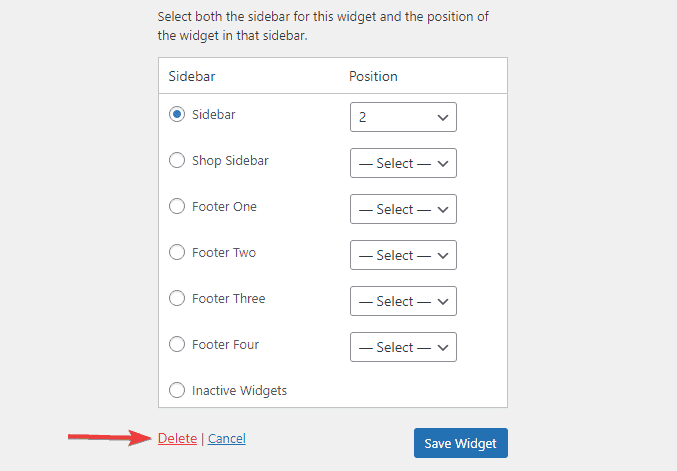
- Now, select where you want to add the widget from the options.
- Click on the ‘Save Widget’ button.
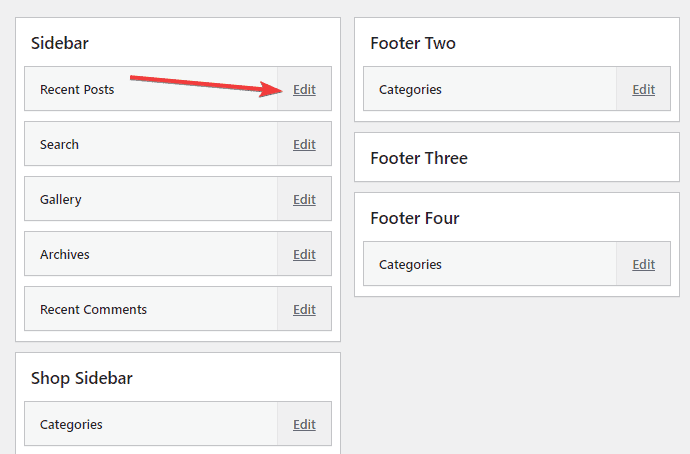
You have successfully added a widget using the accessibility mode. While you are still on this mode, you can edit the individual widgets you have added as follows:
- Click on the ‘Edit’ button at the side of the widget you want to edit.
- Now, you can edit the widget according to the available options.
- After making your adjustments, click on the ‘Save Widget’ button at the bottom.
Method 4: Using Theme Customizer
You can also add a widget using your theme customizer.
Here’s the complete process of adding a widget using the theme customizer:
- Go to your dashboard.
- Go to Appearance > Customize.
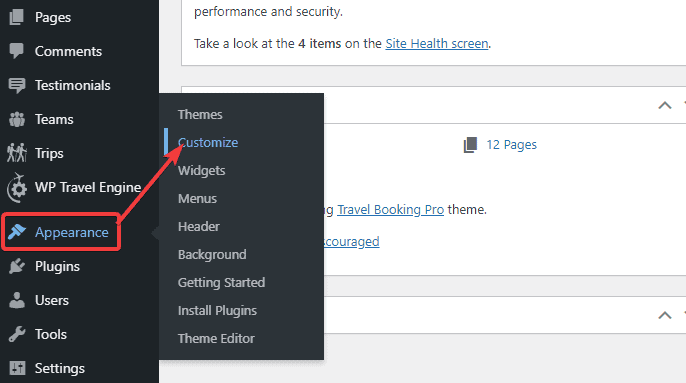
- Click on the ‘Widgets’ option from the left-hand panel.
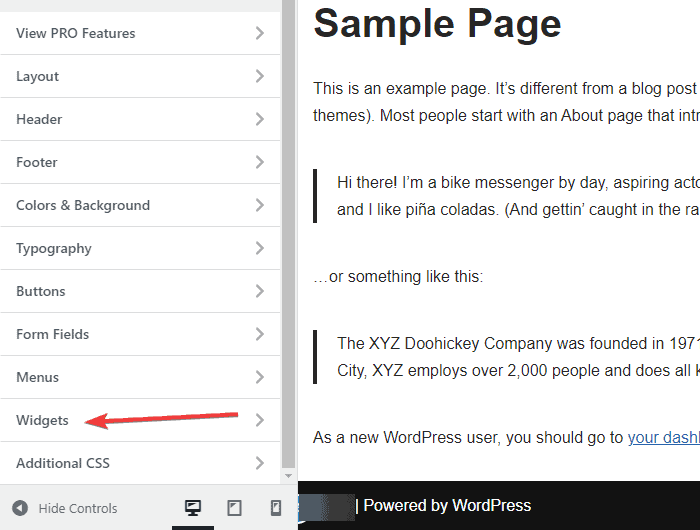
- A list of available widget areas shows up. Click on the area where you want to add the widget.
- Click on the ‘Add a widget’ button.
- A list of available widgets on your WordPress shows up. Select the widget you want to add.
- Click on the ‘Done’ option to finish the process.
Method 5: Using Plugins
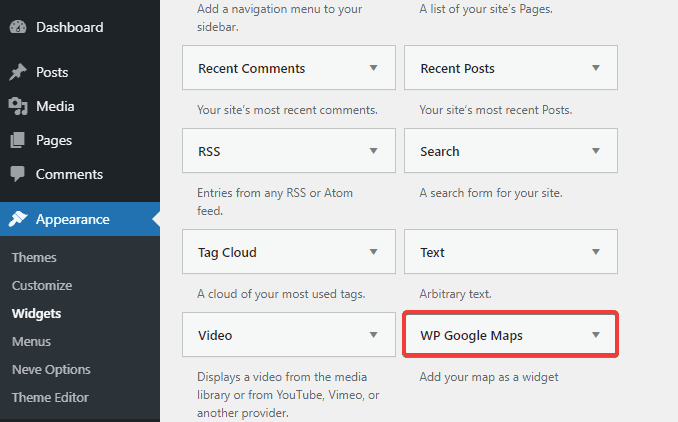
If the widget you are looking for is not available on the built-in list, you can use a suitable plugin to add that widget. Here is an example of adding a map widget using the WP Google Maps plugin:
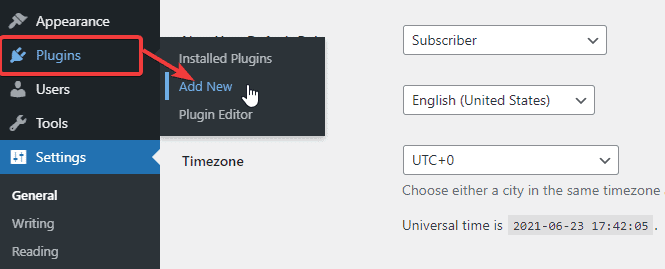
- Go to your dashboard.
- Navigate to ‘Plugins’ and click on the ‘Add New’ option.
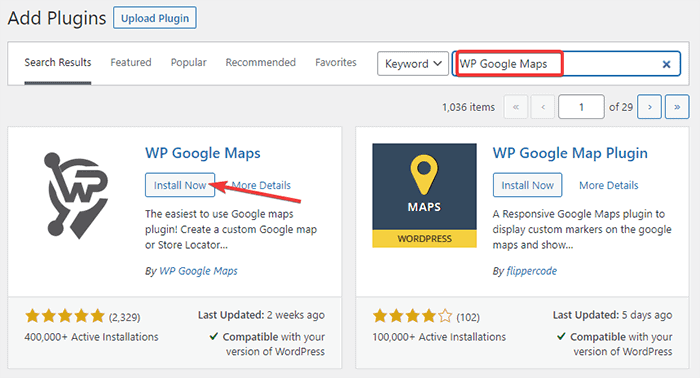
- Search for the WP Google Maps plugin. Install and activate it.
- Doing so will now add a new widget option called “WP Google Maps” on your WordPress. To see it, go to Appearance > Widgets.
- You can now add the widget using any of the four methods we mentioned in the above sections.
Widget Areas and WordPress Theme
Most of the WordPress themes have the sidebar alignment to the right. It is the most common spot for adding widgets, and it looks good too. However, some users want the liberty to add widgets wherever they want, such as left, right, header, footer, or between content.
Not all themes offer such liberty. You need to code the widget area into your theme or make sure the theme lets you add widgets where you want. The first option is not feasible for all the users. So, we recommend checking the widget option of the theme before using it on your website.
Gaining More Control Over Widgets
Following the above steps will only let you add widgets to WordPress. You won’t have control over the visibility, device, or login state. That means you can’t control which page to include/exclude the widget, who can see the widget, and which device can render the display.
There is a plugin that fixes this issue instantly. It is called the Widget Options plugin. Using this plugin, you can control everything about the widget. You can set where to display the widget, how to align it, who can see it (all users or only the logged-in users), which device to show/hide a widget on, and many more.
Try out this plugin to find out for yourself.
How to Remove Widgets in WordPress?
Sometimes, you may want to remove widgets that you have added earlier for some reason. Here is how you can do it:
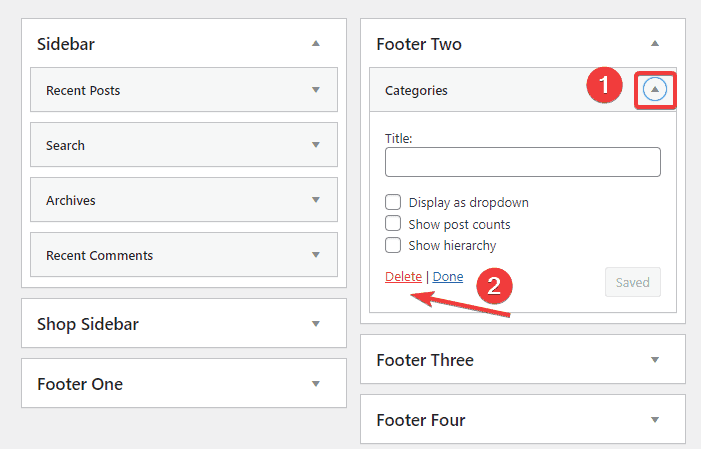
- Go to Appearance > Widgets.
- Click on the widget you want to remove.
- Now click on the ‘Delete’ option.
If you are in the accessibility mode:
- Click on the ‘Edit’ button at the side of the widget you want to delete.
- Click on the ‘Delete’ option.
Words of Wisdom
You just learned five different ways to add widgets to WordPress. You must be tempted to go ahead and try them out yourself.
But hold on a minute.
You must be familiar with the phrase, “Too much of anything is good for nothing.” Adding widgets to your website does help increase its functionality. However, if you overload your site with widgets, all the design credit is lost. Your content loses its value, and you may end up with a jumbled-up website.
To avoid this issue, consider limiting the number of widgets on your site. Only add the widget you actually need for your site. If you are using the Widget Options plugin, you can control where and how to show the widgets. You can use it to disable widgets on the pages that have a lot of content and design going on.
If not, you are sure to overwhelm your visitors and increase the bounce rate.
Final Words
WordPress lets you add features and functionalities using multiple tools and techniques. Widgets are one of them. By adding extra widgets, you can add functionality to your website and also improve its visual appearance if you know what you are doing.
In this article, you learned five easy ways to add widgets to WordPress. Which one did you find most suitable? Share your thoughts below!