I think you will probably agree with me when I say Google is a necessary evil.
Evil because as a website owner, it forces you to do things that cost you time and money.
For example, in April 2016, Google announced to give ranking boost to the mobile friendly websites.
So if your website wasn’t mobile-friendly, you needed to make it mobile-friendly. Otherwise, your website ranking would drop and you would lose traffic from Google Search Engine.
But, making websites mobile-friendly was necessary for better user experience.
Recently, Google made another big announcement – Google Chrome will start warning users about non-HTTPS sites from 2017.
It means if your website doesn’t use HTTPS, it will be flagged as “not secure” from the start of 2017.
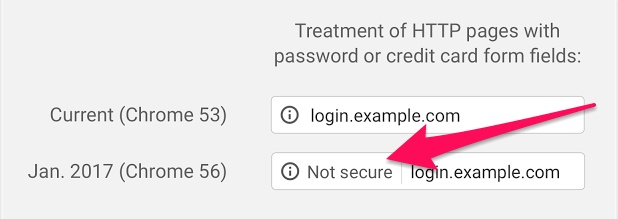
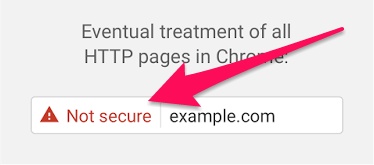
Initially, this will only be applied to the websites that transmit password or credit card details over HTTP. But, Google Chrome will eventually mark all HTTP sites as non-secure.
In January, the security warning in the address bar of their browser will look like this at first:
And then as it rolls out to all the websites, the warning will look like this:
What Does it Mean to You as a Website Owner?
Imagine you go to a website using Google Chrome and then getting a warning that the website is not secure to visit.
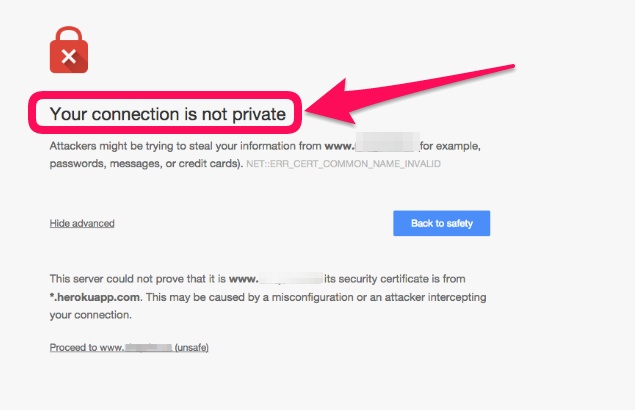
What will you do next – open the website or close it?
If you are like me, you will probably close the website and never visit it again.
A security warning is a big turn off for website visitors. If your website is not using HTTPS and Chrome displays warning message, you are most likely to lose more than 50% of your traffic.
How?
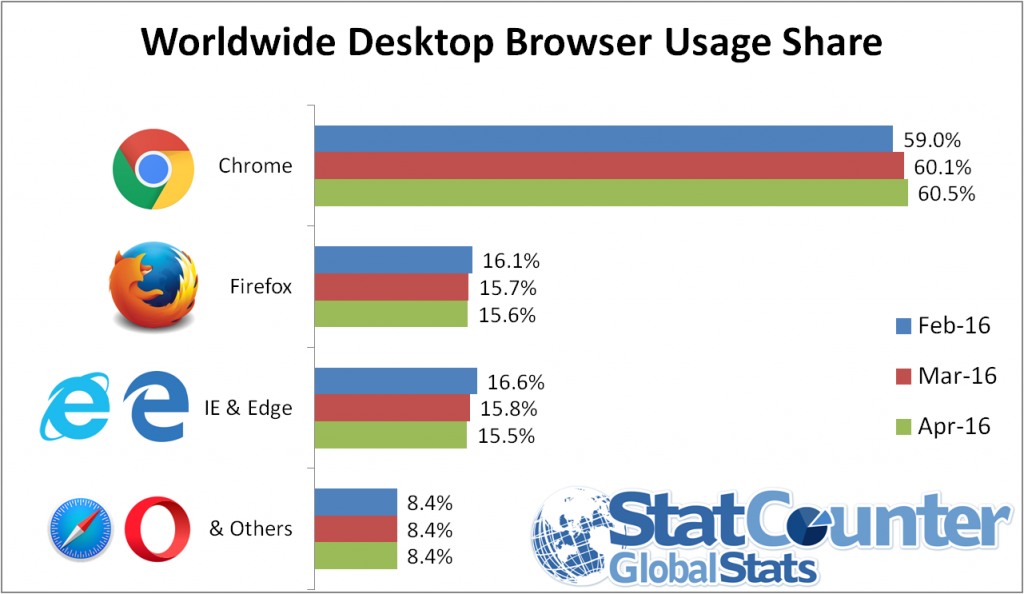
Because according to StatCounter, around 59% of the users use Google Chrome, followed by Firefox (around 15%), Internet Explorer and Edge (around 15%) and Safari and Opera (around 8%)
That means you are not just losing traffic but you are also losing sales and leads from the visitors on your site. The end result – loss of lots of potential sales and inquiries because of not adding SSL Certificate on your website.
Another reason you should use HTTPS because Google gives ranking boost to websites using HTTPS:
It is clear – you need to add SSL Certificate on your website. The important questions is, how can you add SSL Certificate on your website, and for free? Keep reading and I’ll show you how you can take easy steps to add HTTPS on your website using Let’s Encrypt.
What is Let’s Encrypt?
Let’s Encrypt is a free, automated, and open certificate authority that provides SSL certificate to the general public.
It is a project by Internet Security Research Group (ISRG), a public service corporation. Let’s Encrypt project is sponsored and supported by several notable companies including Google, Facebook, Mozilla, Automattic (parent company of WordPress), Cisco, etc.
Having said that, let’s take a look how to implement SSL Certificate on your website using Let’s Encrypt.
Step 1: Using a Host That Offers Built-in Let’s Encrypt Setup
As Let’s Encrypt is becoming popular, some of the hosting services are offering built-in Let’s Encrypt set-up.
SiteGround is one of the most popular and trusted hosting service that provides a built-in implementation of Let’s Encrypt. We use SiteGround for our Rara Theme.
In this tutorial, I will walk you through each step to add HTTPS on your website using Let’s Encrypt provided by SiteGround.
Please note that if you are using another hosting service, check whether or not your hosting company provides built-in Let’s Encrypt. The process of adding HTTPS should be more or less similar.
Step 2: Enable Let’s Encrypt free SSL in SiteGround
Log into your cPanel Dashboard in Siteground and scroll down to Security section. You will see Let’s Encrypt icon.
Alternatively, you can search for “Let’s Encrypt”.

Click on the Let’s Encrypt icon. This will take you to the Let’s Encrypt installation page.
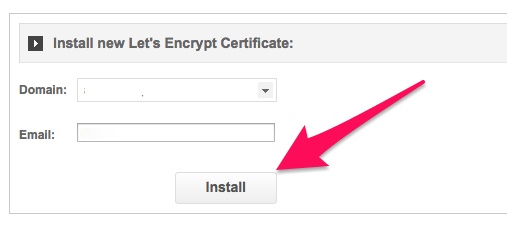
Here, you will need to provide your email address and select the website where you want to add HTTPS.
Click on the Install button.
Let’s encrypt will run for a few seconds (sometimes a few minutes) and issue a unique SSL certificate for your website. After the installation is finished, you will see a success message.
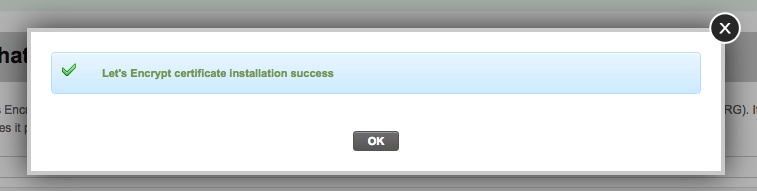
That’s all. You have successfully installed Let’s Encrypt Free SSL to your WordPress website.
But, your website is not yet ready to use HTTPS. You will need to update your website URL and fix insecure content issues.
Step 3: Update WordPress Website URLs
You need to change your website URL from HTTP to HTTPS to use SSL.
A website with HTTP looks like http://www.example.com.
A website with HTTPS looks like https://www.example.com.
Having said that, lets go ahead and change your website URL.
Go to Admin Dashboard of your WordPress websiteand click on Settings.
Here, you need to update WordPress Address (URL) and Site Address (URL) to use HTTPS.
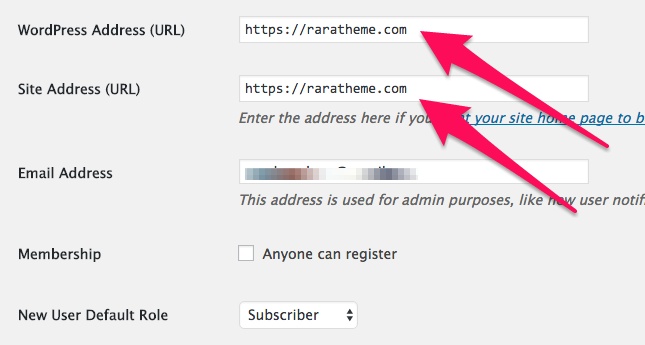
Save the changes.
Step 4: Fix Insecure Content Issues
After saving changes in the above Step 3, you will be logged out of your website. Enter your username and password to login again.
Insecure content issues can be easily fixed using Really Simple SSL WordPress plugin. You need to install and activate this plugin.
For more information, please refer to our guide on how to install and activate a plugin.
The plugin will automatically fix insecure content issues. It will also automatically detect your SSL certificate and add it to your website. In most cases, you don’t have to do anything.
Step 5: Update Google Analytics Settings
This step has nothing to do with adding HTTPS to your website. If you have followed Step 1 to Step 4, you have successfully added HTTPS to your website.
Congratulation!
If you are using Google Analytics for your website, I would highly recommend to follow Step 5.
After adding HTTPS to your website, your website URL has changed from HTTP to HTTPS.
Therefore, you need to update Google Analytics settings and add your website new URL with HTTPS.

- Log into your Google Analytics Dashboard
- Click on “Admin” at the top Menu
- Click on property settings under your website
- You will see default URL option. Click on HTTP and select HTTPS.
- Save the changes
That’s all!
But if you haven’t created a Google Analytics account yet. You may look into this guide: How to Add Google Analytics to WordPress? We have explained the step-by-step process to create a Google Analytics account and add it to your website.
Conclusion
I hope this article has helped you to add free SSL on your website using Let’s Encrypt.
If you like this article, please subscribe to our newsletter for WordPress related tutorials and theme releases. You can also find us on Facebook.


I’ve recently started a site, the information you offer on this website has helped me greatly. Thanks for all of your time & work.
Great blog Raushan, very helpful. It’s really interesting to read this and super timely. I noticed putting a link to my blog on facebook minutes prior to reading this didn’t get the green tick. In the search bar for my blog it warns me the connection is ‘Not Secure’ also.
I feel so much happier now I unerastdnd all this. Thanks!
Awesome post, thanks for the share!