
Being able to harness WordPress’s flexibility and the ease of Google Form side-by-side can significantly improve user-convenience. Both platforms are popular. So, it would be a walk in the park to keep track of responses on your site.
But the question here is, how to embed a Google Form in WordPress? Although most of the users are familiar with Google Form and WordPress’s potential, they struggle to merge these two.
If you’re one of such users, here is a guide on how to embed a Google Form in WordPress. Believe us, it only takes a few minutes, and you can do it easily.
Google Form Vs. Form Builders
It is true that WordPress has a pool of plugins for every functionality and feature you would need. WPForms plugin, for example, helps you create custom login forms, registration forms, accept payments, and more. It fairly does the same job as Google Form.
But sometimes, you may need to create and share a form on different websites, emails, or platforms and store it at the same location. In such scenarios, Google Form is an easier option. Most people are already familiar with Google Form. Moreover, Google Form is mobile friendly, has an easy-to-use interface, is easy to share, and lets you add collaborators on the form.
Why Embed Google Form in WordPress?
There are multiple reasons to use Google Forms. You can create online surveys, registrations form, or even quizzes using Google Forms. Besides these, Google Form also:
- Processes real-time responses
- Lets you insert media items on your form
- Contains powerful and customizable features
- It packs tons of add-ons.
By embedding Google Form in WordPress, you can enjoy all those features mentioned above. You can also share your form on multiple platforms, email lists, and websites. Moreover, you can find all the responses in the same place. Such a feature offers automation and universality to make your work much easier and quicker.
How to embed a Google Form in WordPress?
Before embedding a Google Form in WordPress, you need to create a form first. To do that, follow the steps below:
1. Create a Google Form.
Here is how you create a Google Form:
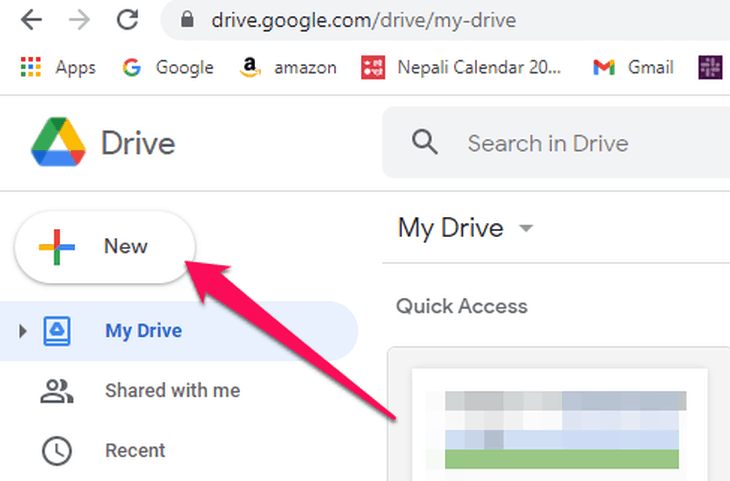
- Go to your Google Drive.
- Click on the ‘New’ button at the left sidebar.
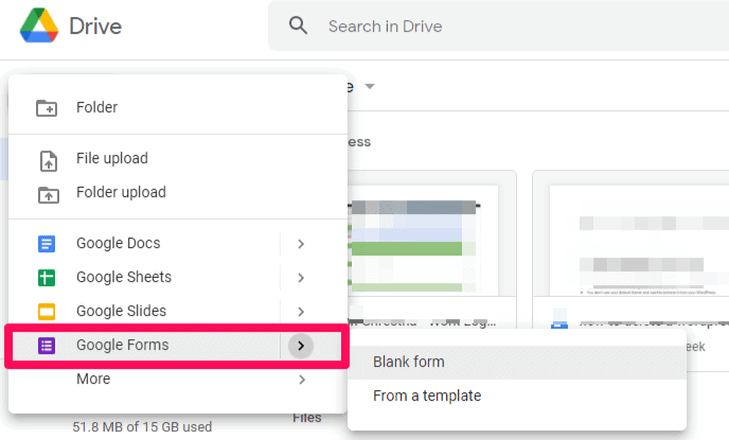
- From the drop-down option, select ‘Google Forms.’
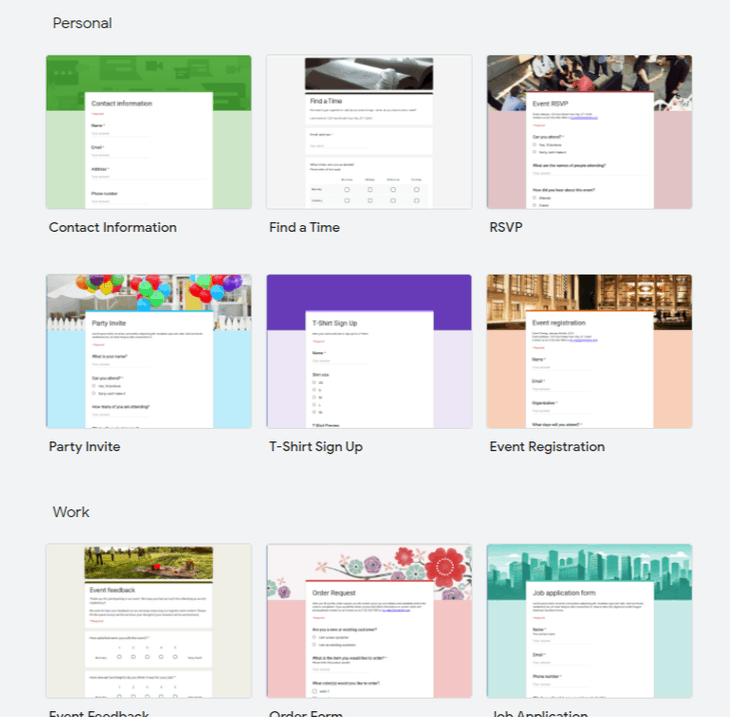
- You can create a blank form or select from ready-made templates.
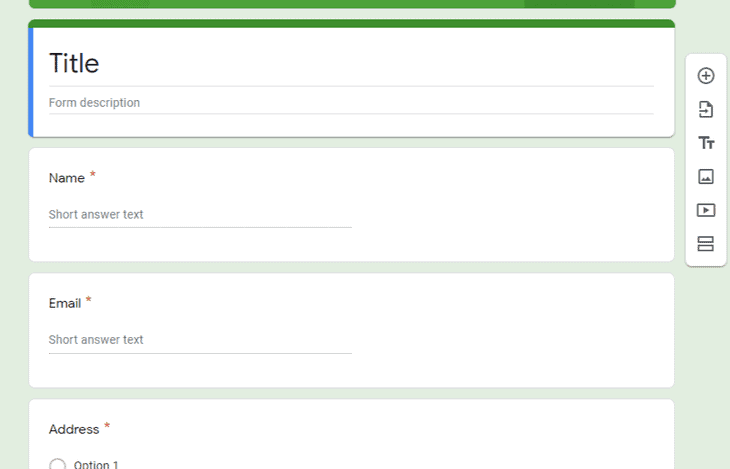
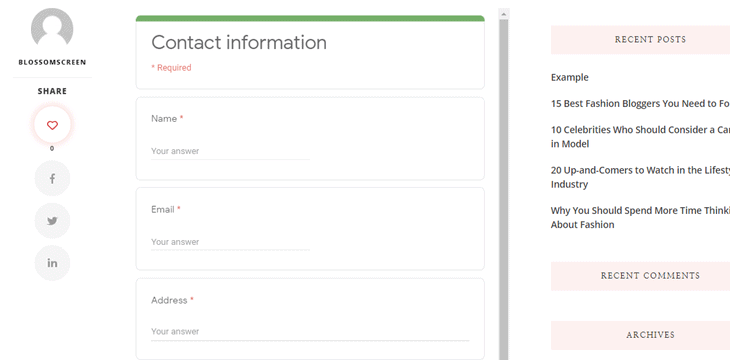
In this example, we have selected the ‘Contact Information’ template.
- Creating a form is very easy and straightforward.
- Add a title, description, and then your form fields.
- Google’s AI automatically selects the appropriate form field based on your questions. However, you can also manually select the fields for your convenience.
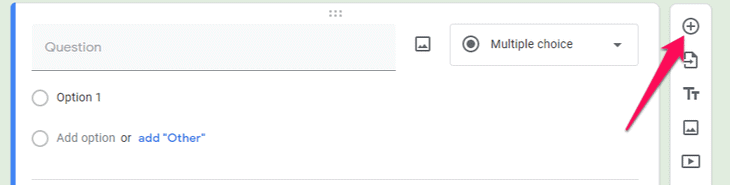
- To add a new field, click on the add button. You can even add images and videos to your form.
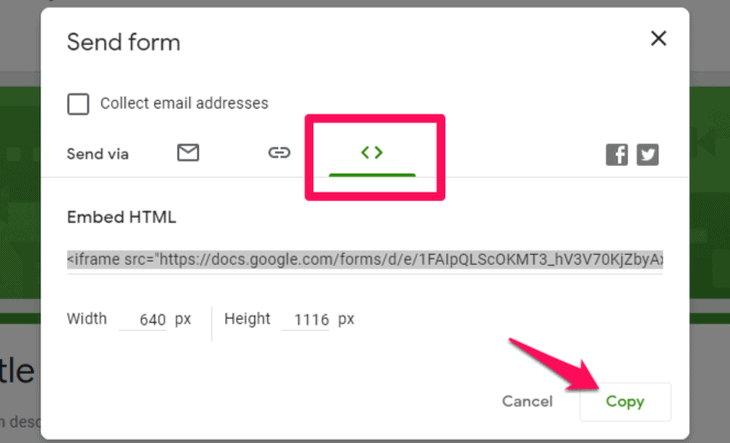
- When you are satisfied with your form, click on the ‘Send’ button at the top of the page.

- Doing so pops up a send form.
- Click on the embed tab “<>” in that popup.
- Under the ‘Embed HTML’ section, you will see a link to the form you just created.
- Copy the link by clicking on the ‘Copy’ button or hitting the ‘Ctrl+C’ button.
You have successfully created a Google Form. Wasn’t it easy?
Now, it’s time to embed that form link on your WordPress.
2. Editing the Appearance of your Google Form
Before embedding your form link on your WordPress, we will talk about changing the form’s appearance. You can easily change the theme color and transform the look. Follow the steps below to change the theme color:
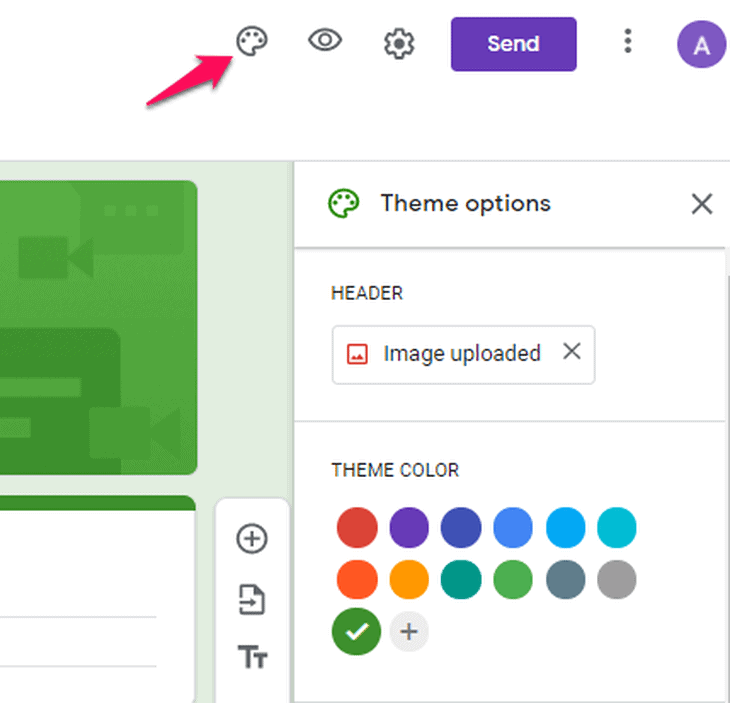
- At the top of your Google Form, you will see a palate icon. Click on it.
- A menu pops up. You can edit the theme color, header, background color, and even font style from here.
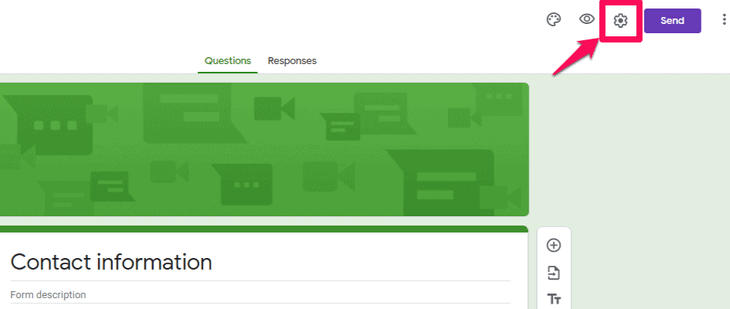
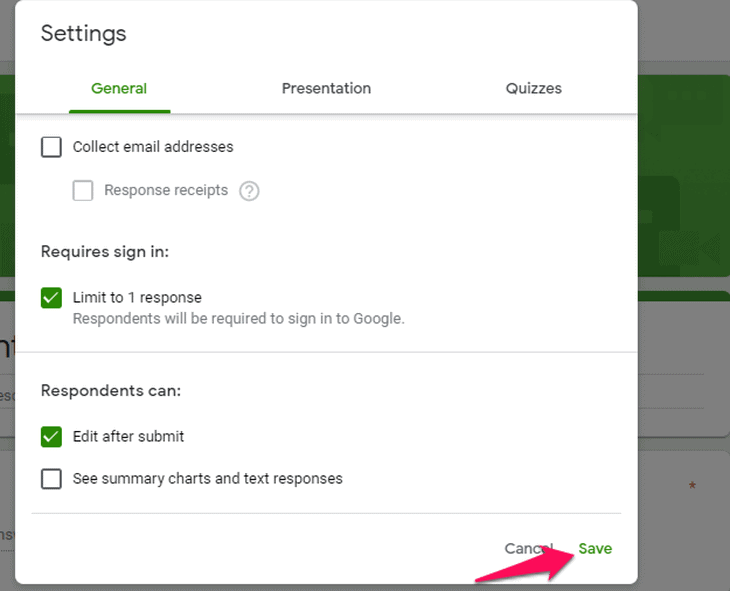
You can also tweak additional settings for your Google Form such as – allowing more than one response, collecting respondents email address, editing the response after submit, and more. To do that click on the settings icon at the top of your Google Form.
This opens up a menu from where you can add settings to your Google Form. Save the changes after finishing.
3. Embed a Google Form in WordPress.
Now you can embed the Google Form you just created in your WordPress. Here are the steps:
- Log in to your WordPress admin dashboard.
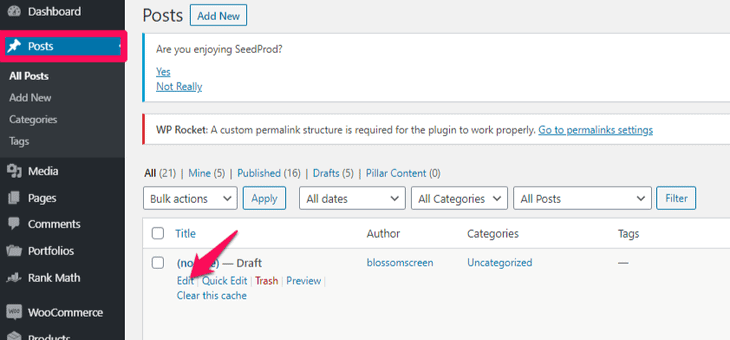
- Select the post or page where you want to add the Google Form.
- Add an HTML block on that post/page.
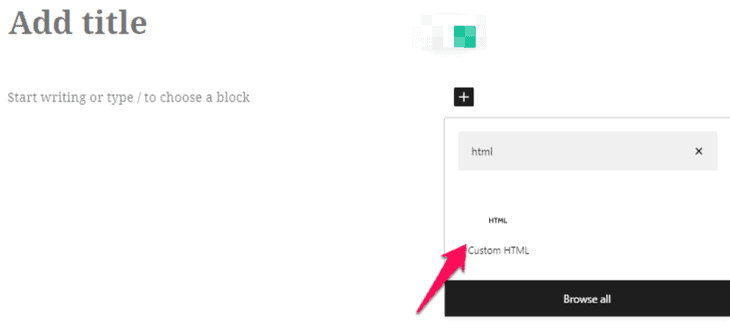
- Now paste the link you copied earlier after creating the Google Form.
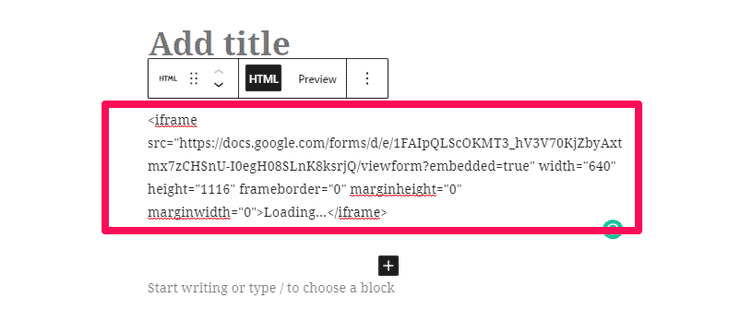
- Make sure to save the changes you make.
- You can then preview the changes on your site to see if the embed process worked.
You can also embed other files on your WordPress besides a Google Form such as images, videos, other user’s forms, and more. Check out our article on How to Use iFrames With WordPress. It will give you a clear idea what we are talking about.
Additional Google Form Options
For additional options on your Google form, you need to add the Google Form plugin on your WordPress. Using this plugin, you can take your form to a new level. There are plenty of customizing options for your form, such as:
- Columns: It lets you split your form responses up to 10 columns.
- Captcha: You can add a security measure to your form. It keeps spambots away from submitting spam responses to your form.
- Read-only: It allows your viewers to only ready from your form. They cannot respond in any other way.
- CSS Prefix: You can style multiple forms by adding a prefix at the beginning of the Google Form class name.
To add the plugin, follow the steps below:
- Log in to your admin dashboard.
- Navigate to ‘Plugins’ on the left side panel.
- Click on the ‘Add New’ option.

- Search for ‘wpgform’ in the search box.
- Install and Activate the plugin.
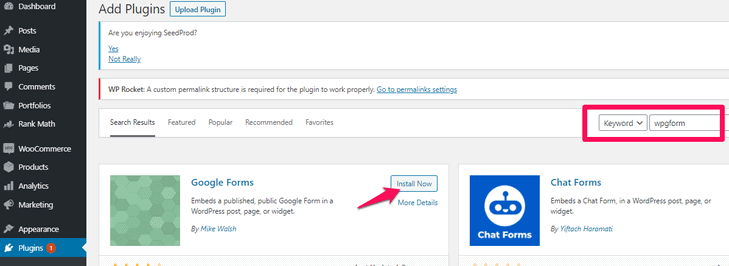
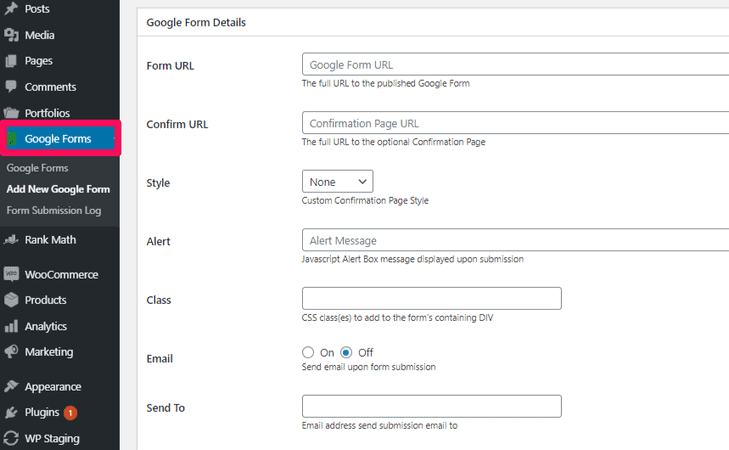
- You can see a new option on the left side panel that says ‘Google Forms.’
To add a Google Form using the plugin, click on that option, and then go to ‘Add New Google Form.’
Note: You need to paste the URL of the form that you have already created.
Conclusion
Google Form makes conducting surveys and quizzes easier and quicker. You can save yourself a significant number of manual work using Google Forms. When you embed Google Forms in WordPress, you are directing all the responses to one place and saving time to share your form across multiple channels. The best part is that it is entirely free.
But if you choose to use the Google Form plugin, make sure to backup your form. The plugin is not Google’s product. It makes your form vulnerable to breaking in case of updates. You can also check out these 15+ Best WordPress Contact Us Form plugins to step up your google form.
You may also want to check out the article on How to embed a PDF in WordPress.
We hope this guide helped you embed a Google Form in WordPress. If you have any other questions, ping us in the comment section below.