SEO has been a top priority for website owners. With top-five results gaining 75% of the clicks, the race for higher ranking has been a challenge. There are various off-page and on-page SEO techniques that come into play. Optimizing the Robot.txt file is one of those tricks which can strengthen the SEO for your site.
However, most beginners don’t know how to optimize WordPress Robots.txt for SEO. Some might not even know what a robots.txt file is in the first place.
Luckily, this article is at your rescue.
Here, we will explain what a robots.txt file is, how to create the robots.txt file, and how to optimize the robots.txt file for SEO. We have also added some FAQs at the end. So make sure you are with us till the end.
Now, let’s get started!
What is a Robots.txt file?
Robots.txt in WordPress is a plain text file that informs the search engine bots which pages on your site to crawl and index. You can also format the file to exclude the pages from indexing.
The robots.txt is stored in the WordPress root directory. This file has a basic format that looks like this:
User-agent: [user-name]
Disallow: [URL of the string not to be crawled]
Allow: [URL of the string to be crawled]
Sitemap: [URL of your WordPress XML Sitemap]
What Does a Robots.txt File Look Like?
A robots.txt file is simply a few lines of text that directs search engines on how and what to crawl on your site. You have multiple lines on this file to allow or restrict specific page URLs. You can also add multiple sitemaps. If you disallow a URL, the search engine bots don’t crawl that page.
Here is an example of the robots.txt file:
User-Agent: *
Allow: /wp-content/uploads/
Disallow: /wp-content/plugins/
Sitemap: https://URL/sitemap_index.xml
Now, let’s learn about these four major terms that you can find in a robots file:
- User-agent: User-agent is the specific web crawler to which you give crawl instruction. It is usually a search engine.
- Allow: Allow is the command that tells Googlebot that it can access a page or subfolder even though its subfolder or a parent page may be disallowed.
- Disallow: The disallow command tells a user-agent not to crawl a particular URL. You can only include one “Disallow:” line for each URL.
- Sitemap: The sitemap is used to call out the location of any XML sitemap(s) that is related with this URL. This command is only supported by Google, Bing, Ask, and Yahoo.
In the above example, we allowed search bots to crawl and index the uploads folder but have restricted the plugins folder. In the end, we allowed indexing of the XML sitemap.
The asterisk sign after User-Agent means the text applies to all the search engine bots. Each search engine has its user agent to index sites. Here are some user-agents of some popular search engines:
- Google: Googlebot
- Googlebot Images: Googlebot-Image
- Googlebot News: Googlebot-News
- Googlebot Video: Googlebot-Video
- Yahoo: Slurp Bot
- Bing: Bingbot
- Amazon’s Alexa: ia_archiver
- DuckDuckGo: DuckDuckBot
- Yandex: YandexBot
- Baidu: Baiduspider
- Exalead: ExaBot
There are so many user-agents out there nowadays. If you want to focus on a particular search engine, you can even specify it on the robots.txt file. That is, to set up instructions for the Googlebot, you can write the first line of your robots.txt file as:
User-agent: Googlebot
Why Do You Need a Robots.txt File in WordPress?
Search bots will crawl and index your site even if you don’t have a robots.txt file. So, why would you really need it? Well, with the robots.txt file, you can direct search engines to prioritize indexing on certain pages. Also, you can exclude pages or folders that you don’t want to index.
This does not have a bigger impact when you first start a blog and don’t have a lot of content. However, after your site grows and has a lot of content, you may need to prioritize indexing on a certain page/post/folder and negate some.
You see, there is a quota for each search bot for each website. That means bots crawl on a certain number of pages at a certain crawl session. If the bots don’t finish crawling in that particular session, the bot comes back and resumes crawling in the next session. This slows your website indexing rate.
So, by using the robots.txt file, you can direct search bots on which pages, files, and folders you want indexing and which to include. By doing so, you save the crawl quota. It may not be the safest way to hide your content from the public, but it prevents those excluded contents from appearing in the SERPs.
How to Create a Robots.txt for Your Website?
You can create robots.txt in two different ways. We will explain those methods below. You can then follow the method you think will work the best for you.
Method 1: Creating Robots.txt file using Rank Math Plugin
Here, we will show you how to create a robots.txt file using the popular Rank Math plugin.
Rank Math is an SEO WordPress plugin that makes it easy to optimize your website content with built-in suggestions based on widely-accepted best practices. Using this handy tool, you can easily customize important SEO settings and control which pages are indexable.
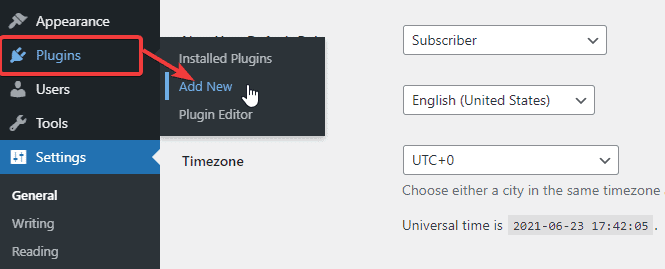
In order to create a robots.txt file using the Rank Math plugin, first, download the plugin by going to Plugins -> Add New from your WordPress Admin Dashboard.
Now, search for Rank Math in the Search bar and click the Install Now and Activate button once you find the plugin.
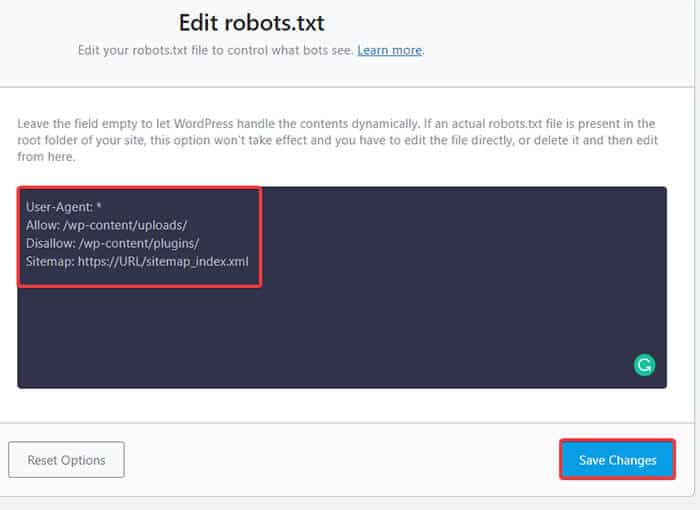
Once you activate the plugin, head over to Rank Math -> General Settings -> Edit robots.txt from the WordPress Dashboard.
Now, enter the following code or copy the code from mentioned in the previous example in the blank space and click the Save Changes button.
There you go! You have successfully created a robots.txt file using the Rank Math plugin.
Method 2: Creating Robots.txt file using FTP
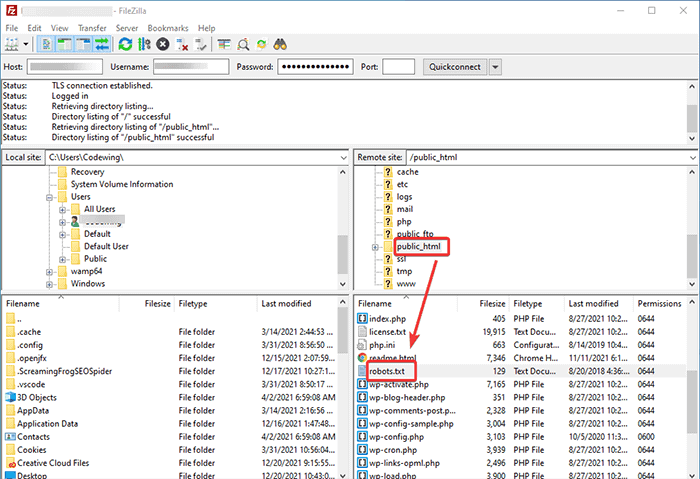
The second method involves creating a robots.txt file manually on a local computer and then uploading it to your Wordpress site’s root folder.
You will need to access your WordPress hosting using an FTP client. After logging in to your FTP client, you can see the robots.txt file in the website’s root folder. Right-click and select the Edit option.
Now, add your custom rule to the file and save the changes. For example:
User-agent: *
Disallow: /wp-admin/
Allow: /wp-admin/admin-ajax.php
If you don’t see the file in the root folder, you can create it on your local computer using the notepad. Add your rules on it and then upload it to your rooter folder using the FTP.
Where to Put Your Robots.txt File?
You should always place your robots.txt file in the root directory of your website. For example, if your site is domainname.com, then your robots.txt file domain will be https://domainname.com/robots.txt.
In addition to adding the robots.txt file in your root directory, here are some extra tips:
- It is a must to name the file “robots.txt.”
- The file name is case-sensitive. Thus, you need to get it right or else it won’t work.
- You need to add a new line for each new rule.
- Add a “$” sign to signify the end of a URL.
- Use each user-agent only once.
How to Test The Robots.txt File?
After creating the robots.txt file, you can test it using the Google Search Console. Here, you will find the Open robot.txt tester tool.
- Select your property from the given drop-down list.
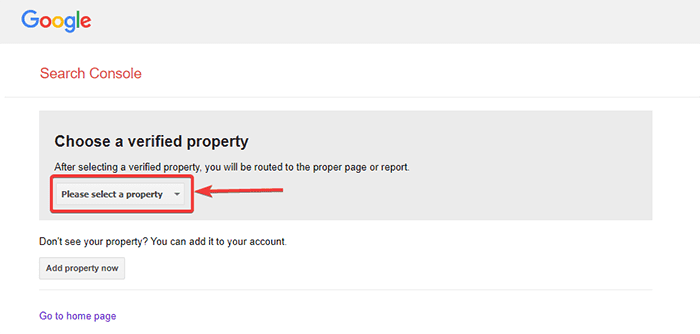
The tool fetches your site’s robots.txt file and highlights the errors and warning if it finds any.
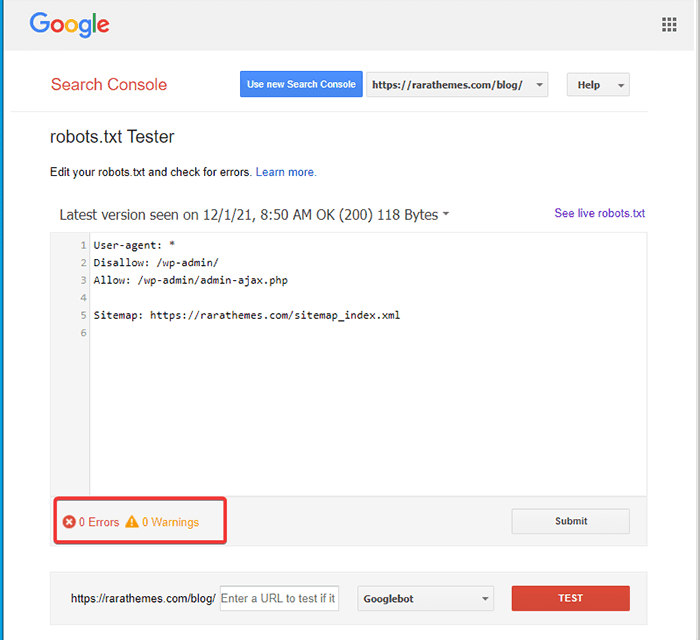
Note: The drop-down property option appears only if you have linked your WordPress site with Google Search Console.
If you haven’t done it, you can quickly link your site as follows:
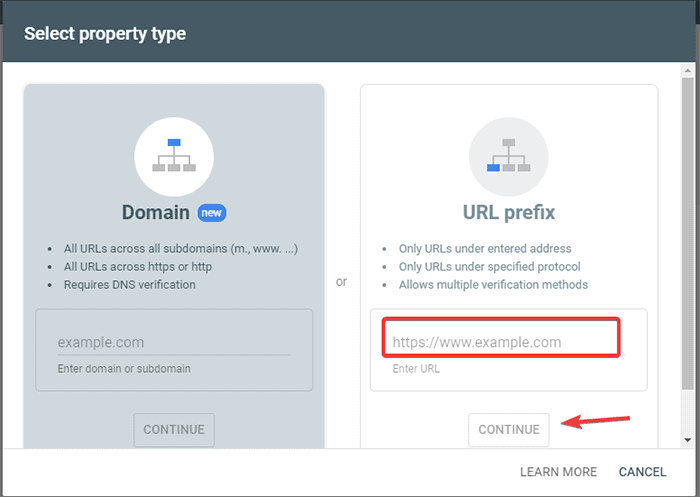
- Log in to Google Search Console and create an account. You can set up your account using either your domain or URL prefix. It is recommended to go with the URL prefix as it is comparatively easier.
- Enter your website’s URL.
- Now, click on the “Continue” button.
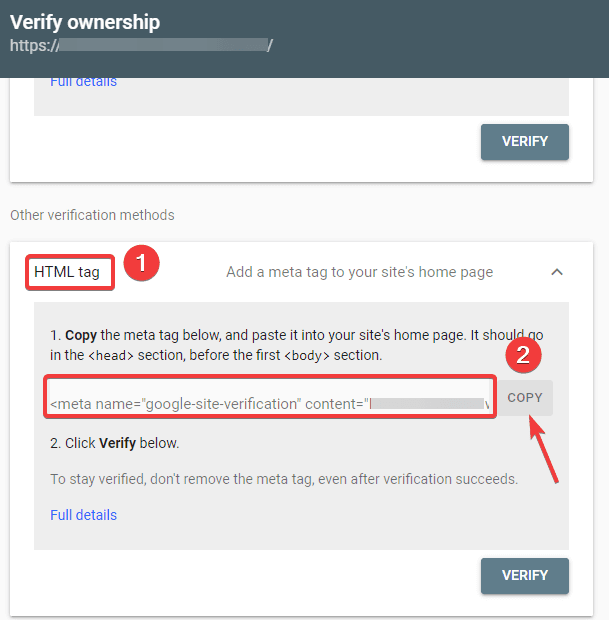
- You should now verify the site’s ownership. You can do this using any of the given options. However, we recommend using the HTML tag option.
- Copy the given code and then head over to your WordPress dashboard.
You can now verify the code using the Insert Headers and Footers plugin. To verify:
- Go to Plugins -> Add New from your WordPress Admin Dashboard.
- Now, search for Insert Headers and Footers plugin in the search bar and then Install and Activate the plugin.
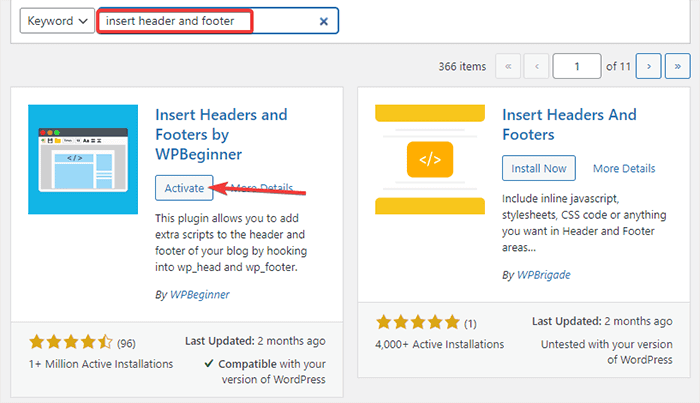
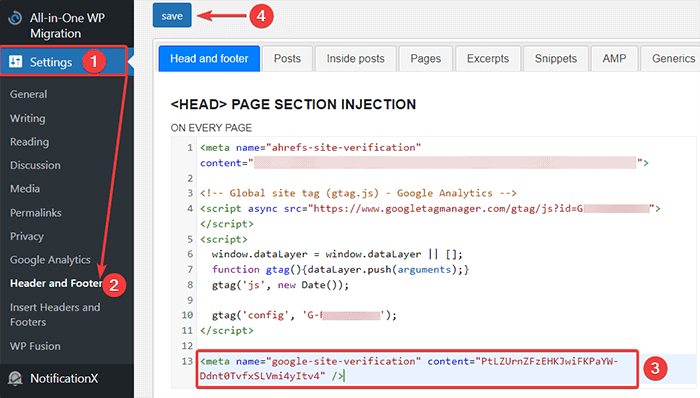
- After that, redirect to Settings -> Header and Footer from your WordPress Dashboard and then paste the copied code in the Head and footer tab. Once you are done, click the Save button.
- Go back to the Google Search Console tab on your browser. Then, click on the verify button.
- Google checks for the ownership and displays the completed message once it is done.
- Click on the “Go to property” option to access the Google Search Console dashboard.
Now, go back to the Open robot.txt tester tool and test your robots.txt as mentioned above.
Pros of Robots.txt File
Here are the benefits of using the Robots.txt file in SEO context:
- It helps to optimize the search engine’s crawl budgets by skipping indexing on the pages that you don’t want the bots crawling. This creates a priority for the search engine to crawl only the pages that are important for you.
- It helps optimize the web server by restricting the bots that are unnecessarily consuming resources.
- It helps to hide the login pages, landing pages, thank you pages from indexing by search engines. Thus, it optimizes the website’s performance.
Cons of robots.txt File
- Creating a robots.txt file is pretty easy, as we have explained above. However, the robots.txt file also includes the URLs to your internal pages that you don’t want crawl bots to index, such as the login page. This makes your website vulnerable to security breaches.
- While creating a robots.txt file is easy, making even a simple mistake can pull all your effort down the drain. For example, if you add or misplace a single character in the file, it messes up all your SEO efforts.
Frequently Asked Questions (FAQs)
What is web crawling?
Search engines send their web crawlers (also known as bots or spiders) across the web. These bots are smart software that navigates the entire web to discover new pages, links, and websites. This discovering process is known as web crawling.
What is indexing?
When web crawlers discover your website, they arrange your pages into a usable data structure. This organizing process is called indexing.
What is the crawl budget?
A crawl budget is a limit to how many URLs a search bot can crawl in a given session. Every site has a specific crawl budget allocation. So you need to make sure that you spend it in a way that is most beneficial to your site.
For example, if you have multiple pages on your site, you need to allocate the crawl budget to the most valuable pages. Thus, you can mention the page URL in your robots.txt file.
Conclusion
When working on a website’s SEO, most of the users focus on creating sitemaps, working on backlinks, researching keywords, and optimizing the content. Only a few webmasters pay attention to the robots.txt file.
The robots.txt file may not play much of a part when you are starting a site. However, as your website grows, paying attention to the robots.txt file yields better results.
Also, there is a myth that blocking category, archive pages, and tags increase the crawl rate and promote faster indexing. It’s false.
Follow the methods we mentioned above to create your robots.txt file.
We hope this article helped you sort your query regarding how to create and optimize WordPress robots.txt for SEO.
If you want to read more useful articles related WordPress, you may read following articles: