
Every website owner wants more traffic on their site. Well, of course, all of us want more visitors and conversions.
This is where SEO tricks play their part. They make your site visible to the right audience and help you crawl up the spot on search engines. One of such similar SEO tricks is creating a sitemap in WordPress.
Using a sitemap in WordPress has a positive impact on your site’s SEO. The better the SEO, the more the site’s visibility and the more traffic.
So, the question is, what is a sitemap and how to create a sitemap in WordPress?
We will be answering those questions in this tutorial. Let’s begin
What is a Sitemap in WordPress?
A sitemap in WordPress is a file that lists your website’s content in an XML format so that search engines can easily discover your site and index your content.
In short, a sitemap is a detailed map of your site that makes it easy for search engine crawlers (bots) to navigate around your site and index it – including all links, pages, posts, and media.
Back in the 2000s, the main pages of the government websites used to have an HTML link titled “Sitemap.” That link contained all the pages on that site. Today, sitemaps are used in XML rather than HTML. Also, their purpose has now changed to aid in navigation for search engines instead of people.
So basically, you can understand sitemap as a way for the site owner to tell search engines what pages and content are there. The sitemap also means the search engine to which links are more important and how often you update the site.
However, you should understand that the XML sitemap does not boost your ranking on search engines. Instead, it allows the search engines to crawl your site in detail and make your site appear in the SERPs (Search Engine Result Pages). This will ultimately result in more search traffic.
Why Do You Need Sitemap in WordPress?
As sitemap aids search engines to crawl through your site and index, it holds great importance from the SEO point of view.
Simply adding a sitemap to your website does not affect the search engine rankings. Instead, it lets the search engine know about your site and the pages on it.
Sitemaps are beneficial in a new blog or website that doesn’t have backlinks. That’s why search engines such as Bing and Google let the new site owners submit a sitemap of their website to their webmaster tools.
Sitemaps also let you highlight a particular part of your site, such as which one is important, which is frequently updated, and so on.
Thus, highlighting the main importance of sitemap in WordPress, here are the three main things you need to know:
- Sitemaps promote the search engine bots to crawl and index your site faster.
- It assists search engines in indexing larger sites by highlighting the important parts.
- It informs the search engines about the updates on your website content and structure.
Benefits of Using Sitemap in WordPress
Here are the major benefits of using a Sitemap in WordPress site:
- Faster crawl times – Sitemaps help search engine robots crawl your site’s content faster than they would without a sitemap. This helps in faster indexing of your content.
- Prioritized crawls – Sitemap allows you to ask Google to prioritize crawling on particular web pages by adding metadata.
- Rich media content – If you have lots of media on your sites like videos and images, adding a sitemap lets the search engine gain additional information and display the results in SERPs where appropriate.
Difference Between XML Sitemap and HTML Sitemap in WordPress
As mentioned earlier, there are two formats of sitemaps in WordPress – XML and HTML.
| XML | HTML |
|---|---|
| The XML sitemap contains metadata along with the site’s URL and all other information relating to it such as, when was the last update, how many links are there, and so on. | The HTML sitemap is a straightforward tool that helps visitors navigate your site. This sitemap tells the visitors what type of pages are on the site and where they can find particular information. Such a feature improves the user experience on your site. |
The main difference between these two sitemaps is that the XML format focuses on search engines. On the contrary, the HTML sitemap focuses on the site visitors.
We recommend adding both the sitemaps on your site, so you don’t miss out on the SEO element or cut back on providing a better browsing experience.
So, let’s learn how to create a sitemap in WordPress:
How to Create a Sitemap in WordPress?
There are two ways to create a sitemap in WordPress. We will discuss them in detail below:
1. Creating XML Sitemap in WordPress Without Using Plugin
WordPress did not have the built-in sitemap feature until the end of August 2020. But in the WordPress 5.5 version, they released a basic feature to add XML sitemap. This feature lets you automatically create an XML sitemap without using any plugin.
For this, you need to add the suffix “/wp-sitemap.xml/” at the end of your site’s domain name. After that, WordPress automatically shows the default XML sitemap.
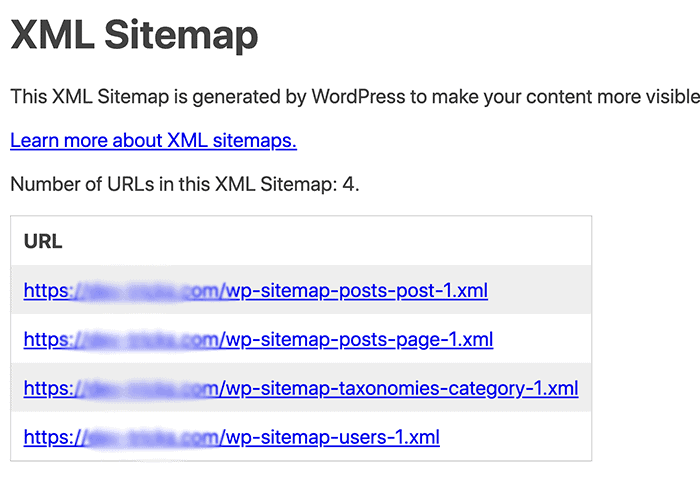
Note: You can also try “page-sitemap.xml” and “sitemap_index.xml” if the first suffix does not work.
WordPress added this new feature so that new WordPress sites do not miss out on the benefits of XML sitemap in terms of SEO. However, this feature is not very flexible. Also, you cannot control which elements of your site to prioritize or remove particular elements from your XML sitemap.
To enjoy such features, you can use SEO plugins. We have included them in the following section.
2. Creating XML Sitemap Using Yoast SEO
Yoast SEO plugin is a popular SEO tool available on the market. As such, the plugin also includes a feature to generate XML sitemaps for websites. To do so, follow the steps below:
- Go to your WordPress dashboard.
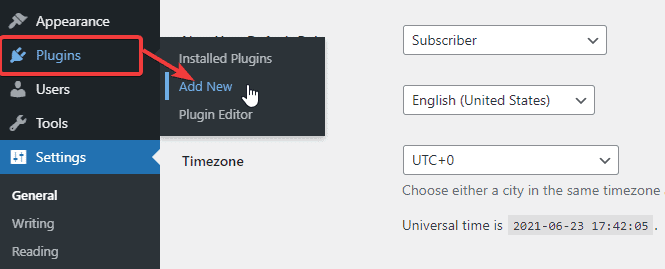
- Go to plugin> Add New.
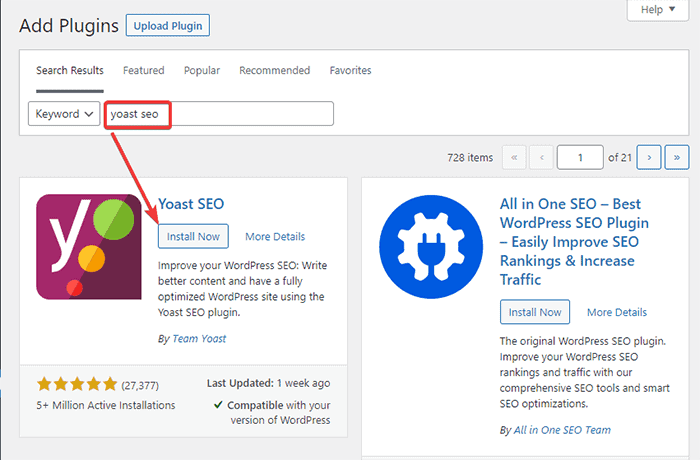
- Search for the “Yoast SEO” plugin. Then, install and activate the plugin.
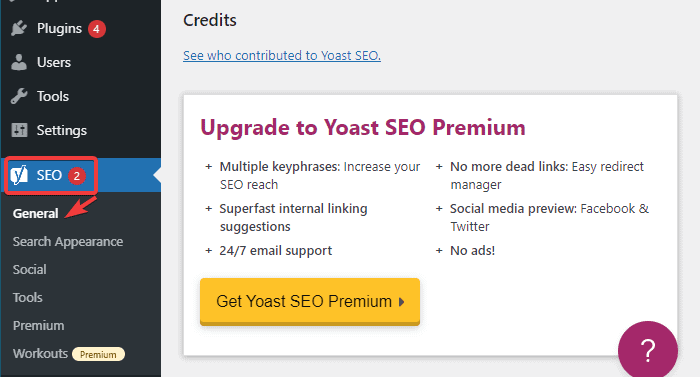
- After activating the plugin, go to “Yoast SEO” on your dashboard and click on the “General” option.
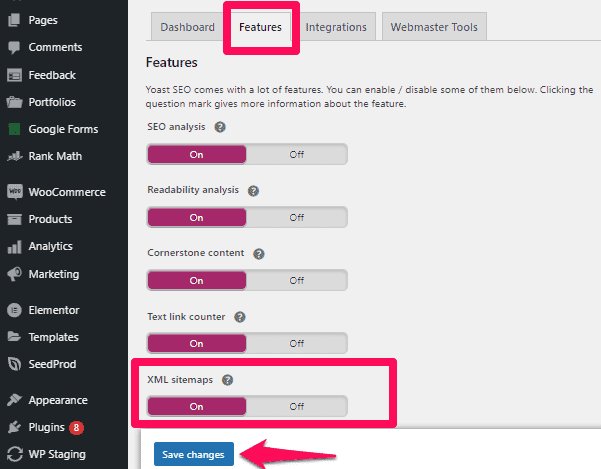
- Go to the “Features” tab and look for the “XML sitemaps” option. Make sure to toggle it on.
- Click on the “Save Changes” button.
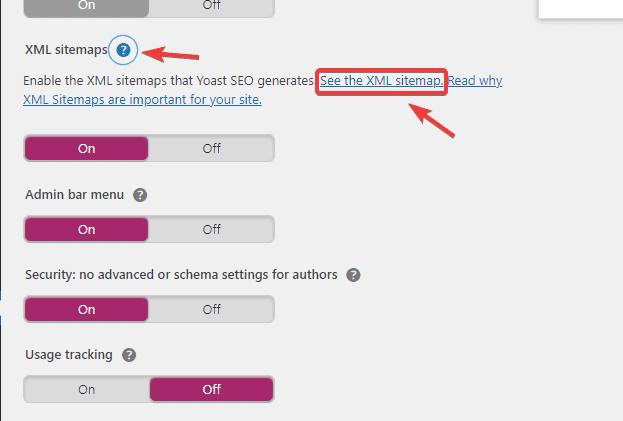
- To verify if the plugin has created a sitemap, click on the question mark icon next to the “XML sitemaps” option.
- Now, click on the “See the XML sitemap” link.
You will get a live view of the Yoast plugin-generate XML sitemap. You can also manually see it by typing “/sitemap_index.xml/” at the end of your URL. such as:
“www./yoursitename.com/sitemap_index.xml”
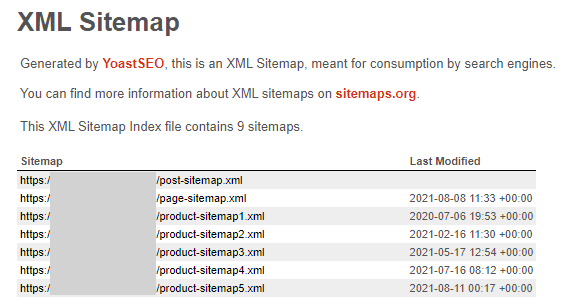
By default, the Yoast SEO plugin generates sitemaps for pages, posts, and other categories.
3. Creating XML Sitemap in WordPress Using Google XML Sitemaps Plugin
The Google XML Sitemaps plugin offers an easy way to generate a sitemap for your WordPress site recognizable by many search engines. The plugin also allows creating sitemaps for all of your website’s pages and even custom URLs. Further, the plugin automatically notifies search engines about a new addition or update on your site.
Here is how to use this plugin:
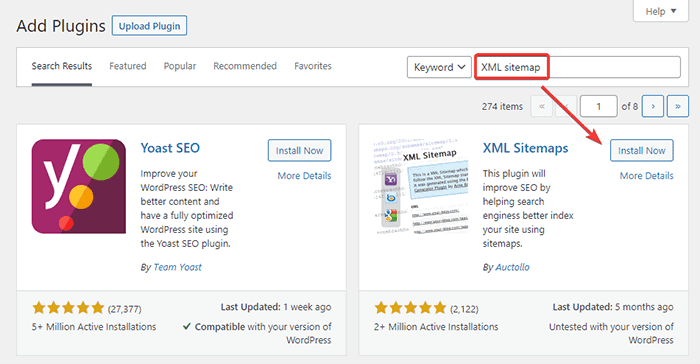
- First, install and activate the plugin. Then, go to plugin> Add New on your WordPress dashboard.
- Search for “XML Sitemaps.” Then, install and activate the plugin.
- Go to the Setting > XML-Sitemaps option on your dashboard.
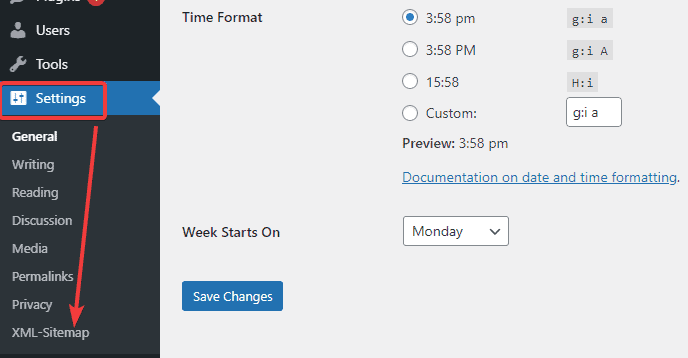
- Here you will see the URL to the sitemap index file.
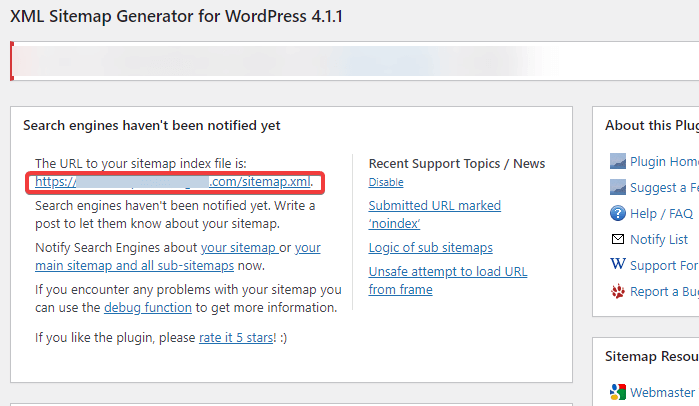
- Click on the link to see the XML sitemap to your WordPress.
4. Creating a Sitemap in WordPress Using All-in-one SEO Plugin
Another easy way to create a sitemap in WordPress is by using the All in One SEO plugin. It offers a comprehensive set of tools for optimizing your posts. Here is how to begin with this plugin to create a sitemap:
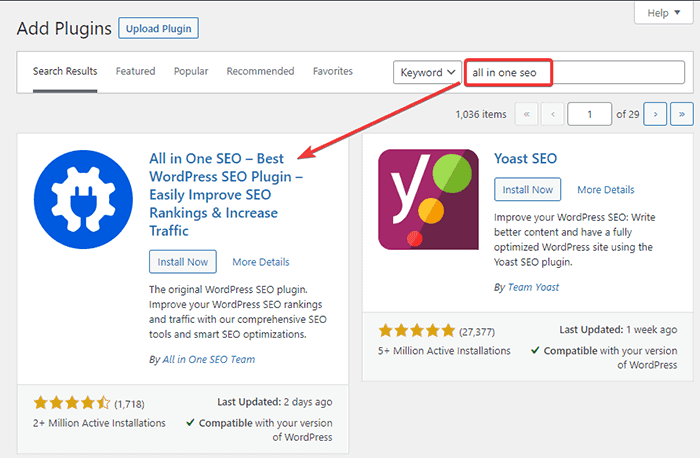
- Go to Plugins > Add new on your dashboard.
- Search for the “All in One SEO” plugin.
- Install and activate it.
- Now go to All in one SEO > Sitemaps on your dashboard.
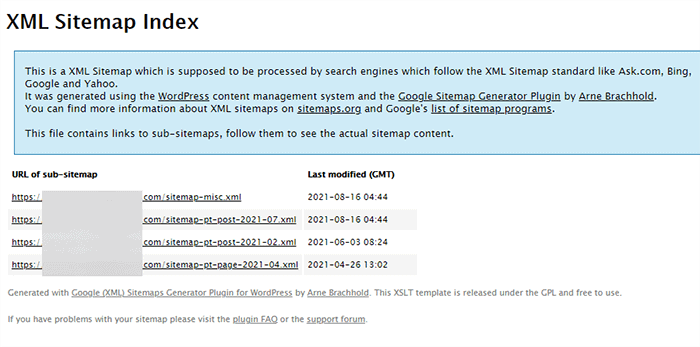
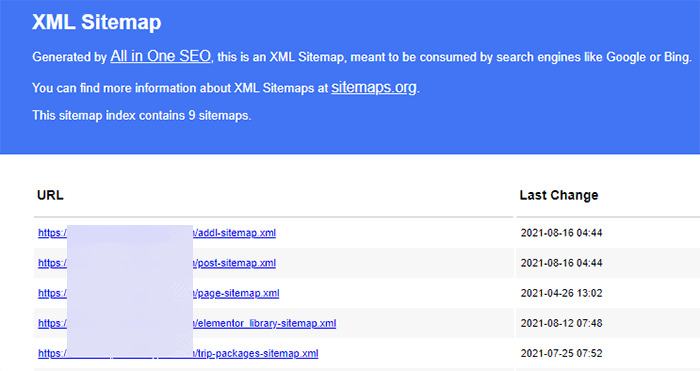
- By default, the plugin enables a sitemap for your site. Click on the “Open Sitemap” button to view it.
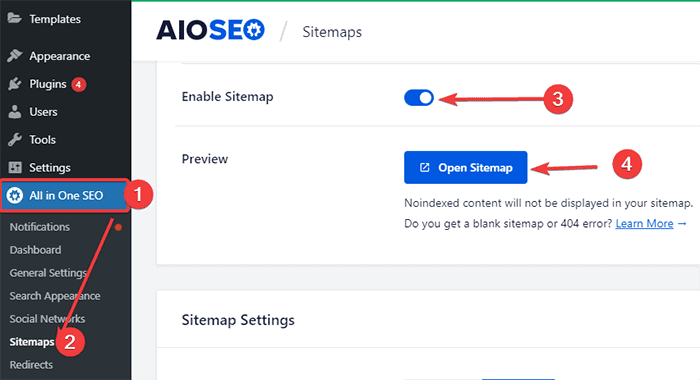
- It will look something like below:
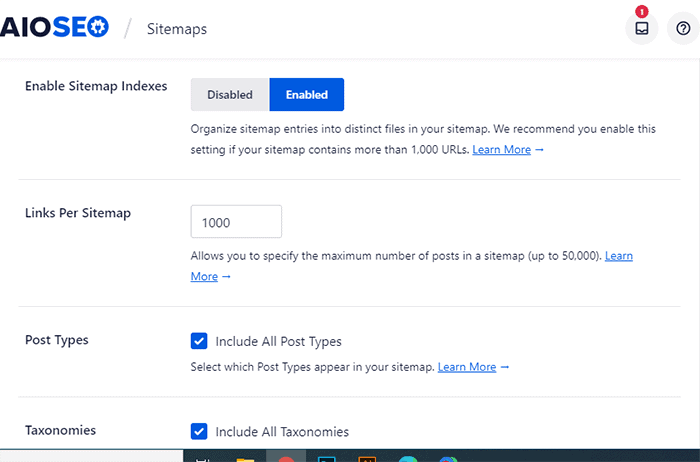
There are many additional settings in the All in One SEO plugin. For example, you can select which post to include/exclude, enable date-based archives, and enable taxonomies as well. You can do this from the “Sitemap Settings” section. Scroll down, and you will see the options as below:
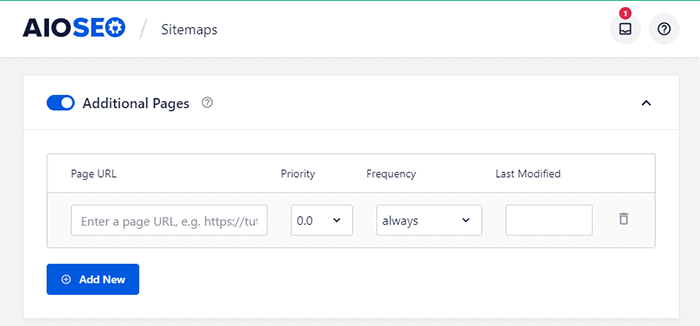
With this plugin, you can also add external pages to your WordPress sitemap. For this:
- Scroll down to the “Additional Pages” section and toggle it on.
- Now add the URL of the external page, such as the landing page, contact form, etc., in the given field. Then set the priority for that page. Here, 0.0 is the lowest priority, and 1.0 is the highest. If you are unsure, we recommend placing the priority to 0.3.
- Then, set the frequency of updates and the date when you last modified the page.
Excluding Specific Page/Post from Sitemap
You can use the Yoast plugin to exclude certain pages and posts from your sitemap. For this:
- From your dashboard, go to the post or page you want to exclude from the sitemap.
- At the top right corner, you will see the Yoast SEO icon. Click on it.
- Scroll to the “Advanced Settings” section.
- Choose the “No” option in the “Allow search engines to show this Post in search results” section.
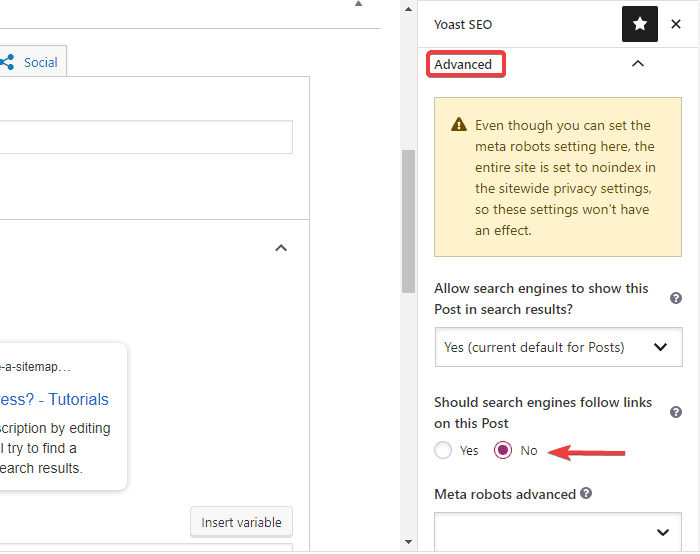
You can now publish or update your post/page. You have successfully excluded a specific page/post from the sitemap.
Creating HTML Sitemap in WordPress
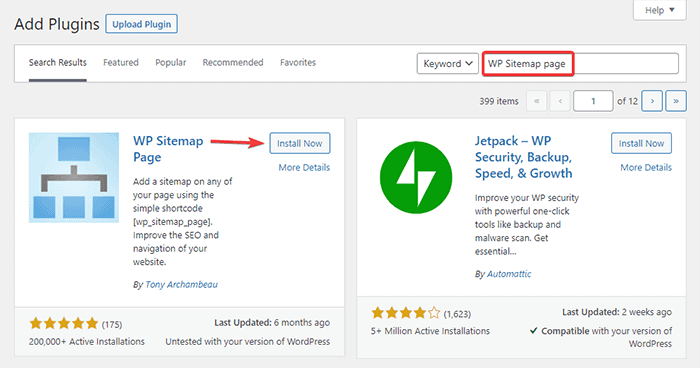
Using the above steps, you can create an XML sitemap in WordPress. In this segment, you will learn how to create an HTML sitemap to improve the user experience on your site. You can create an HTML sitemap by using the WP Sitemap Page plugin. Now, follow the steps below:
- First, install and activate the plugin.
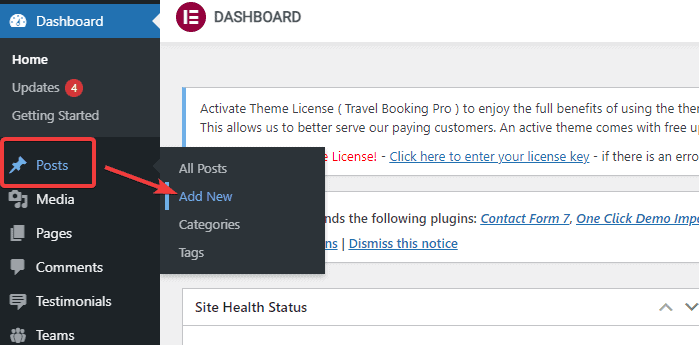
- Now, add a new page by going to Pages > Add New option on your WordPress dashboard.
- Add a “Shortcode” block wherever you like on the page.
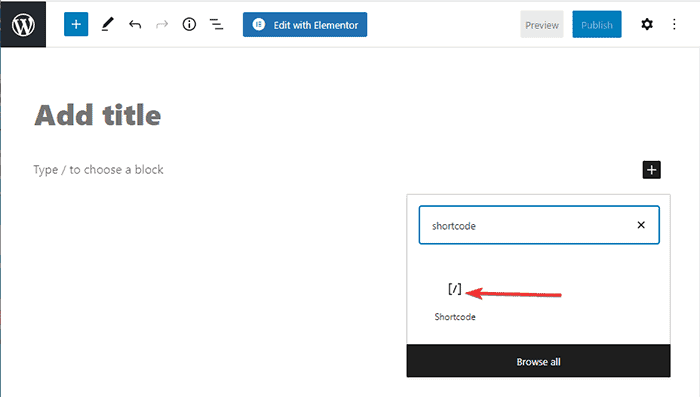
- Now, paste the following shortcode:
[wp_sitemap_page]
- You can preview the draft or publish the HTML sitemap on your website.
Submitting XML Sitemaps to Search Engines
Only creating a sitemap for your WordPress site does not get the job completed. You still need to submit the XML sitemaps you created to the search engines so that they can index your content. So, let’s now learn how to submit sitemaps to the search engines such as Google and Bing:
Submitting XML Sitemap to Google Search Engine
To submit the XML sitemap to Google Search engine, follow these steps:
- First, visit the Google Search Console and create an account. You can set up an account using either your domain or URL prefix. However, we recommend going with the URL prefix as it is comparatively easier.
- Enter your site’s URL and click on the “Continue” button.
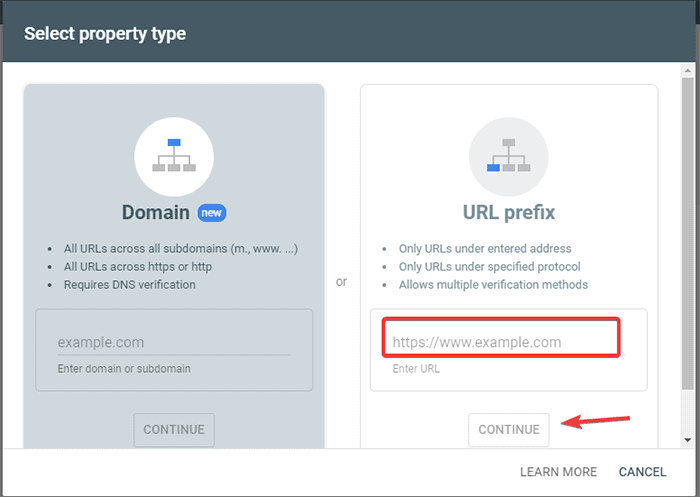
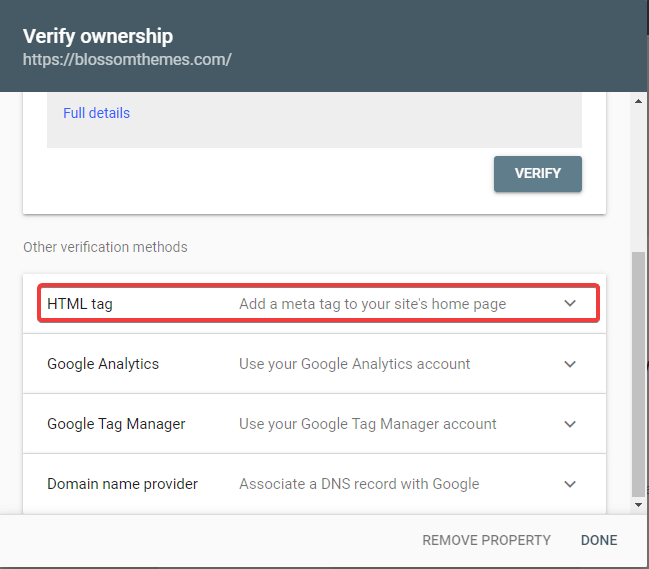
- You now have to verify the site’s ownership. You can verify it using any of the given options. However, we will be using the HTML tag option.
Note: If you already have a Google Analytics account, you don’t have to go through the following steps. If you have the Google Analytics account for the same email address, you can click on the Google Analytics options. It automatically verifies and creates the console account.
If you don’t have a Google Analytics account yet and don’t know how to create one, check out How to add Google Analytics to WordPress for more information.
- Copy the given code and then go to your WordPress dashboard.
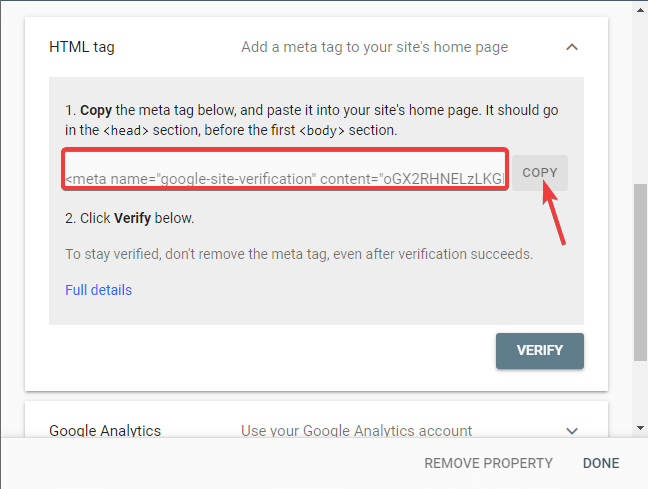
You can now verify the code using the insert header and footer plugin.
First, install and activate the insert header and footer plugin.
- Go to your dashboard. Click on Settings > Insert Headers and Footers option
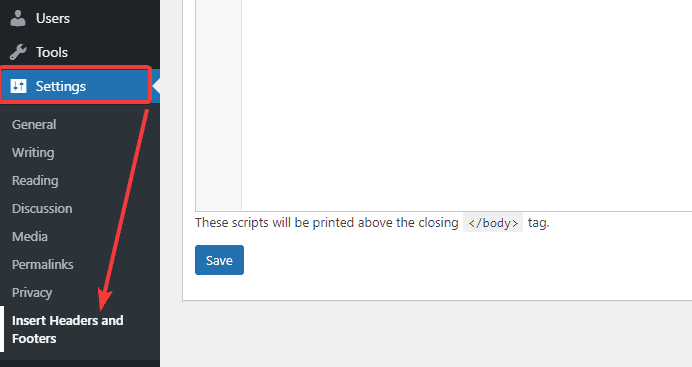
- Paste the code you copied earlier on the header section.
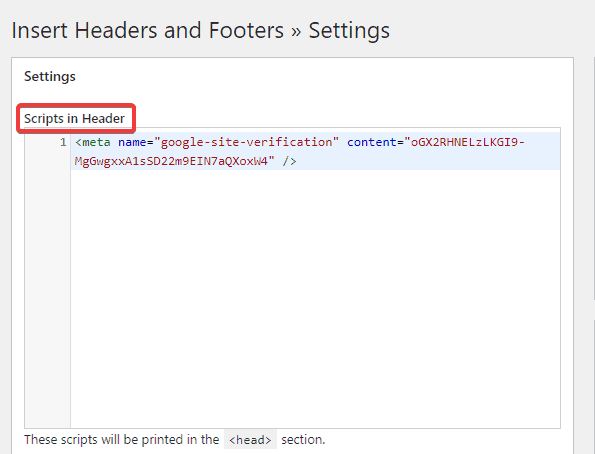
- Save the changes.
- Go back to the Google Search Console tab on your browser. Then, click on the verify button.
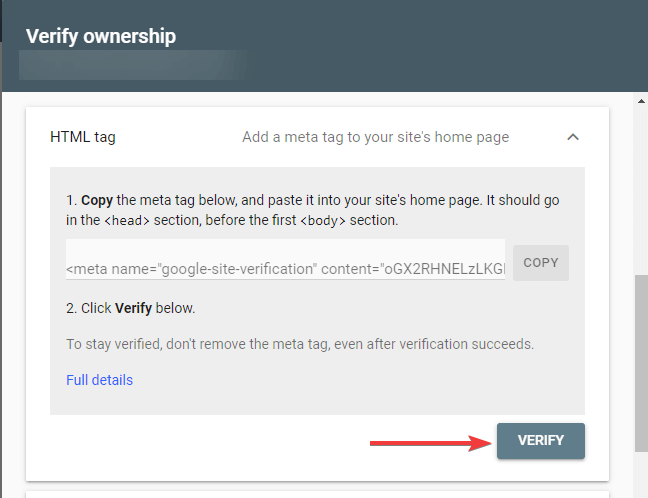
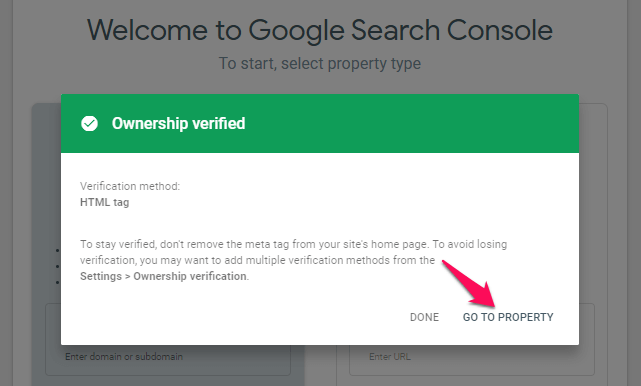
- Google checks for the ownership and displays the completed message once it is done.
- Click on the “Go to property” option to access the Google Search Console dashboard.
- Click on the “Sitemap” option from the left column.
- Enter your sitemap URL in the “Add a new sitemap” section, then click on the submit button.
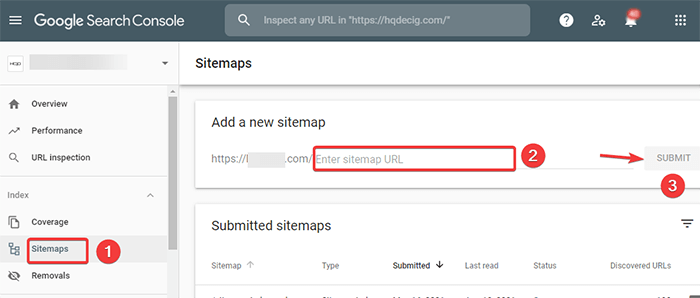
Google now adds your sitemap URL to GSE (Google Search Console). It may take some time for Google bots to crawl your entire site.
Submitting XML Sitemap to Bing Search Engine
Similar to GSE, Bing’s search engine also offers tools to let site owners monitor their site. You can submit the XML sitemap to Bing as follows:
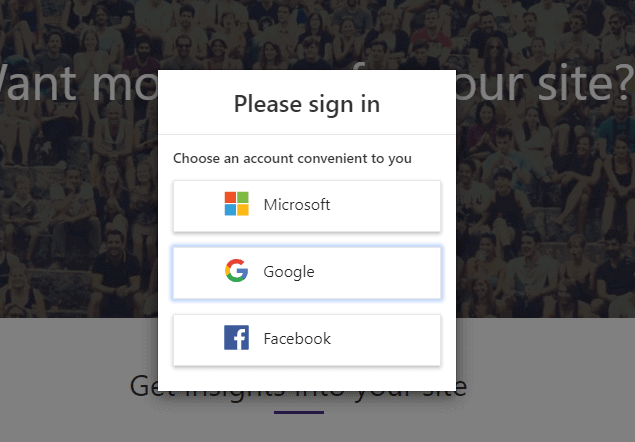
- Visit the Bing Webmaster Tools.
- You have various options to sign up for the Bing Webmaster tools. Select one that you like.
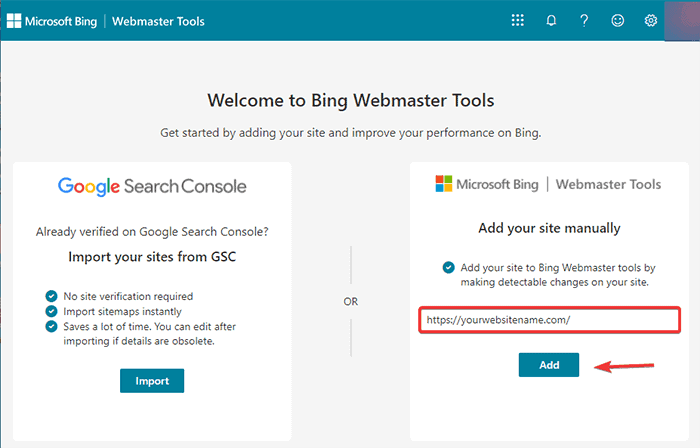
- You get two options – Importing from the Google Search Console or adding your site manually.
- If you already added your site to your Google Search Console, click on the import option. It will save you time. If you want to add your site manually, go ahead and enter your site’s URL.
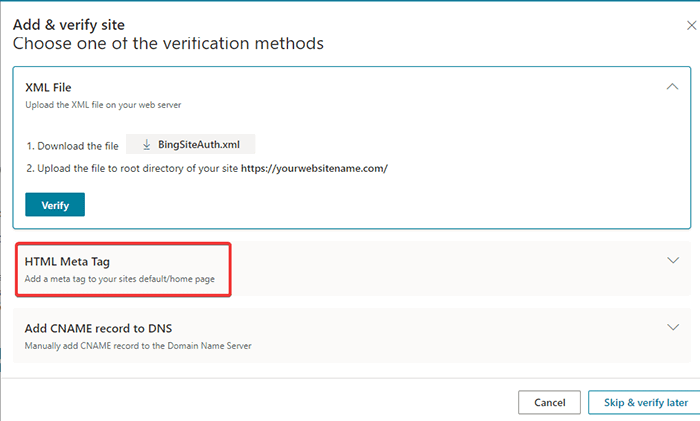
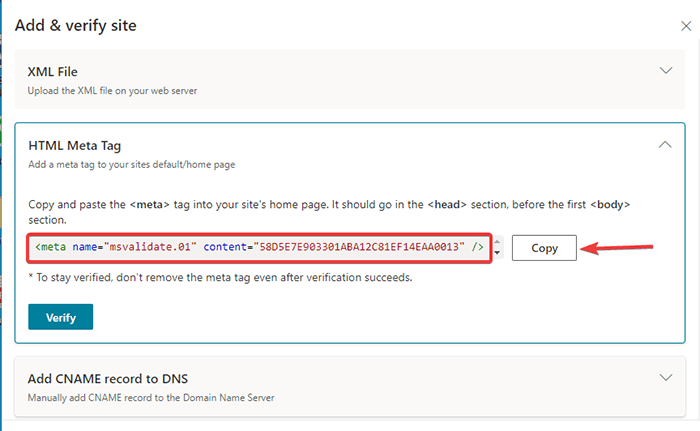
- You need to verify your ownership. You get multiple options to do so. We recommend using the HTML meta tag option as it is the easiest.
- Copy the given code to the clipboard.
- Go to your dashboard.
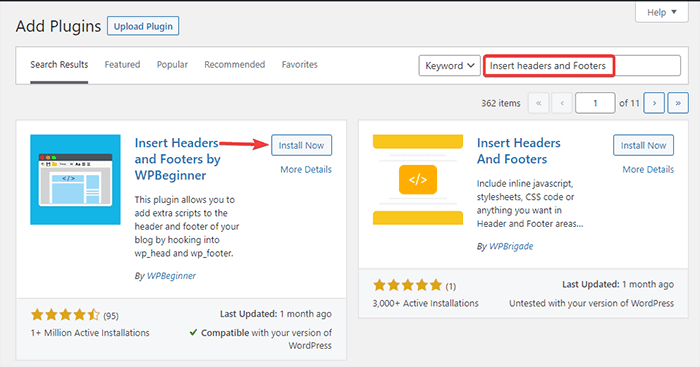
- Go to plugin> Add New option.
- Search for Insert headers and footers plugin.
- Install and activate the plugin.
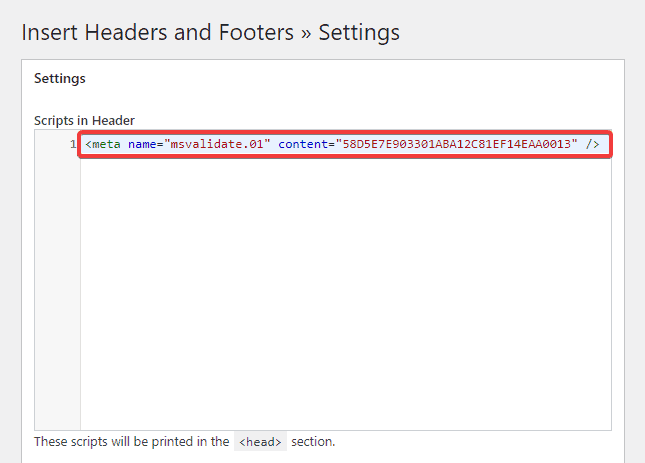
- After activating it, go to Settings > Insert Headers and Footers option.
- Paste the code you copied from the Bing Webmaster tools earlier in the header box.
- Save the changes.
- After verification, go to the Webmaster Tools dashboard and click on the “Sitemaps” option from the left column.
- Then, click on the “Submit Sitemap” button.
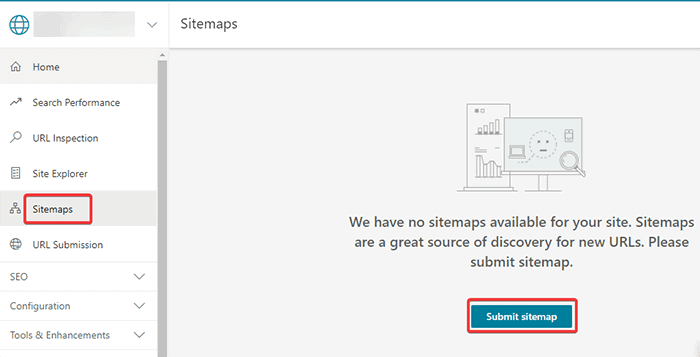
- Enter your sitemap URL in the dialogue box and click on submit.
Conclusion
So, these were the four easy steps of creating an XML sitemap in WordPress. Manually adding a sitemap is possible.
However, using a plugin to do the job is much easier and quicker. After creating a sitemap, make sure to submit it to the search engine, or it would make no sense to have it lying around without any purpose.
Creating a sitemap is one of many SEO tricks to improve your rankings and increase traffic. For more of such tricks, check out:
Frequently Asked Questions
Q. What is the sitemap in WordPress?
A sitemap in WordPress is a file that lists all of your website’s content in an XML format to let search engines easily discover your site and index your content. In other words, it is a map for search engines to navigate and index your site.
Q. How do I create a sitemap?
You can easily create a sitemap using plugins in a few minutes. This article explains the process using Yoast, All-in-one SEO, and Google XML sitemap plugins. Check out the details.
Q. Is there a limit for adding URLs in an XML sitemap?
Yes, sitemap limits the number of URLs to 50,000. However, you can add sitemaps to your sitemap and thus increase the limit. Meaning, you can add one master sitemap and add more sitemaps to that master link. Therefore, each sitemap can have 50,000 sitemaps in it.