The Maintenance Mode in WordPress is more important than you might think. Suppose you want to make an update on your existing page, debug an error, or renovate the site’s appearance. Doing so will take your site down for some time or even a considerable duration, depending on your project.
In such a case, your site appears broken and concerns your visitors’ frontend experience. As a result, it negatively impacts your brand.
But, if you know how to put WordPress in maintenance mode, you can set up a user-friendly message notifying the cause of the error. You can also provide an alternative link and add a timeframe for the maintenance job.
There are three easy ways to put WordPress sites in maintenance mode. We will take you through them step-by-step. But first, let’s begin with what a maintenance mode is and when you need it.
Let’s dive in:
What is a Maintenance Mode in WordPress?
Simply put, a maintenance mode is a message displayed on the website when the site owner makes changes to it. The status generally includes why your site is offline with an estimated date of when it will be accessible again.
You can perform minor changes such as updating themes, installing plugins, and publishing content on a live site.
However, for more considerable changes such as setting up a new WordPress theme, setting up a plugin that changes the site’s behavior, making a site-wide upgrade, and such, you need to put your WordPress site in maintenance mode. Working such changes on a live site can cause errors or breakage.
If you know how to set up a staging site, you can make changes on a test environment then push them to your live site. If not, setting up a maintenance mode is your best shot to maintain the viewer’s trust.
When to Put Your WordPress Site in Maintenance Mode?
As mentioned above, the main reason for putting up a maintenance mode message is to bring major changes to the website. Here are some common scenarios when putting the maintenance mode message makes sense:
- When you want to rebrand your entire site
- When you want to add details to your popular page, such as the landing page
- When you install a plugin that adds new functionality to your overall site
- When you are troubleshooting an error or a bug
- When cleaning your site after a security breach
- When creating a coming soon site and advertising your upcoming project
How to Put Your WordPress Site in Maintenance Mode
There are three ways to put up a maintenance mode in WordPress. We have explained them below. We recommend you create a backup just in case something goes wrong, and you need to switch back.
1. Putting WordPress Site in Maintenance Mode Using Code
If you think the maintenance will take an hour, you can use the code to put it in maintenance mode. Follow these steps:
- Go to your WordPress dashboard.
- Go to Appearance > Theme Editor.
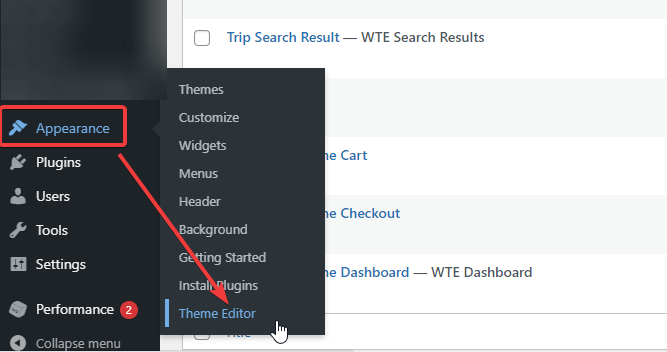
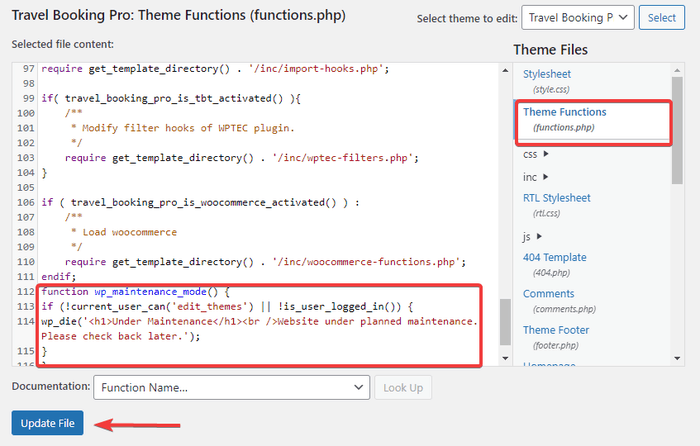
- Look for “functions.php” under the Theme Files option.
- Scroll down and add the following snippet of code:
function wp_maintenance_mode() {
if (!current_user_can('edit_themes') || !is_user_logged_in()) {
wp_die('<h1>Under Maintenance</h1><br />Website under planned maintenance. Please check back later.');
}
}
add_action('get_header', 'wp_maintenance_mode');- You can also add custom text regarding the maintenance in the third line “<h1>Under Maintenance</h1><br/>Website under planned maintenance. Please check back later.”
- Click on the “Update File” bottom once you are done.
- If you want to remove the maintenance mode later, come back here and delete the simple code snippet you added earlier. Then update the file.
2. Putting WordPress Site in Maintenance Mode Using Plugin
You might want to use a plugin to put up the maintenance mode for the more extended downtime. With plugins, you can set up a custom maintenance page with the reason, link to another page, contact information, and even contact form.
Here we will guide you with two major maintenance plugins:
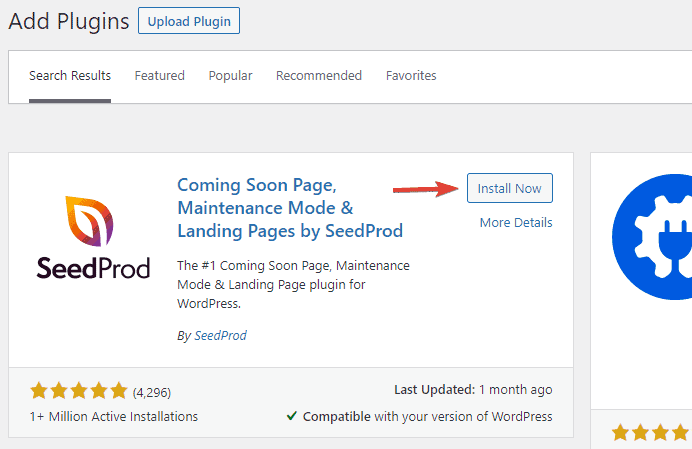
Option A: Putting WordPress Maintenance Mode Using SeedProd Plugin
SeedProd is one of the popular plugins, and it’s free. This maintenance mode plugin lets you create:
- Maintenance Mode Pages
- Custom Coming Soon Pages
- Custom 404 Pages
- Marketing Landing Pages
Here is how you put a WordPress site in maintenance mode using the SeedProd plugin:
- Install the SeedProd plugin on your WordPress and activate it.
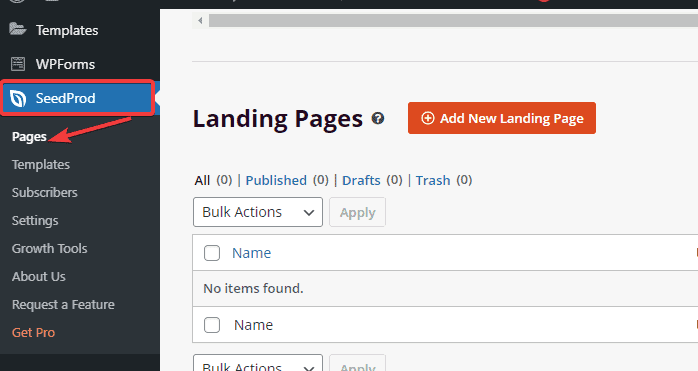
- Go to the “SeedProd” option on your dashboard. Then, click on the Pages and click on the “Set up a Maintenance Mode Page” option.
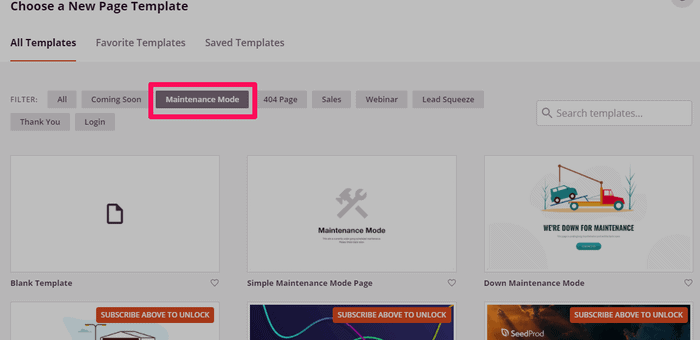
- Go to the “Maintenance Mode” tab from the available options. From here, you can create your custom maintenance mode page. Select your template first.
- Now, you can customize your template using the drag-and-drop interface. You can change the text, size, color, background color, add images, and lots more.
- Click on the “Save” button.
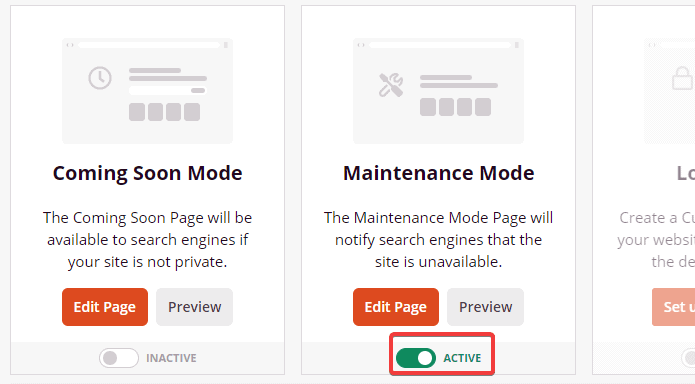
- Finally, click on SeedProd > Pages on the dashboard. Toggle the activate button on the “Maintenance Mode” option.
You have successfully put your WordPress site in maintenance mode using the SeedProd free plugin. If you want additional services, SeedProd Pro lets you control your maintenance mode further, such as excluding a particular page/post, giving access to designated users during maintenance mode, and more.
Option B: Putting WordPress Maintenance Mode Using WP Maintenance Mode Plugin
The next powerful plugin to set up a maintenance mode in WordPress is the WP Maintenance Mode plugin. Its design-builder is not as powerful as that of SeedProd. Nevertheless, you can set up a maintenance page easily with this landing page builder.
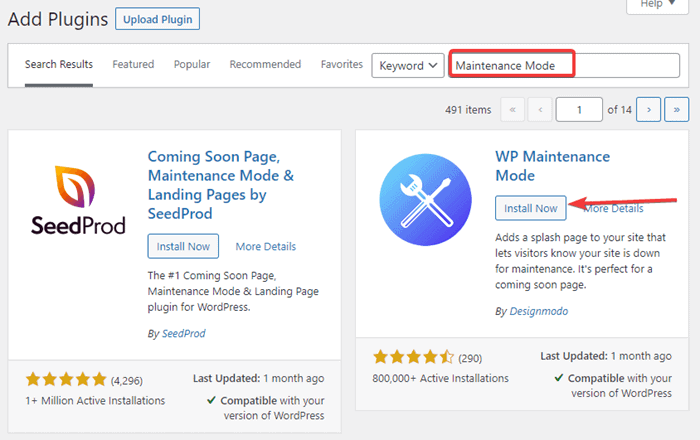
- Go to Plugins > Add New option.
- Install and activate the WP Maintenance Mode plugin.
You need to configure the plugin. For this, follow these steps:
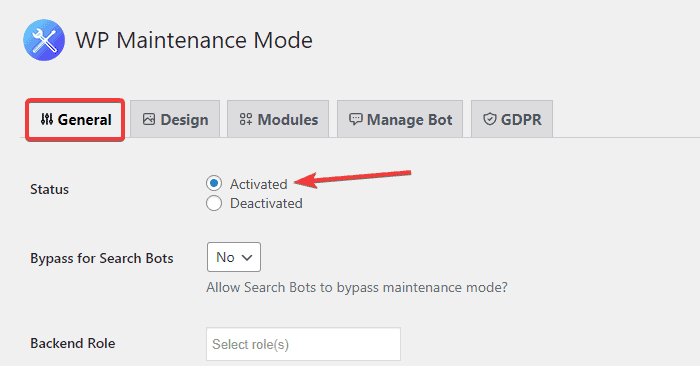
- Go to Settings > WP Maintenance Mode on your dashboard.
- By default, the status in the General tab is set to “Deactivated.” Select the “Activated” option and save the settings from enabling the maintenance mode using this plugin.
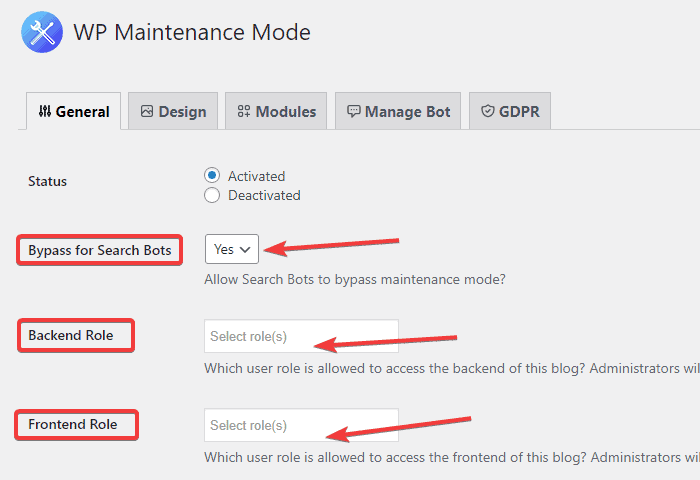
You can let search engines see your site even if in maintenance mode by setting the “Bypass for Search Bots” option to “Yes.” Likewise, you can also access user roles on the backend and frontend while the site is in maintenance mode.
- To customize your Maintenance Mode page using this plugin, go to the “Design” tab. From here, you can customize the color, font, message to display, background image, and even add custom CSS.
- Save the settings at the end after making changes.
You can also show the countdown timer for the site to be live again. Also, you can add your social media icons with links and newsletter signup on the maintenance page. Simple, go to the “Modules” tab and set it all up.
3. Putting WordPress Site in Maintenance Mode Using Theme/Page Builder
You can also activate maintenance mode using the theme or page builder in WordPress. Here, we will show the steps with the Elementor Page Builder.
- Install and then activate the Elementor Page Builder plugin on your WordPress.
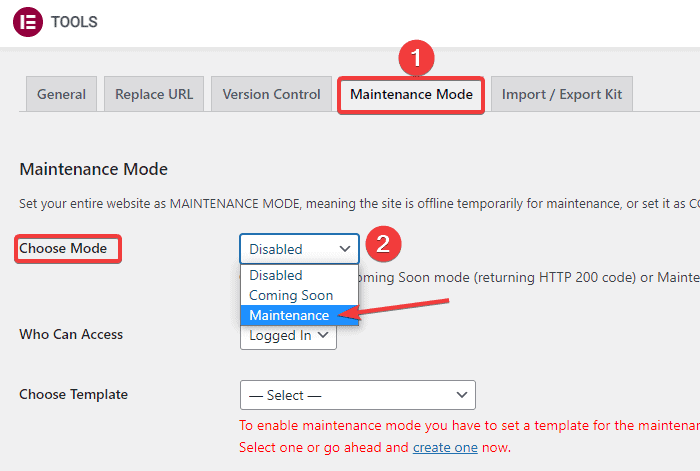
- Go to Elementor > Tools option on the dashboard.

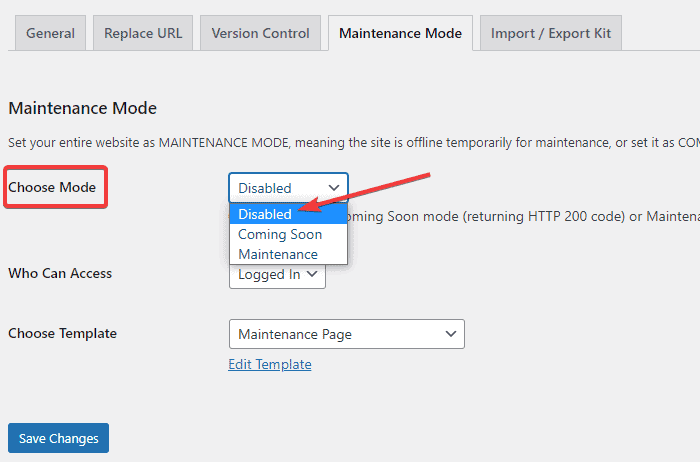
- Go to the “Maintenance Mode” tab.
- Select the “Maintenance” option and save the changes. You could also set a coming soon page here.
A decent feature of this method is that the page builder automatically sends the HTTP 503 code to search engines. Thus, search engines continue to index your site. Similarly, for a coming soon page, it sends the HTTP 200 code.
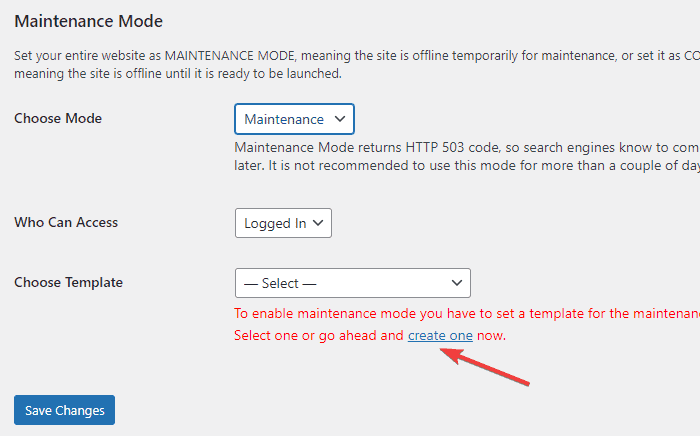
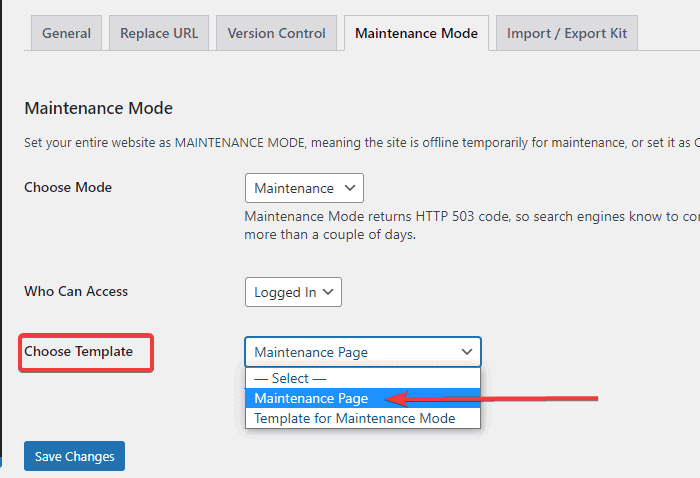
To customize your maintenance mode page using the Elementor Page Builder, click on the “Create one” link below the “Choose Template” choice.
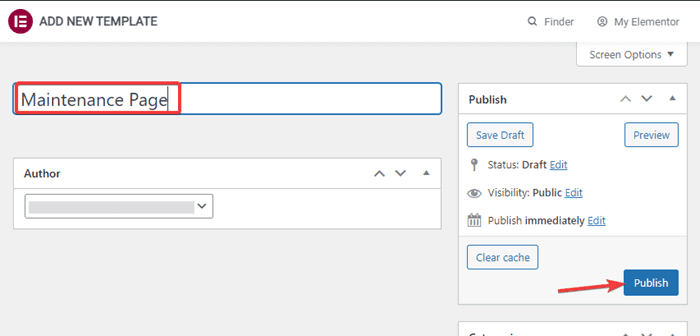
- You reach a page to create your new template. Give it a name and click on the “Publish” button.
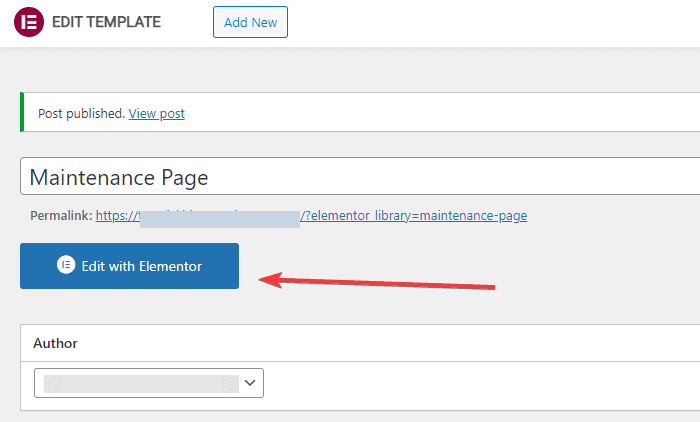
- Click the “Edit with Elementor” button to reach the template editor.
- You can customize your maintenance mode template for the editor now. You can customize text, color, background, and others.
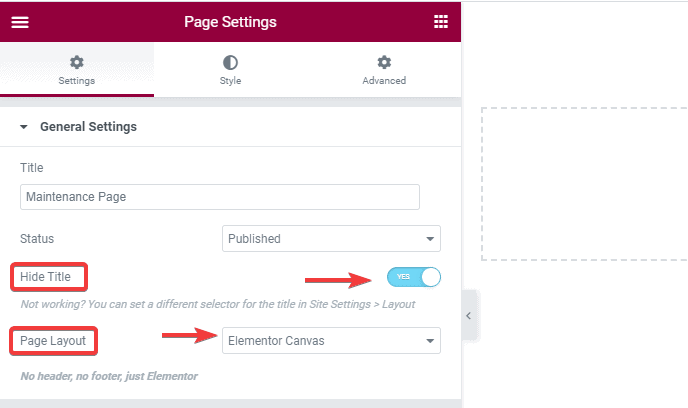
But first, you need to remove the header and footer from the page. Since your page narrates the maintenance mode, it is better that you don’t allow access to the header and footer.
- Click on the “Settings” icon. You should see it at the bottom left corner.

- Toggle the “Hide Title” option to “Yes” and set the “Elementor Canvas” on the “Page Layout” option.
- To quickly add a maintenance page template, click on the library folder icon in the preview panel.

- Go to the “Pages” tab.
- Now, search for “Maintenance” in the search box. You will get multiple templates in the results. Select the one you like.
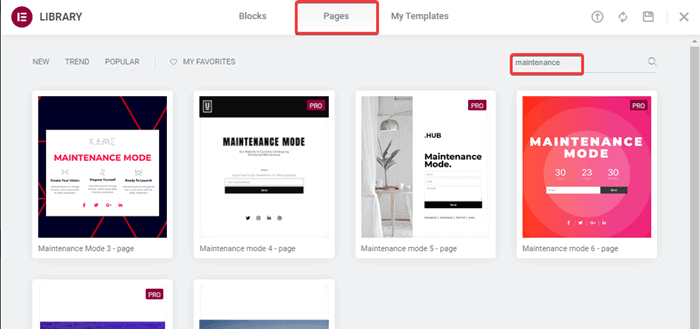
- After selecting a template, click on the “Insert” button. Doing so adds the template to your page.
You can now edit the template from the editor.
Note: You need to create a free account with Elementor to use the template. It will only take a few seconds.
Now, for activating the maintenance mode using Elementor, go to Elementor > Tool on your dashboard.
On the “Maintenance Mode” tab, you will see the name of the template you just created on the scroll-down option. Select it and save the changes.
To deactivate the maintenance page, come back here and select the “Disable” in the “Choose Mode” option.
Conclusion
So, these were the three ways to put your WordPress site in maintenance mode. Of course, an efficient way to edit your site would be by creating a WordPress staging site. However, these three methods will also do good. Let us know which method you will choose in the comments below.
FAQs (Frequently Asked Questions)
Q. How Does Actual Website Maintenance Mode Affect Visitors?
When visitors reach your site, they are expecting something from it. But, if they receive a broken page or error message, it makes your site seem unprofessional. As a result, visitors may lose trust in your brand.
However, putting a maintenance mode gives a proper reason why the site is offline and even the time estimation of the maintenance. This seems more understandable to the visitors, and there is a high chance they come back later.
Thus, a maintenance mode helps to maintain visitors’ trust and maintain your brand image.
Q. How do I put WordPress in Maintenance Mode?
You can put your WordPress in maintenance mode using plugins, page builder, or the actual maintenance code on the function.php file.